The P0113 code in Mercedes-Benz vehicles indicates a high input signal from the Intake Air Temperature (IAT) sensor, signaling potential issues with engine performance. AutoExplain.com provides a comprehensive guide to understanding the P0113 error code, its common causes, diagnostic procedures, and effective repair strategies, ensuring optimal vehicle operation. Address IAT sensor malfunctions swiftly and maintain your Mercedes-Benz’s performance; explore lasting fixes, component testing, and preventative tips for seamless driving experiences and peak engine efficiency.
The P0113 code specifically refers to a problem with the Intake Air Temperature (IAT) sensor circuit in a Mercedes-Benz. This sensor plays a vital role in the engine’s fuel management system. When the Engine Control Unit (ECU) detects an abnormally high voltage signal from the IAT sensor, it triggers the P0113 code. This typically suggests the IAT sensor is reporting an excessively high air temperature, or the circuit has an open or short, causing significant disruptions in engine performance. The IAT sensor is a critical component for measuring the temperature of the air entering the engine. Accurate temperature readings are necessary for the ECU to calculate the correct air-fuel mixture, manage ignition timing, and optimize overall engine performance.
The IAT sensor works as a variable resistor. The ECU sends a reference voltage, typically 5 volts, to the IAT sensor. Based on the temperature of the intake air, the resistance changes. When the air is cold, the resistance is high, resulting in a lower voltage returning to the ECU. Conversely, when the air is hot, the resistance is low, leading to a higher voltage. The ECU uses this voltage reading to determine the air temperature and adjust the fuel mixture accordingly.
When the ECU receives a voltage signal from the IAT sensor that is higher than the expected range, it interprets this as an open circuit or a very high temperature reading, even if the actual intake air temperature is normal. This condition prompts the ECU to store the P0113 code and illuminate the check engine light. The ECU may also initiate default or “limp” modes to protect the engine, which can adversely affect engine performance, fuel efficiency, and emissions.
Several factors can trigger the P0113 code in Mercedes-Benz vehicles. Identifying the root cause is essential for effective repair.
The most common cause of the P0113 code is a defective IAT sensor. Over time, the sensor can fail due to thermal stress, physical damage, or internal component degradation. A faulty sensor may provide inaccurate readings or no reading at all, leading to the high voltage signal that triggers the P0113 code.
Damaged, corroded, or disconnected wiring can cause the P0113 code. Issues include:
Mercedes-Benz engine wiring harness inspection for diagnosing P0113 code
The connector that attaches the IAT sensor to the wiring harness is a potential point of failure. Corrosion, bent pins, or loose connections within the connector can disrupt the signal flow and trigger the P0113 code.
Although less common, an ECU malfunction can cause the P0113 code. If the ECU is unable to properly interpret the signal from the IAT sensor or has internal faults, it may incorrectly flag the high voltage condition.
A severely clogged air filter restricts airflow into the engine. While it doesn’t directly cause a high voltage signal from the IAT sensor, it can lead to increased intake air temperatures, indirectly affecting the sensor readings and overall engine performance.
Recognizing the symptoms associated with the P0113 code can help diagnose the issue quickly and efficiently.
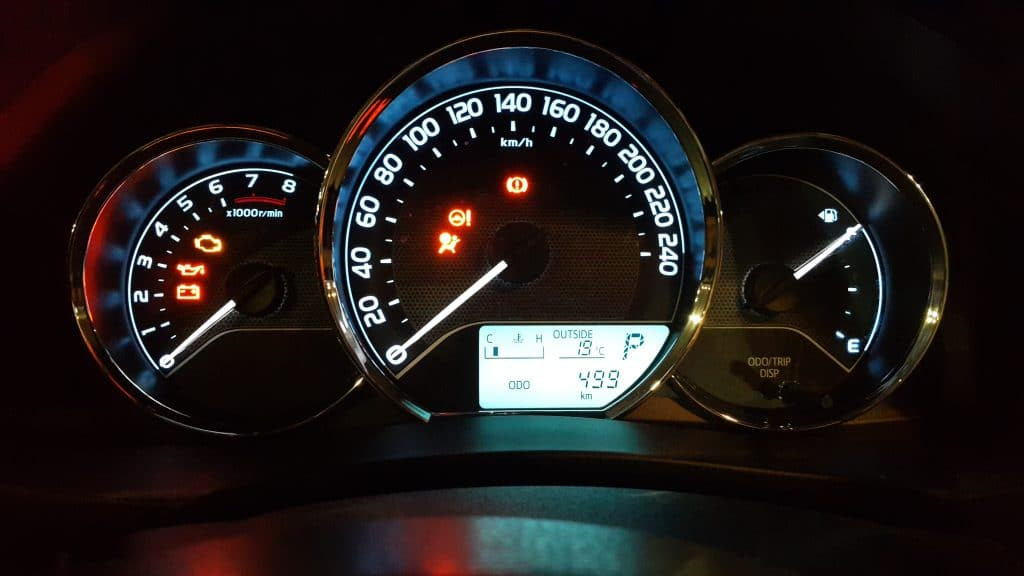
The most obvious symptom is the illumination of the check engine light on the dashboard. This light indicates that the ECU has detected a problem and stored a diagnostic trouble code.
The incorrect air-fuel mixture caused by inaccurate IAT sensor readings can lead to several performance issues, including:
Inaccurate temperature readings can cause the ECU to miscalculate the fuel mixture, leading to poor fuel economy. You may notice that you need to fill up your gas tank more frequently than usual.
An improper air-fuel mixture can result in increased emissions, causing the vehicle to fail an emissions test. The exhaust may also have a noticeable odor.
In some cases, a faulty IAT sensor can make it difficult to start the engine, particularly in cold weather. The engine may crank for an extended period before starting, or it may not start at all.
Diagnosing the P0113 code requires a systematic approach to identify the root cause. Here’s a step-by-step guide to help you diagnose the issue effectively:
If the IAT sensor, wiring, and connectors all test within specifications, the problem may be with the ECU. ECU testing typically requires specialized equipment and expertise. Consider consulting a professional mechanic or an AutoExplain.com expert for assistance.
Avoiding common diagnostic mistakes can save time and prevent unnecessary repairs.
Always confirm the presence of the P0113 code using an OBD-II scanner before beginning any diagnostic procedures. This ensures that you are addressing the correct issue.
Wiring problems are a common cause of the P0113 code, so thoroughly inspect the wiring and connectors before replacing the IAT sensor.
A dirty air filter can indirectly affect IAT sensor readings and engine performance. Always check and replace the air filter as part of the diagnostic process.
While a faulty IAT sensor is a common cause, other factors such as wiring issues, connector problems, and ECU malfunctions can also trigger the P0113 code. Perform thorough testing to identify the root cause.
Once you have diagnosed the root cause of the P0113 code, you can implement the appropriate solution to resolve the issue.
If the IAT sensor is found to be faulty, replacing it is the most straightforward solution. Follow these steps:
If the wiring is damaged, corroded, or has loose connections, repairing or replacing the wiring is necessary. Follow these steps:
If the connectors are corroded or have loose connections, cleaning or replacing the connectors may be necessary. Follow these steps:
If the ECU is found to be faulty, it may need to be reprogrammed or replaced. ECU reprogramming or replacement typically requires specialized equipment and expertise. Consider consulting a professional mechanic or an AutoExplain.com expert for assistance.
Preventive maintenance can help reduce the likelihood of the P0113 code recurring.
Replace the air filter at the manufacturer-recommended intervals to ensure proper airflow to the engine. A clean air filter helps maintain optimal engine performance and prevents the IAT sensor from being affected by increased intake air temperatures.
Regularly inspect the wiring and connectors associated with the IAT sensor for any signs of damage, corrosion, or loose connections. Clean the connectors with electrical contact cleaner and ensure they are properly seated.
Pay attention to any changes in engine performance, fuel economy, or emissions. Addressing minor issues promptly can prevent them from escalating into more significant problems that trigger the P0113 code.
Follow the manufacturer’s recommended maintenance schedule for your Mercedes-Benz. This includes regular inspections and servicing of the engine and related components.
While many P0113 code issues can be resolved with basic diagnostic and repair procedures, there are situations where professional help is necessary.
If you are unable to diagnose the root cause of the P0113 code after performing the recommended diagnostic steps, it may be time to seek professional help. Complex diagnostic issues may require specialized equipment and expertise.
ECU reprogramming or replacement requires specialized equipment and expertise. If you suspect that the ECU is the cause of the P0113 code, consult a professional mechanic or an AutoExplain.com expert.
If you are not comfortable working on your vehicle’s electrical system or lack the necessary tools and experience, it is best to seek professional help. Attempting repairs without the proper knowledge and skills can lead to further damage and safety risks.
AutoExplain.com offers expert remote technical support to assist with diagnosing and repairing the P0113 code in Mercedes-Benz vehicles. Contact AutoExplain.com via WhatsApp at (+84)967469410 or email at [email protected] for professional assistance. Our team of experienced technicians can provide guidance, diagnostic assistance, and repair recommendations to help you resolve the issue quickly and effectively.
Having the right tools is essential for diagnosing and repairing the P0113 code in Mercedes-Benz vehicles.
An OBD-II scanner is necessary for reading and clearing diagnostic trouble codes. It can also be used to monitor IAT sensor data and other engine parameters.
A multimeter is used to measure voltage, resistance, and continuity in electrical circuits. It is essential for testing the IAT sensor, wiring, and connectors.
Electrical contact cleaner is used to clean corroded connectors and ensure proper electrical connections.
A wiring repair kit includes wiring connectors, terminals, and tools for repairing damaged wiring.
A wrench or socket set is used to remove and install the IAT sensor.
Pliers and wire strippers are used for cutting and stripping wires when repairing or replacing wiring.
While the general principles of diagnosing and repairing the P0113 code apply to most vehicles, there may be Mercedes-Benz-specific considerations.
The location of the IAT sensor may vary depending on the specific Mercedes-Benz model and engine type. Consult the vehicle’s service manual or repair database for the exact location.
Mercedes-Benz wiring diagrams can be helpful for tracing the wiring between the IAT sensor and the ECU. These diagrams provide detailed information about wire colors, connector locations, and circuit layouts.
Mercedes-Benz may have specific diagnostic procedures for the P0113 code. Consult the vehicle’s service manual or repair database for the recommended procedures.
Ensure that any replacement parts, such as the IAT sensor or wiring connectors, are compatible with your Mercedes-Benz model and engine type. Using incompatible parts can lead to further problems.
For complex or intermittent P0113 code issues, advanced diagnostic techniques may be necessary.
Use an OBD-II scanner with data logging capabilities to record IAT sensor data and other engine parameters over time. This can help identify intermittent issues that may not be apparent during a static diagnostic test.
Examine the freeze frame data stored by the ECU when the P0113 code was triggered. This data provides a snapshot of the engine conditions at the time of the fault and can help identify the cause.
Use an oscilloscope to analyze the IAT sensor signal waveform. This can help identify signal abnormalities that may not be detectable with a multimeter.
A 2015 Mercedes-Benz C300 exhibited a P0113 code and poor engine performance. Diagnostic testing revealed that the IAT sensor was providing inaccurate temperature readings. Replacing the IAT sensor resolved the issue, and the engine performance returned to normal.
A 2018 Mercedes-Benz E300 had a P0113 code and reduced fuel economy. A visual inspection revealed damaged wiring near the IAT sensor connector. Repairing the wiring resolved the issue, and the fuel economy improved.
A 2016 Mercedes-Benz CLA250 displayed a P0113 code and difficulty starting. Inspection of the IAT sensor and ECU connectors revealed corrosion. Cleaning the connectors with electrical contact cleaner resolved the issue, and the engine started normally.
Accurate IAT sensor readings are critical for proper engine management and performance. The ECU uses IAT sensor data to calculate the correct air-fuel mixture, manage ignition timing, and optimize overall engine performance. Inaccurate IAT sensor readings can lead to a variety of issues, including poor engine performance, decreased fuel economy, increased emissions, and difficulty starting.
The IAT sensor helps the ECU determine the density of the air entering the engine. Colder air is denser than hotter air, so the ECU needs to adjust the fuel mixture accordingly. If the IAT sensor is providing inaccurate readings, the ECU may miscalculate the fuel mixture, leading to a lean or rich condition.
The IAT sensor also affects ignition timing. Colder air requires more advanced ignition timing, while hotter air requires less advanced timing. If the IAT sensor is providing inaccurate readings, the ECU may miscalculate the ignition timing, leading to poor engine performance.
Accurate IAT sensor readings are essential for optimizing overall engine performance. By providing the ECU with accurate information about the temperature of the air entering the engine, the IAT sensor helps ensure that the engine runs smoothly and efficiently.
AutoExplain.com offers comprehensive support for diagnosing and repairing the P0113 code in Mercedes-Benz vehicles. Our team of experienced technicians can provide:
Contact AutoExplain.com via WhatsApp at (+84)967469410 or email at [email protected] for professional assistance.
The P0113 code indicates a high input signal from the Intake Air Temperature (IAT) sensor, suggesting a problem with the sensor or its circuit.
It is not recommended to drive with a P0113 code, as it can lead to poor engine performance, decreased fuel economy, and increased emissions.
The P0113 code can be fixed by replacing the IAT sensor, repairing or replacing damaged wiring, cleaning or replacing corroded connectors, or addressing ECU malfunctions.
You can test the IAT sensor using a multimeter to measure voltage and resistance. Compare the values to the manufacturer’s specifications.
The location of the IAT sensor varies depending on the specific model and engine type. Consult the vehicle’s service manual for the exact location.
The cost to fix the P0113 code depends on the root cause. Replacing the IAT sensor is typically the least expensive repair, while addressing ECU malfunctions can be more costly.
Yes, a dirty air filter can indirectly affect IAT sensor readings and engine performance, potentially contributing to the P0113 code.
You will need an OBD-II scanner, a multimeter, electrical contact cleaner, and a wrench or socket set.
Yes, AutoExplain.com offers expert remote technical support to assist with diagnosing and repairing the P0113 code in Mercedes-Benz vehicles.
You can contact AutoExplain.com via WhatsApp at (+84)967469410 or email at [email protected] for professional assistance.
Don’t let the P0113 code compromise your Mercedes-Benz’s performance. Contact AutoExplain.com today for expert guidance and support. Our experienced technicians are ready to help you diagnose and resolve the issue quickly and effectively. Reach out via WhatsApp at (+84)967469410 or email at [email protected] for immediate assistance. Visit our office at 4590 Angus Road, New York, United States, or explore our website AutoExplain.com for more information.


Josh William is a seasoned automotive expert and technical writer at AutoExplain. With a background as an automotive technician, he brings hands-on experience and deep industry knowledge to his writing.