
The Mercedes-Benz Sprinter was first introduced in 1995. Its initial generation, W901–W905, was produced from 1995 to 2006. This was followed by the second generation, W906 (2006–2018), and the current third generation, W907, which has been in production since 2018.
In this case study, we focus on AdBlue, DPF, and EGR removal solutions for the Sprinter W907. In addition, we also provide DPF and EGR removal services for earlier W906 models.
Before performing any modification, it is essential to identify the correct ECU type:
Each ECU requires a specific approach when applying AdBlue, DPF, or EGR removal solutions.
Similar to other vehicles, performing an AdBlue (SCR) removal on the Mercedes Sprinter requires both software adjustments and hardware actions. Without proper handling, the system may continue to trigger faults or warning messages.
Required Actions by ECU Type
Proper execution of these steps ensures that the AdBlue system is fully disabled without causing recurring errors or dashboard warnings.
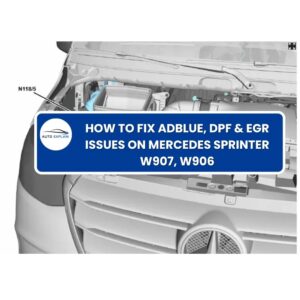
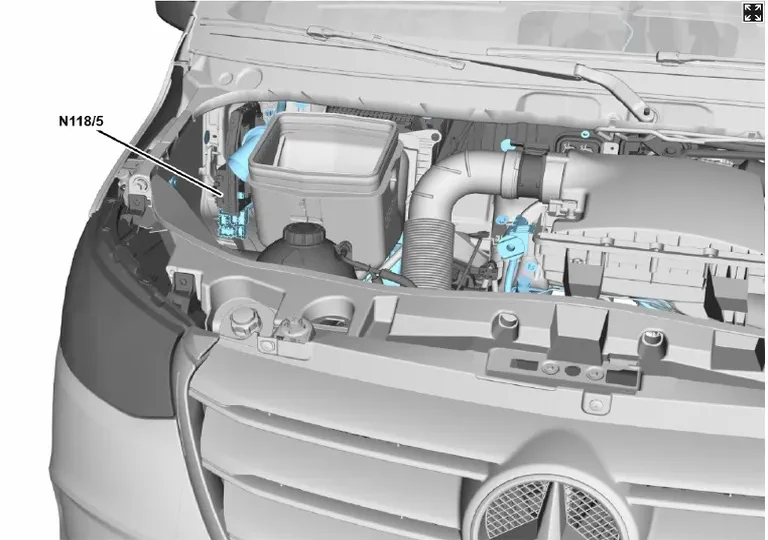
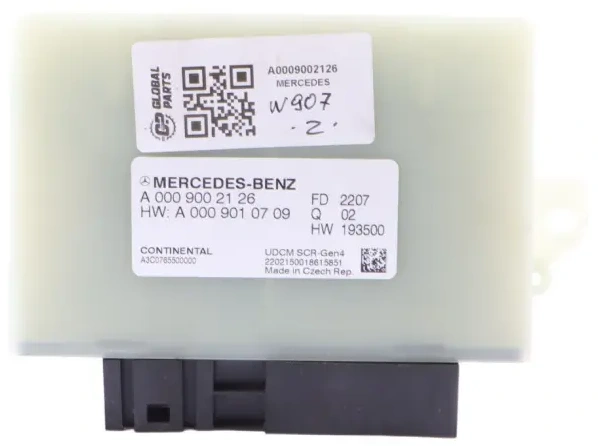
The AdBlue control module (SCR / dosing unit) is often labelled N118/5 in wiring diagrams.
It is generally located inside the vehicle, on the right side of the cabin, behind or under a trim panel near the front passenger side or the driver’s footwell/ seat base area, depending on the variant. Some diagrams show “engine compartment, right” related to AdBlue control units, but those often refer to sensor/dosing parts, not the control module itself.
The module is often placed close to other vehicle electronic modules (ECUs, fuse/relay centers), but it’s positioned to be somewhat protected from heat and moisture.
To safely access the AdBlue control module on the Sprinter W907, follow these steps:
Prepare the vehicle
Adjust the seat
Remove interior trim
Locate the module
AdBlue Module Removal
To remove the module:
Important notes:
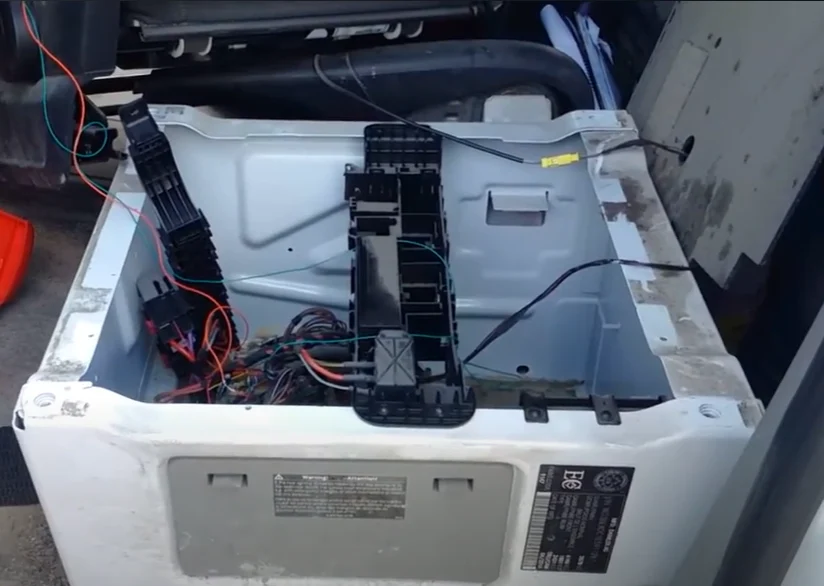
On the Sprinter W906, the AdBlue control module is typically located under the driver’s seat, inside the seat base compartment.
How to Access the Module
Remove the seat base cover
Locate the AdBlue module

Disconnecting the Module
Mercedes Sprinter DPF Removal
For proper DPF removal, the procedure is similar across all ECU types.
Required Hardware Actions
Disconnect:
Proper disconnection of these components is essential to prevent fault codes and ensure the ECU modifications work correctly.
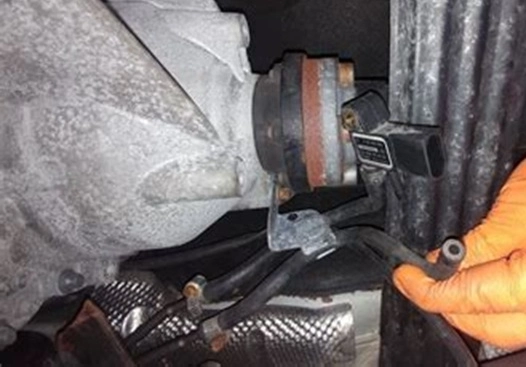
On the Sprinter W907, the DPF pressure sensor is typically mounted in the engine bay, rather than underneath the vehicle.
It is usually located on the bulkhead (firewall) or attached to the inner fender, depending on the engine configuration. While the exact position may vary slightly between engines such as OM651, OM654, or OM642, the sensor is always installed on a bracket in the engine bay for easy access and servicing.
Two small pressure pipes run from the exhaust system (before and after the DPF) down to the sensor, allowing it to measure pressure differences across the filter.
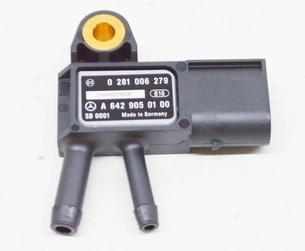
How to Identify the Sensor
You can recognize the DPF pressure sensor by the following characteristics:
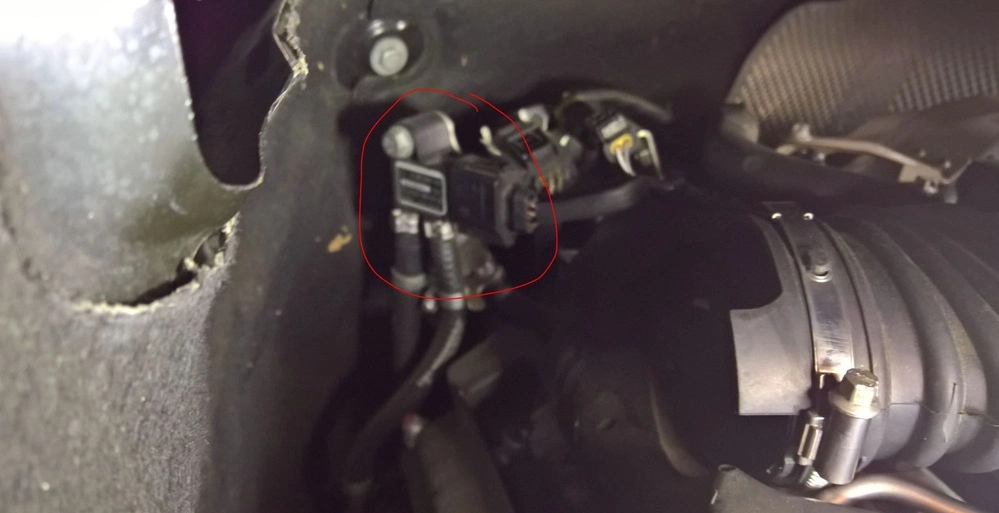
Proper identification of the DPF pressure sensor is essential before performing any disconnection or modification to avoid confusion with other components in the engine bay.
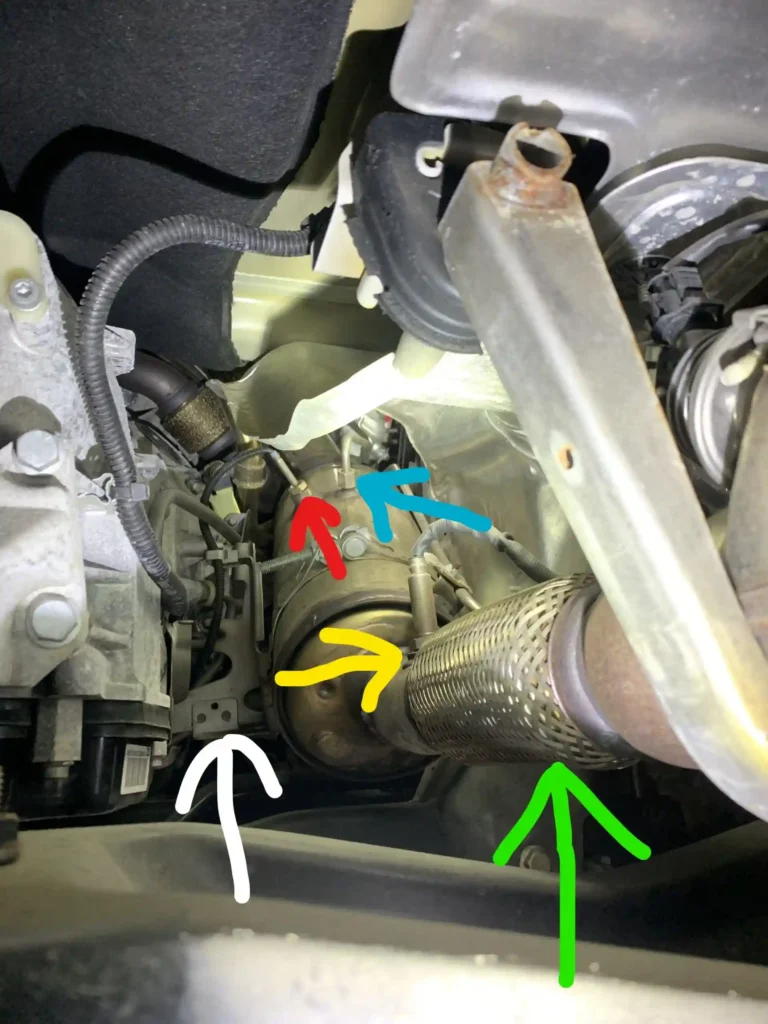
There are usually two or three EGT sensors around the DPF/ oxidation catalyst assembly:
They are threaded into the exhaust pipe or DPF housing, each with a single electrical connector leading up into the engine bay harness.
Same principle! There are 3 sensors around the DPF/ SCR unit.
Some versions add an extra SCR temp sensor downstream of the AdBlue catalyst for NOx control.
If you need a reliable AdBlue, DPF, EGR, and DTC removal solution for your Mercedes Sprinter, you can send us your ECU file and receive a tested, ready-to-use file in the shortest possible time. Contact AutoExplain via WhatsApp: +1 (936) 289 6695.