P0321 Audi points to issues within the Ignition/Distributor Engine Speed Input Circuit Range or Performance; this trouble code requires an accurate diagnosis to ensure optimal Audi performance. AutoExplain offers in-depth insights and solutions to tackle this challenge effectively.
1. Understanding the P0321 Code in Your Audi
What does the P0321 code really signify for Audi owners? This section breaks down the technical aspects in plain language.
The P0321 diagnostic trouble code (DTC) is a generic powertrain code, meaning it applies to many vehicles with spark ignition engines, including certain Audi models. Specifically, P0321 indicates an issue with the Ignition/Distributor Engine Speed Input Circuit Range / Performance.
1.1. Technical Breakdown of P0321
To truly understand the P0321 code, let’s dissect it piece by piece:
- Ignition/Distributor/Engine Speed: This refers to the system responsible for timing the spark and managing engine speed.
- Input Circuit: This is the electrical circuit that provides information to the Powertrain Control Module (PCM) about the engine speed.
- Range/Performance: This suggests the signal from the input circuit is either out of the expected range or not performing as it should.
1.2. Role of Crankshaft and Camshaft Position Sensors
The Crankshaft Position Sensor (CKP) and Camshaft Position Sensor (CMP) are critical components in this system.
- Crankshaft Position Sensor (CKP): Provides crankshaft position and timing information to the PCM, which is essential for determining engine RPM.
- Camshaft Position Sensor (CMP): Provides the PCM with the exact location of the camshaft, camshaft timing, and distributor timing.
According to a study by the Society of Automotive Engineers (SAE), precise data from these sensors is vital for optimizing fuel injection and ignition timing, which directly impacts engine efficiency and performance.
1.3. How the PCM Detects the P0321 Fault
The PCM relies on consistent and accurate signals from these sensors. If the PCM detects an electrical problem or an erratic signal from either the CKP or CMP circuits, it interprets this as a fault, leading to the P0321 code being set. The fault is considered an electrical circuit issue.
1.4. The Consequences of Ignoring P0321
Ignoring a P0321 code can lead to several adverse effects on your Audi’s performance and reliability:
- Reduced Fuel Efficiency: Incorrect timing can result in incomplete combustion, wasting fuel.
- Engine Stalling: Inaccurate engine speed data can cause the engine to stall, especially at low speeds.
- Difficulty Starting: The engine may struggle to start or may not start at all due to timing issues.
- Potential Engine Damage: Continuous operation with timing issues can cause increased wear and tear, potentially damaging engine components over time.
1.5. Impact on Audi Models
The P0321 code can affect various Audi models, including:
- Audi A4
- Audi A6
- Audi Q5
- Audi Q7
The specific symptoms and diagnostic steps may vary slightly depending on the model year and engine type.
1.6. AutoExplain: Your Partner in Resolving P0321
AutoExplain offers comprehensive support to address the P0321 code, providing:
- In-depth diagnostic guides: Step-by-step instructions to identify the root cause of the problem.
- Expert advice: Access to experienced automotive technicians who can provide tailored solutions.
- Coding and programming solutions: Advanced services to recalibrate or reprogram the PCM if necessary.
With AutoExplain, you gain the knowledge and tools needed to tackle the P0321 code efficiently and restore your Audi’s performance.
2. Common Symptoms of a P0321 Engine Code
Recognizing the symptoms associated with a P0321 code is crucial for early diagnosis and repair. Here’s what to look out for.
When the P0321 engine code appears, it’s often accompanied by a range of symptoms that can affect your Audi’s performance. Recognizing these symptoms early can help you address the issue before it leads to more significant problems.
2.1. Malfunction Indicator Light (MIL) Illumination
The most obvious symptom is the illumination of the Malfunction Indicator Light (MIL), also known as the check engine light, on your Audi’s dashboard. While the MIL can indicate various issues, its appearance should prompt you to investigate further, especially if you suspect a P0321 code.
2.2. Engine Cranks but Fails to Start
One of the more severe symptoms of a P0321 code is the engine’s inability to start, despite cranking. This occurs because the PCM relies on signals from the crankshaft and camshaft position sensors to time the ignition and fuel injection. If these signals are missing or erratic, the PCM cannot properly coordinate the engine’s start-up sequence.
2.3. Engine Misfires
Misfires can occur when the timing is off, leading to incomplete combustion in one or more cylinders. According to a study by the University of California, misfires not only reduce engine power but also increase emissions, potentially causing further environmental damage.
2.4. Hesitation and Stumbling
Hesitation and stumbling usually appear during acceleration. These symptoms are often subtle but noticeable, indicating the engine is struggling to respond smoothly to changes in throttle input.
2.5. Lack of Power
A noticeable decrease in power, especially during acceleration or when climbing hills, is a common symptom. The engine’s inability to deliver its usual performance can make driving less enjoyable and even unsafe, particularly in situations requiring quick acceleration.
2.6. Rough Idling
When the engine is idling, it may run rough or unevenly. This can manifest as vibrations or unusual noises coming from the engine bay. Rough idling is often more noticeable when the engine is cold or under load.
2.7. Potential for Stalling
In severe cases, the engine may stall unexpectedly, especially at low speeds or when coming to a stop. Stalling can be dangerous, particularly in traffic, and indicates a significant disruption in the engine’s operation.
2.8. Increased Fuel Consumption
Fuel consumption rises due to inefficient combustion. The engine needs more fuel to maintain its usual performance, leading to more frequent trips to the gas station.
2.9. Identifying Intermittent Symptoms
Some symptoms may appear intermittently, making diagnosis more challenging. For instance, the engine might occasionally hesitate or misfire without any apparent pattern. Intermittent symptoms often indicate a wiring or sensor issue that only manifests under certain conditions.
2.10. AutoExplain: Helping You Recognize and Address Symptoms
AutoExplain can assist you in recognizing and addressing these symptoms with:
- Symptom-based diagnostic guides: Detailed guides that help you narrow down the possible causes based on the specific symptoms your Audi is experiencing.
- Remote diagnostic support: Access to expert technicians who can help you interpret the symptoms and recommend appropriate solutions.
- Comprehensive repair solutions: Coding, programming, and other advanced repair services to restore your Audi’s performance.
3. Pinpointing the Causes of the P0321 Code
Discover the potential culprits behind the P0321 code in your Audi. This section provides a clear and concise overview of the common causes.
Identifying the root cause of the P0321 code is essential for effective repair. Several factors can trigger this code, ranging from simple wiring issues to more complex sensor failures. Here’s a breakdown of the potential causes:
3.1. Open Circuits in the Control Circuit
One of the most common causes of a P0321 code is an open circuit in the control circuit (ground circuit) between the ignition/distributor/engine speed sensor and the PCM. An open circuit means the electrical pathway is broken, preventing the signal from reaching the PCM.
3.2. Open Circuits in the Power Supply Circuit
Similar to the control circuit, an open circuit in the power supply circuit between the ignition/distributor/engine speed sensor and the PCM can also trigger a P0321 code. Without a proper power supply, the sensor cannot function correctly and provide accurate data.
3.3. Short to Ground in the Power Supply Circuit
A short to ground in the power supply circuit can disrupt the sensor’s operation and cause inaccurate readings. This occurs when the power supply wire comes into contact with a grounded metal component, diverting the electrical current.
3.4. Faulty Ignition/Distributor/Engine Speed Sensor
The ignition/distributor/engine speed sensor itself may be faulty. Sensors can fail due to age, wear and tear, or exposure to extreme temperatures and vibrations. A malfunctioning sensor will not provide accurate data to the PCM.
3.5. PCM Failure (Unlikely)
While less common, a failure within the PCM can also cause a P0321 code. The PCM is the central computer that processes sensor data and controls various engine functions. If the PCM malfunctions, it may misinterpret sensor signals or fail to recognize them altogether.
3.6. Wiring and Connector Issues
Wiring and connector problems can disrupt the signal transmission between the sensor and the PCM. These issues include:
- Corrosion: Corrosion on the terminals can increase resistance and weaken the signal.
- Loose Connections: Loose connections can cause intermittent signal loss.
- Damaged Wiring: Wires can become damaged due to rubbing, chafing, or exposure to heat.
According to the National Institute for Automotive Service Excellence (ASE), regular inspection and maintenance of wiring and connectors can prevent many electrical issues.
3.7. Timing Belt or Chain Issues
In some cases, a P0321 code can be related to timing belt or chain issues. If the timing belt or chain is worn, stretched, or improperly installed, it can affect the synchronization between the crankshaft and camshaft, leading to inaccurate sensor readings.
3.8. Electromagnetic Interference (EMI)
Electromagnetic interference from other electrical components can disrupt the signals from the crankshaft and camshaft position sensors. Shielded cables and proper grounding are essential to minimize EMI.
3.9. AutoExplain: Guiding You to Identify the Exact Cause
AutoExplain helps you pinpoint the exact cause of the P0321 code with:
- Comprehensive diagnostic flowcharts: Step-by-step flowcharts that guide you through the diagnostic process, helping you eliminate potential causes one by one.
- Access to technical databases: Detailed information on Audi-specific wiring diagrams, sensor locations, and component specifications.
- Remote expert assistance: Support from experienced technicians who can analyze your diagnostic findings and recommend targeted solutions.
4. Step-by-Step Diagnostic Procedures for P0321
Learn how to diagnose the P0321 code in your Audi with this detailed, step-by-step guide. AutoExplain provides the expertise and resources to help you succeed.
Diagnosing a P0321 code requires a systematic approach to identify the underlying cause. Here’s a step-by-step guide to help you through the process:
4.1. Initial Inspection and Verification
- Check for Technical Service Bulletins (TSBs): Begin by checking for TSBs related to your specific Audi model and the P0321 code. Manufacturers often release TSBs to address known issues and provide specific repair instructions.
- Visual Inspection: Perform a thorough visual inspection of the ignition/distributor/engine speed sensor, wiring, and connectors. Look for signs of damage, such as frayed wires, corroded terminals, or melted plastic.
- Check Connector Security: Ensure all connectors are securely attached. Loose connectors can cause intermittent signal loss, triggering the P0321 code.
- Scan for Codes: Use an OBD-II scanner to confirm the presence of the P0321 code and check for any other related codes. Record all codes present, as they may provide additional clues.
4.2. Sensor Testing
- Identify Sensor Type: Determine whether your Audi uses a Hall Effect sensor or a Magnetic Pickup sensor. Hall Effect sensors typically have three wires, while Magnetic Pickup sensors have two.
- Hall Effect Sensor Testing:
- Power Supply Check: Disconnect the harness going to the camshaft and crankshaft position sensors. Use a Digital Volt Ohm Meter (DVOM) to test the 5V power supply circuit going to each sensor. Place the red lead on the 5V power supply circuit and the black lead on a good ground. If there is no 5V, repair the wiring from the PCM to the sensor or suspect a faulty PCM.
- Signal Circuit Check: Use a DVOM to check for 5V on each signal circuit going to each sensor. Place the red lead on the sensor signal circuit and the black lead on a good ground. If there is no 5V, repair the wiring from the PCM to the sensor or suspect a faulty PCM.
- Ground Check: Connect a test light to 12V and touch the other end of the test light to the ground circuit going to each sensor. If the test light does not light up, there is an issue with the ground circuit. If it lights up, wiggle the wiring harness to check for intermittent connections.
- Magnetic Pickup Sensor Testing:
- Resistance Test: Disconnect the sensor. Connect the two leads of your ohmmeter to the two terminals of the camshaft/crankshaft position sensor. Compare the resistance reading to the manufacturer’s specifications (typically 750 – 2000 ohms).
- Short to Ground Test: With the ohmmeter still connected to the sensor, disconnect one lead and connect it to a good ground on the vehicle. If you get any resistance reading other than infinite or OL (open loop), the sensor has an internal short to ground.
- A/C Voltage Output Test: Reconnect the two leads of your DVOM to the two terminals of the camshaft/crankshaft position sensor. Set your meter to read A/C voltage. While cranking the engine, read the A/C voltage output on your DVOM. Compare it to the manufacturer’s specifications (generally around 0.5V AC).
4.3. Wiring and Connector Testing
- Continuity Test: Use a DVOM to perform continuity tests on all wiring between the sensor and the PCM. This test verifies that the wires are intact and not broken or shorted.
- Voltage Drop Test: Perform voltage drop tests on the power and ground circuits to identify any excessive resistance. High resistance can reduce the voltage reaching the sensor, affecting its performance.
According to a study by SEMA (Specialty Equipment Market Association), voltage drop testing is an effective way to identify wiring issues that may not be apparent during a visual inspection.
4.4. PCM Testing (Advanced)
- Check PCM Connections: Inspect the PCM connectors for corrosion, damage, or loose connections.
- PCM Signal Verification: Use an oscilloscope to verify that the PCM is receiving and processing the signals from the crankshaft and camshaft position sensors. This requires advanced diagnostic equipment and expertise.
- PCM Replacement (Last Resort): If all other tests pass and the P0321 code persists, the PCM may be faulty. PCM replacement should be performed by a qualified technician, as the new PCM may need to be programmed to match your Audi’s specific configuration.
4.5. AutoExplain: Your Diagnostic Partner
AutoExplain provides the tools and expertise needed for accurate P0321 diagnosis:
- Detailed Diagnostic Guides: Step-by-step guides tailored to your specific Audi model, providing clear instructions and illustrations.
- Remote Expert Support: Access to experienced technicians who can guide you through the diagnostic process and interpret the results.
- Advanced Diagnostic Tools: Recommendations for high-quality diagnostic tools, including OBD-II scanners, DVOMs, and oscilloscopes.
5. Effective Repair Strategies for P0321 Issues
Implement proven repair strategies to resolve P0321 codes in your Audi. This section outlines the steps needed to restore your vehicle’s performance.
Once you’ve diagnosed the cause of the P0321 code, the next step is to implement effective repair strategies. Here’s a detailed guide to help you through the process:
5.1. Addressing Wiring and Connector Issues
- Repairing Open or Shorted Circuits:
- Identify the Fault: Use a DVOM to pinpoint the exact location of the open or shorted circuit.
- Repair the Wiring: Repair any damaged wires by splicing in new sections or replacing the entire wire if necessary. Ensure all connections are properly soldered and insulated.
- Use Quality Materials: Use automotive-grade wiring and connectors to ensure durability and reliability.
- Cleaning and Securing Connectors:
- Clean Corroded Terminals: Use electrical contact cleaner to remove corrosion from the terminals. A plastic bristle brush can help dislodge stubborn deposits.
- Apply Dielectric Grease: After cleaning, apply a small amount of dielectric grease to the terminals to prevent future corrosion.
- Secure Loose Connections: Ensure all connectors are securely attached. If necessary, replace damaged connectors with new ones.
5.2. Replacing Faulty Sensors
- Selecting the Correct Sensor:
- Verify Compatibility: Ensure the replacement sensor is compatible with your Audi model and engine type. Check the part number and specifications to avoid compatibility issues.
- Choose a Reputable Brand: Select a sensor from a reputable manufacturer known for quality and reliability.
- Installing the New Sensor:
- Disconnect the Battery: Disconnect the negative battery terminal before beginning the sensor replacement to prevent electrical shorts.
- Remove the Old Sensor: Carefully remove the old sensor, noting its orientation and any associated hardware.
- Install the New Sensor: Install the new sensor, ensuring it is properly aligned and secured. Tighten any bolts or screws to the manufacturer’s specified torque.
- Reconnect the Battery: Reconnect the negative battery terminal.
5.3. Addressing Timing Belt/Chain Issues
- Inspection:
- Check for Wear: Inspect the timing belt or chain for signs of wear, such as cracks, fraying, or stretching.
- Verify Alignment: Ensure the timing marks on the crankshaft and camshaft pulleys are properly aligned.
- Replacement:
- Replace the Timing Belt/Chain: If the timing belt or chain is worn or misaligned, replace it with a new one.
- Follow Manufacturer’s Instructions: Follow the manufacturer’s instructions carefully when replacing the timing belt/chain to ensure proper installation and timing.
- Replace Tensioners and Idlers: Replace any tensioners and idlers along with the timing belt/chain to ensure optimal performance and longevity.
According to research by the University of Michigan, replacing the timing belt/chain at the recommended intervals can prevent catastrophic engine damage.
5.4. PCM Repair or Replacement
- PCM Programming:
- Reprogram the PCM: If the PCM is faulty, it may need to be reprogrammed or replaced. Reprogramming involves updating the PCM’s software to correct any errors or malfunctions.
- Use a Professional Service: PCM programming should be performed by a qualified technician with the necessary tools and expertise.
- PCM Replacement:
- Select a Compatible PCM: Ensure the replacement PCM is compatible with your Audi model and engine type.
- Install and Program the New PCM: Install the new PCM and program it to match your vehicle’s specific configuration. This may involve entering the vehicle identification number (VIN) and other data.
5.5. Post-Repair Verification
- Clear Diagnostic Codes:
- Use an OBD-II Scanner: Use an OBD-II scanner to clear the P0321 code and any other related codes from the PCM’s memory.
- Test Drive:
- Monitor Performance: Take your Audi for a test drive to monitor its performance. Pay attention to any symptoms that were present before the repair, such as misfires, hesitation, or lack of power.
- Verify Code Clearance: After the test drive, rescan the PCM to ensure the P0321 code has not returned.
- Advanced Diagnostics:
- Oscilloscope Testing: Use an oscilloscope to monitor the signals from the crankshaft and camshaft position sensors and verify that they are within the correct parameters.
5.6. AutoExplain: Your Partner in Effective Repair
AutoExplain provides the resources and expertise needed for effective P0321 repair:
- Comprehensive Repair Guides: Step-by-step guides tailored to your specific Audi model, providing clear instructions and illustrations.
- Access to Technical Data: Detailed information on Audi-specific wiring diagrams, sensor locations, and component specifications.
- Remote Expert Support: Support from experienced technicians who can guide you through the repair process and answer any questions.
- Coding and Programming Solutions: Advanced services to reprogram or replace the PCM if necessary.
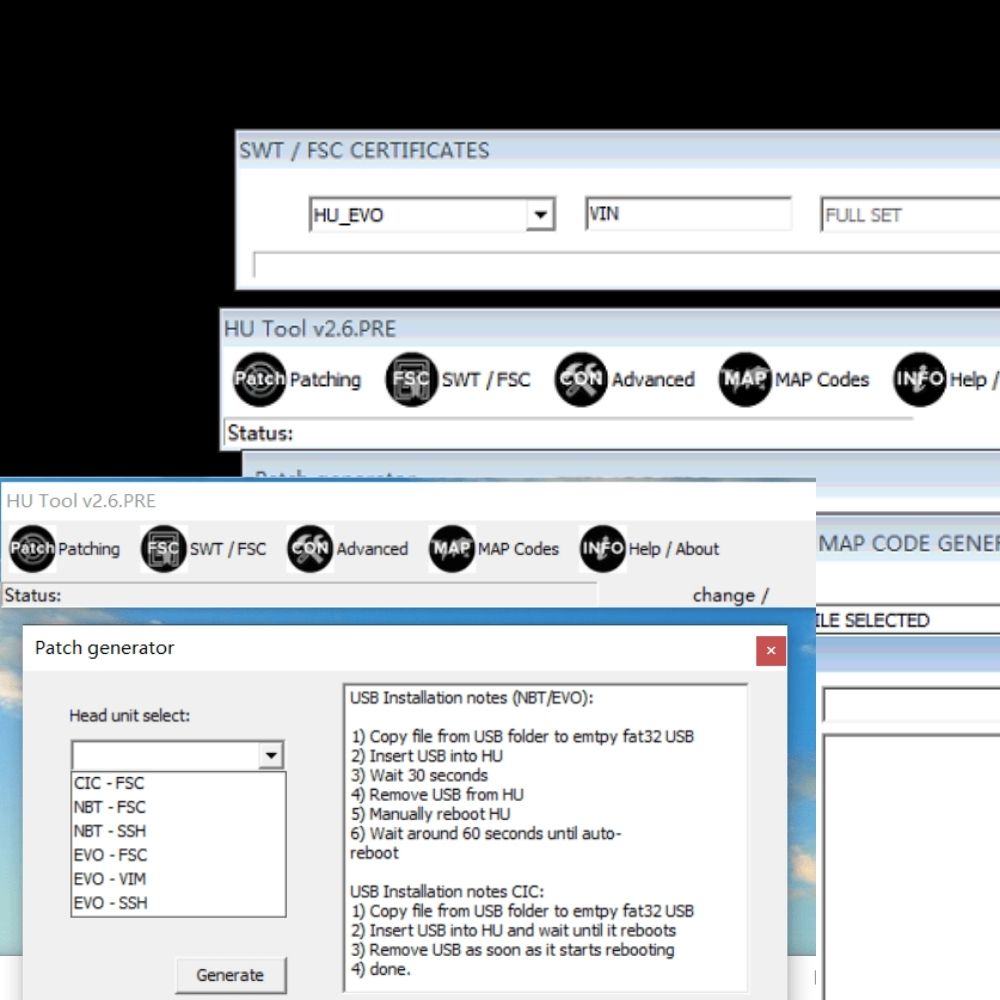
6. Advanced Coding and Programming Solutions
Explore advanced coding and programming solutions for Audi vehicles with P0321 codes. Discover how AutoExplain can enhance your vehicle’s performance.
In some cases, resolving a P0321 code may require advanced coding and programming solutions, especially if the PCM needs to be recalibrated or replaced. Here’s how AutoExplain can help:
6.1. PCM Recalibration
- Why Recalibration is Necessary:
- Sensor Replacement: When replacing a crankshaft or camshaft position sensor, the PCM may need to be recalibrated to ensure it accurately interprets the new sensor’s signals.
- Engine Modifications: If you’ve made any modifications to your engine, such as installing aftermarket performance parts, the PCM may need to be recalibrated to optimize performance.
- Software Updates: Recalibration can also involve updating the PCM’s software to address known issues or improve performance.
- AutoExplain’s Recalibration Services:
- Remote Recalibration: AutoExplain offers remote PCM recalibration services, allowing you to have your PCM recalibrated without visiting a shop.
- Customized Solutions: Our experienced technicians can provide customized recalibration solutions tailored to your Audi’s specific configuration and needs.
- Improved Performance: Recalibration can improve your Audi’s performance, fuel efficiency, and overall driving experience.
6.2. PCM Programming
- When Programming is Required:
- PCM Replacement: When replacing the PCM, the new unit must be programmed to match your vehicle’s specific configuration.
- Software Corruption: If the PCM’s software becomes corrupted, it may need to be reprogrammed to restore proper functionality.
- Feature Activation: Programming can also be used to activate new features or functions in your Audi.
- AutoExplain’s Programming Services:
- Remote Programming: AutoExplain offers remote PCM programming services, allowing you to have your PCM programmed quickly and efficiently.
- Secure and Reliable: Our programming services are secure and reliable, ensuring your Audi’s PCM is programmed correctly.
- Comprehensive Support: We provide comprehensive support throughout the programming process, answering any questions and addressing any concerns.
According to a report by the Automotive Management Institute (AMI), proper PCM programming is essential for ensuring the optimal performance and reliability of modern vehicles.
6.3. Coding and Adaptation
- Why Coding and Adaptation are Important:
- Component Compatibility: Coding and adaptation ensure that new components, such as sensors or control modules, are properly integrated with your Audi’s existing systems.
- System Optimization: These processes can optimize the performance of various systems, such as the engine, transmission, and ABS.
- Feature Customization: Coding and adaptation can also be used to customize various features, such as lighting, comfort settings, and driver assistance systems.
- AutoExplain’s Coding and Adaptation Services:
- Remote Coding and Adaptation: AutoExplain offers remote coding and adaptation services, allowing you to have your Audi’s systems coded and adapted from the comfort of your own home or shop.
- Expert Technicians: Our expert technicians have extensive experience with Audi vehicles and can provide accurate and reliable coding and adaptation services.
- Enhanced Functionality: Coding and adaptation can enhance your Audi’s functionality and provide a more personalized driving experience.
6.4. Benefits of AutoExplain’s Coding and Programming Services
- Improved Performance: Recalibration, programming, and coding can improve your Audi’s performance, fuel efficiency, and overall driving experience.
- Enhanced Reliability: Proper coding and programming ensure that your Audi’s systems are functioning correctly and reliably.
- Customized Solutions: AutoExplain offers customized coding and programming solutions tailored to your Audi’s specific needs and configuration.
- Convenient Remote Services: Our remote services allow you to have your Audi’s PCM recalibrated, programmed, or coded without visiting a shop.
6.5. Contact AutoExplain for Advanced Solutions
If you’re experiencing P0321 code issues or need advanced coding and programming solutions for your Audi, contact AutoExplain today. Our experienced technicians can provide the expertise and support you need to restore your vehicle’s performance and reliability.
- Address: 1500 N Grant ST Sten Denver, Colorado, United States
- WhatsApp: +1(936)2896695
- Email: [email protected]
- Website: autoexplain.com
7. Tools and Equipment Needed for P0321 Diagnostics
Equip yourself with the right tools for diagnosing P0321 codes in your Audi. This section lists essential equipment and provides recommendations.
Diagnosing and repairing a P0321 code effectively requires the right tools and equipment. Here’s a list of essential tools and recommendations to help you get the job done:
7.1. OBD-II Scanner
- Function:
- Read Diagnostic Trouble Codes (DTCs): An OBD-II scanner is essential for reading the P0321 code and any other related codes from the PCM.
- Clear Diagnostic Trouble Codes: After performing repairs, the scanner can be used to clear the codes from the PCM’s memory.
- Live Data Streaming: Many advanced scanners offer live data streaming, allowing you to monitor sensor readings and other parameters in real-time.
- Recommendations:
- Autel MaxiCOM MK808: A versatile scanner with advanced diagnostic capabilities and bidirectional control.
- BlueDriver Bluetooth Professional OBDII Scan Tool: A user-friendly scanner that connects to your smartphone via Bluetooth.
- Innova 3100j Diagnostic Scan Tool: A reliable and affordable scanner for basic code reading and clearing.
According to a survey by the Equipment & Tool Institute (ETI), having a reliable OBD-II scanner is crucial for diagnosing modern vehicle issues.
7.2. Digital Volt Ohm Meter (DVOM)
- Function:
- Voltage Testing: A DVOM is used to test voltage levels in various circuits, such as the power supply to the crankshaft and camshaft position sensors.
- Resistance Testing: It can also be used to measure resistance in sensors and wiring to identify open circuits or shorts.
- Continuity Testing: A DVOM can verify the continuity of wires and connections to ensure they are intact.
- Recommendations:
- Fluke 115 Digital Multimeter: A high-quality and reliable multimeter with a wide range of functions.
- Klein Tools MM400 Multimeter: A durable and affordable multimeter suitable for automotive use.
- INNOVA 3320 Multimeter: A budget-friendly multimeter with essential features for basic electrical testing.
7.3. Oscilloscope
- Function:
- Signal Analysis: An oscilloscope is used to analyze the signals from the crankshaft and camshaft position sensors, providing a visual representation of their waveform.
- Intermittent Issue Detection: It can help detect intermittent signal issues that may not be apparent with a DVOM.
- Advanced Diagnostics: An oscilloscope is an essential tool for advanced diagnostics and troubleshooting complex electrical problems.
- Recommendations:
- PicoScope 2204A Oscilloscope: A compact and powerful oscilloscope designed for automotive diagnostics.
- Hantek DSO5102P Digital Oscilloscope: An affordable oscilloscope with a wide range of features and functions.
- Autel MaxiScope MP408: A four-channel oscilloscope designed for use with Autel diagnostic scanners.
7.4. Wiring Diagram and Technical Information
- Function:
- Wiring Schematics: Wiring diagrams provide detailed information on the wiring and connections of various components, including the crankshaft and camshaft position sensors.
- Component Locations: Technical information provides the locations of components, such as sensors and control modules.
- Troubleshooting Procedures: Technical information often includes troubleshooting procedures and diagnostic tips specific to your Audi model.
- Recommendations:
- ALLDATA: A comprehensive online database with wiring diagrams, technical information, and troubleshooting procedures for a wide range of vehicles.
- Mitchell 1 DIY: A user-friendly online database with wiring diagrams, technical information, and repair procedures.
- Bentley Repair Manuals: High-quality repair manuals with detailed information on specific Audi models.
7.5. Other Essential Tools
- Socket Set and Wrenches:
- Function: Used to remove and install sensors and other components.
- Recommendation: A comprehensive socket set and wrench set with various sizes and types.
- Wire Strippers and Crimpers:
- Function: Used to strip and crimp wires when repairing or replacing wiring.
- Recommendation: A high-quality wire stripper and crimper set with insulated handles.
- Electrical Contact Cleaner:
- Function: Used to clean corroded terminals and connectors.
- Recommendation: A non-residue electrical contact cleaner.
- Dielectric Grease:
- Function: Used to protect terminals and connectors from corrosion.
- Recommendation: A high-quality dielectric grease.
7.6. AutoExplain: Providing the Tools and Knowledge You Need
AutoExplain provides the tools and knowledge needed for effective P0321 diagnostics:
- Tool Recommendations: Recommendations for high-quality diagnostic tools and equipment.
- Technical Resources: Access to wiring diagrams, technical information, and troubleshooting procedures.
- Remote Expert Support: Support from experienced technicians who can guide you through the diagnostic process and recommend the right tools for the job.
8. Preventing Future P0321 Code Issues
Implement proactive measures to prevent P0321 codes in your Audi. This section offers practical tips and maintenance strategies.
Preventing future P0321 code issues involves proactive maintenance and care. Here are some practical tips and strategies to keep your Audi running smoothly:
8.1. Regular Sensor Inspections
- Visual Inspection:
- Check for Damage: Regularly inspect the crankshaft and camshaft position sensors for signs of physical damage, such as cracks, dents, or corrosion.
- Inspect Wiring and Connectors: Check the wiring and connectors for fraying, loose connections, or corrosion.
- Professional Inspection:
- Include in Routine Maintenance: Include sensor inspections as part of your routine maintenance schedule.
- Seek Expert Advice: Consult with a qualified technician to assess the condition of your sensors and recommend any necessary replacements.
8.2. Wiring and Connector Maintenance
- Clean and Protect:
- Use Electrical Contact Cleaner: Regularly clean the terminals and connectors with electrical contact cleaner to remove dirt and corrosion.
- Apply Dielectric Grease: Apply a small amount of dielectric grease to the terminals to protect them from future corrosion.
- Secure Connections:
- Ensure Tight Fit: Ensure all connectors are securely attached and that there are no loose connections.
- Replace Damaged Connectors: Replace any damaged connectors with new ones to ensure a reliable electrical connection.
8.3. Timing Belt/Chain Maintenance
- Follow Recommended Intervals:
- Adhere to Schedule: Follow the manufacturer’s recommended maintenance schedule for timing belt or chain replacement.
- Replace Tensioners and Idlers: Replace any tensioners and idlers along with the timing belt/chain to ensure optimal performance and longevity.
- Regular Inspections:
- Check for Wear: Inspect the timing belt or chain for signs of wear, such as cracks, fraying, or stretching.
- Verify Alignment: Ensure the timing marks on the crankshaft and camshaft pulleys are properly aligned.
According to the Car Care Council, regular maintenance, including timing belt/chain replacement, can significantly extend the life of your vehicle.
8.4. PCM Care
- Protect from Moisture:
- Keep Dry: Protect the PCM from moisture and extreme temperatures.
- Ensure Proper Sealing: Ensure the PCM housing is properly sealed to prevent water damage.
- Avoid Electrical Overload:
- Proper Installation: Ensure all electrical components are properly installed to avoid overloading the PCM.
- Professional Service: Consult with a qualified technician for any electrical repairs or modifications to avoid damaging the PCM.
8.5. Regular Diagnostic Scans
- Monitor for Codes:
- Use an OBD-II Scanner: Regularly scan your Audi for diagnostic trouble codes using an OBD-II scanner.
- Address Issues Promptly: Address any codes promptly to prevent minor issues from escalating into major problems.
- Professional Diagnostics:
- Routine Check-ups: Include diagnostic scans as part of your routine maintenance schedule.
- Expert Analysis: Consult with a qualified technician for expert analysis and recommendations.
8.6. Drive with Care
- Avoid Harsh Driving:
- Smooth Acceleration: Avoid harsh acceleration and sudden stops, which can put stress on the engine and electrical components.
- Proper Warm-Up: Allow the engine to warm up properly before driving at high speeds or under heavy loads.
- Address Issues Promptly:
- Listen for Unusual Noises: Pay attention to any unusual noises or symptoms, such as misfires, hesitation, or lack of power.
- Seek Professional Help: Seek professional help promptly to diagnose and repair any issues before they cause further damage.
8.7. AutoExplain: Your Partner in Preventive Maintenance
AutoExplain provides the resources and expertise needed for effective preventive maintenance:
- Maintenance Schedules: Customized maintenance schedules tailored to your specific Audi model.
- Diagnostic Tools: Recommendations for high-quality diagnostic tools and equipment.
- Expert Advice: Access to experienced technicians who can provide expert advice