What is B181E2A Mercedes Fault Code and How to Fix It
The B181E2A Mercedes fault code signals an issue with the right engine hood contact switch circuit, leading to persistent error messages and potential system malfunctions. At AutoExplain, we specialize in diagnosing and resolving complex automotive issues like this, offering remote support and expert guidance. This article delves into the intricacies of the B181E2A code, providing actionable insights and solutions, encompassing hood latch malfunctions, wiring harness assessments, and front SAM module troubleshooting.
Table of Contents
Toggle1. Understanding the B181E2A Mercedes Fault Code
The B181E2A fault code in Mercedes-Benz vehicles indicates a problem with the “Right engine hood contact switch Circuit.” This code suggests that the vehicle’s system is detecting an unexpected or incorrect signal from the hood contact switch, which is responsible for indicating whether the hood is open or closed. When this fault code appears, it can trigger a variety of issues, from annoying dashboard warnings to potential security system problems.
1.1 Symptoms of a B181E2A Fault Code
When the B181E2A fault code is triggered, several symptoms may become apparent:
- Dashboard Warning: The most common symptom is a persistent “Hood Open” warning message displayed on the instrument cluster, even when the hood is securely closed.
- Audible Alerts: Along with the visual warning, the vehicle may produce a constant “dinging” sound, which can be distracting and irritating.
- Alarm System Issues: In some cases, the fault code can interfere with the vehicle’s alarm system, causing false alarms or preventing the system from arming correctly.
- Remote Start Problems: Vehicles equipped with remote start functionality may not start if the system believes the hood is open.
- Interior Lighting Issues: The interior lights may stay on or flicker, as the system incorrectly assumes the hood is not properly closed.
- Fault Code Persistence: The fault code may reappear even after attempts to clear it, indicating an ongoing underlying issue.
1.2 Potential Causes of the B181E2A Code
Several factors can trigger the B181E2A fault code in Mercedes-Benz vehicles:
- Faulty Hood Contact Switch: The most common cause is a malfunctioning hood contact switch. This switch can fail due to physical damage, corrosion, or internal electrical issues.
- Wiring Issues: Damaged, corroded, or shorted wiring in the hood contact switch circuit can lead to incorrect signals. This includes issues with the wiring harness, connectors, and grounding points.
- Front SAM (Signal Acquisition Module) Problems: The front SAM is responsible for processing signals from various sensors, including the hood contact switch. A faulty SAM can misinterpret the signal or fail to process it correctly.
- Software Glitches: In rare cases, software issues within the vehicle’s electronic control units (ECUs) can cause false fault codes to appear.
- Connector Problems: Loose or corroded connectors in the hood contact switch circuit can disrupt the signal flow and trigger the fault code.
- Mechanical Issues: A misaligned or damaged hood latch mechanism can prevent the hood from fully closing, leading to an incorrect signal from the contact switch.
2. Diagnostic Steps for the B181E2A Fault Code
Diagnosing the B181E2A fault code requires a systematic approach to identify the root cause of the problem. Here are the key steps to follow:
2.1 Initial Inspection
Begin with a thorough visual inspection of the hood latch area and the hood contact switch:
- Check the Hood Contact Switch: Look for any signs of physical damage, corrosion, or loose connections on the hood contact switch.
- Inspect Wiring: Examine the wiring harness and connectors for any damage, corrosion, or loose connections. Pay close attention to the wiring near the hood hinges and latch mechanism.
- Verify Hood Alignment: Ensure that the hood is properly aligned and closes securely. A misaligned hood can prevent the contact switch from engaging correctly.
2.2 Using a Diagnostic Tool
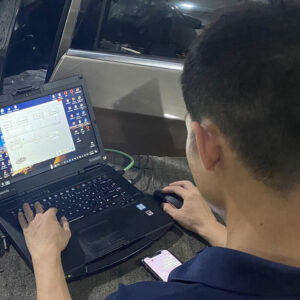
A diagnostic tool, such as the Mercedes-Benz XENTRY system, is essential for accurately diagnosing the B181E2A fault code:
- Connect the Diagnostic Tool: Connect the diagnostic tool to the vehicle’s OBD-II port and retrieve the fault codes.
- Read and Clear Fault Codes: Read the stored fault codes and note any other related codes that may be present. Clear the B181E2A fault code and see if it reappears.
- Live Data Analysis: Use the diagnostic tool to monitor the live data from the hood contact switch. Observe the signal status (open or closed) as the hood is opened and closed. This can help determine if the switch is functioning correctly.
- Actuation Test: Perform an actuation test on the hood contact switch, if available. This test can help verify the switch’s functionality and the wiring integrity.
2.3 Testing the Hood Contact Switch
If the initial inspection and diagnostic tool analysis do not reveal the issue, the next step is to test the hood contact switch directly:
- Disconnect the Switch: Disconnect the hood contact switch from the wiring harness.
- Continuity Test: Use a multimeter to perform a continuity test on the switch. Check for continuity in both the open and closed positions. The switch should show continuity when the hood is closed and no continuity when the hood is open.
- Resistance Test: Use a multimeter to measure the resistance of the switch in both the open and closed positions. Compare the readings to the manufacturer’s specifications.
- Voltage Test: With the switch connected, use a multimeter to measure the voltage at the switch connector. Verify that the voltage is within the specified range.
2.4 Checking the Wiring Harness
If the hood contact switch tests good, the next step is to check the wiring harness for any issues:
- Visual Inspection: Inspect the wiring harness for any signs of damage, corrosion, or loose connections. Pay close attention to the wiring near the hood hinges and latch mechanism.
- Continuity Test: Use a multimeter to perform a continuity test on each wire in the hood contact switch circuit. Check for continuity between the switch connector and the front SAM.
- Short Circuit Test: Use a multimeter to check for short circuits between the wires in the hood contact switch circuit and ground.
- Voltage Drop Test: Perform a voltage drop test on the wiring harness to identify any areas of high resistance.
2.5 Front SAM (Signal Acquisition Module) Testing
If the hood contact switch and wiring harness test good, the issue may be with the front SAM:
- Visual Inspection: Inspect the front SAM for any signs of damage, corrosion, or loose connections.
- Connector Check: Ensure that all connectors are securely attached to the front SAM.
- Software Update: Check for any available software updates for the front SAM. Outdated software can sometimes cause issues with signal processing.
- Module Replacement: If all other tests fail, the front SAM may need to be replaced. This should be done by a qualified technician with the appropriate diagnostic tools and programming capabilities.
3. Repair Solutions for the B181E2A Fault Code
Once the root cause of the B181E2A fault code has been identified, the appropriate repair solution can be implemented:
3.1 Replacing the Hood Contact Switch
If the hood contact switch is found to be faulty, the most straightforward solution is to replace it:
- Disconnect the Old Switch: Disconnect the old hood contact switch from the wiring harness.
- Remove the Old Switch: Remove the old switch from its mounting location.
- Install the New Switch: Install the new hood contact switch in its mounting location.
- Connect the New Switch: Connect the new switch to the wiring harness.
- Test the System: Use a diagnostic tool to clear the fault code and verify that the system is functioning correctly.
3.2 Repairing or Replacing Wiring
If the wiring harness is found to be damaged, corroded, or shorted, it will need to be repaired or replaced:
- Identify the Damaged Wiring: Locate the damaged section of the wiring harness.
- Repair the Wiring: If the damage is minor, the wiring can be repaired by splicing in new wire and using heat-shrink tubing to protect the connection.
- Replace the Wiring: If the damage is extensive, the entire wiring harness may need to be replaced.
- Test the System: Use a diagnostic tool to clear the fault code and verify that the system is functioning correctly.
3.3 Front SAM (Signal Acquisition Module) Replacement
If the front SAM is found to be faulty, it will need to be replaced:
- Disconnect the Battery: Disconnect the vehicle’s battery to prevent electrical damage.
- Remove the Old SAM: Remove the old front SAM from its mounting location.
- Install the New SAM: Install the new front SAM in its mounting location.
- Connect the Battery: Connect the vehicle’s battery.
- Program the New SAM: Use a diagnostic tool to program the new front SAM to the vehicle. This step is essential to ensure that the new SAM functions correctly with the vehicle’s other systems.
- Test the System: Use a diagnostic tool to clear the fault code and verify that the system is functioning correctly.
3.4 Addressing Connector Issues
If the connectors are found to be loose or corroded, they will need to be cleaned or replaced:
- Clean the Connectors: Use a wire brush or contact cleaner to clean the connectors.
- Tighten the Connectors: Ensure that the connectors are securely attached.
- Replace the Connectors: If the connectors are severely damaged or corroded, they may need to be replaced.
- Test the System: Use a diagnostic tool to clear the fault code and verify that the system is functioning correctly.
3.5 Resolving Mechanical Issues
If the hood latch mechanism is misaligned or damaged, it will need to be adjusted or repaired:
- Adjust the Latch: Adjust the hood latch mechanism to ensure that the hood closes securely and the contact switch engages correctly.
- Repair the Latch: If the latch mechanism is damaged, it may need to be repaired or replaced.
- Test the System: Use a diagnostic tool to clear the fault code and verify that the system is functioning correctly.
4. Advanced Troubleshooting Techniques
In some cases, the B181E2A fault code may be caused by more complex issues that require advanced troubleshooting techniques:
4.1 Using Oscilloscope Diagnostics
An oscilloscope can be used to analyze the signal from the hood contact switch and identify any anomalies that may not be apparent with a multimeter. This can help diagnose intermittent issues or signal degradation.
4.2 Circuit Load Testing
Circuit load testing involves using a specialized tool to apply a load to the hood contact switch circuit and measure the voltage drop. This can help identify issues with the wiring harness or the front SAM.
4.3 Analyzing Wiring Diagrams
Detailed wiring diagrams can provide valuable information about the hood contact switch circuit, including the location of connectors, grounding points, and other components. This information can be helpful in troubleshooting complex wiring issues.
5. Preventing Future Issues
To prevent future occurrences of the B181E2A fault code, consider the following preventive measures:
5.1 Regular Maintenance
Perform regular maintenance on the hood latch mechanism and contact switch:
- Lubricate the Latch: Lubricate the hood latch mechanism with a silicone-based lubricant to keep it functioning smoothly.
- Clean the Switch: Clean the hood contact switch with a contact cleaner to remove any dirt or corrosion.
- Inspect the Wiring: Inspect the wiring harness for any signs of damage or wear.
5.2 Protecting the Wiring
Protect the wiring harness from damage by using wire loom or other protective coverings:
- Use Wire Loom: Cover the wiring harness with wire loom to protect it from abrasion and environmental factors.
- Secure the Wiring: Secure the wiring harness to prevent it from rubbing against other components.
5.3 Avoiding Water Damage
Prevent water from entering the hood contact switch circuit:
- Seal the Connectors: Use dielectric grease to seal the connectors and prevent water from entering.
- Check for Leaks: Check for any water leaks in the engine compartment and repair them promptly.
6. The Role of AutoExplain in Resolving B181E2A Fault Codes
At AutoExplain, we understand the complexities of modern automotive systems and the challenges technicians face when diagnosing and repairing issues like the B181E2A fault code. Our team of experienced automotive experts is dedicated to providing comprehensive support and solutions to help you get your vehicle back on the road quickly and efficiently.
6.1 Remote Diagnostic Support
We offer remote diagnostic support to help you identify the root cause of the B181E2A fault code. Our experts can connect to your vehicle remotely using diagnostic tools and software to analyze the system and provide step-by-step guidance.
6.2 Expert Consultation
Our team of automotive experts is available to provide consultation and advice on the best course of action for resolving the B181E2A fault code. We can help you understand the diagnostic results, recommend repair solutions, and answer any questions you may have.
6.3 Wiring Diagrams and Technical Information
We provide access to a comprehensive database of wiring diagrams and technical information for Mercedes-Benz vehicles. This information can be invaluable in troubleshooting complex wiring issues and identifying the correct components for repair.
6.4 Software Updates and Programming
We offer software updates and programming services for Mercedes-Benz vehicles. This can help resolve software-related issues that may be causing the B181E2A fault code.
6.5 Component Sourcing
We can help you source the correct replacement components for your Mercedes-Benz vehicle. We have established relationships with trusted suppliers and can ensure that you receive high-quality parts at competitive prices.
7. Step-by-Step Guide to Clear the B181E2A Fault Code
Once you’ve addressed the underlying issue causing the B181E2A fault code, clearing the code from your Mercedes-Benz’s system is essential. Here’s a detailed, step-by-step guide:
7.1. Gather Necessary Tools
Before you begin, ensure you have the following tools:
- OBD-II Scanner: A diagnostic tool capable of reading and clearing Mercedes-Benz specific fault codes.
- Vehicle’s Key: Ensure the key is readily available to turn on the ignition.
7.2. Connect the OBD-II Scanner
- Locate the OBD-II Port: This port is typically found under the dashboard on the driver’s side.
- Plug in the Scanner: Connect the OBD-II scanner to the port. Ensure it’s securely plugged in.
7.3. Turn on the Ignition
- Insert the Key: Insert the vehicle’s key into the ignition.
- Turn to “On” Position: Turn the key to the “On” position without starting the engine. This powers up the vehicle’s electrical systems, allowing the scanner to communicate with the car’s computer.
7.4. Navigate the Scanner Menu
- Power on the Scanner: Turn on the OBD-II scanner. It should automatically start reading the vehicle’s data.
- Select Mercedes-Benz: If prompted, select Mercedes-Benz from the vehicle manufacturer list.
- Enter Vehicle Information: Enter your vehicle’s year, make, and model if required by the scanner.
- Access Fault Codes: Navigate to the section for reading fault codes. This is often labeled as “Read Codes,” “Trouble Codes,” or similar.
7.5. Review and Record the Codes
- Read Stored Codes: The scanner will display a list of stored fault codes. Locate the B181E2A code.
- Record the Code: Write down the code and any accompanying information. This can be useful for future reference.
7.6. Clear the Fault Code
- Find the “Clear Codes” Option: Navigate to the section for clearing fault codes. This may be labeled as “Clear Codes,” “Erase Codes,” or similar.
- Select “Clear Codes”: Choose the option to clear the codes. The scanner will prompt you to confirm.
- Confirm the Action: Confirm that you want to clear the codes. The scanner will then erase the stored fault codes from the vehicle’s computer.
7.7. Verify the Code is Cleared
- Re-Read Codes: After clearing the codes, navigate back to the “Read Codes” section to ensure the B181E2A code is no longer present.
- Check for Other Codes: Verify that no new fault codes have appeared.
7.8. Test the System
- Turn off the Ignition: Turn the vehicle’s ignition off.
- Start the Engine: Start the engine and let it run for a few minutes.
- Monitor the Dashboard: Check the dashboard for any warning lights or messages related to the hood latch.
- Take a Short Drive: If safe, take the vehicle for a short drive to ensure the issue is resolved and the code does not reappear.
7.9. Final Check
- Re-Scan if Necessary: If the fault code reappears, it indicates that the underlying issue was not fully resolved. Repeat the diagnostic steps to identify and fix the problem.
- Consult a Professional: If you are unable to clear the code or the issue persists, seek assistance from a professional mechanic or Mercedes-Benz service center.
By following these detailed steps, you can effectively clear the B181E2A fault code from your Mercedes-Benz after addressing the root cause of the problem.
8. Common Misconceptions About the B181E2A Fault Code
Several misconceptions surround the B181E2A fault code. Addressing these can prevent misdiagnosis and ensure effective repairs.
8.1. Misconception 1: It Always Means a Faulty Hood Latch Switch
- Reality: While a faulty hood latch switch is a common cause, the B181E2A code can also result from wiring issues, SAM problems, or mechanical misalignment. Always perform a thorough diagnosis before replacing the switch.
8.2. Misconception 2: Clearing the Code Fixes the Problem
- Reality: Clearing the code only removes the symptom, not the underlying issue. The code will reappear if the root cause is not addressed.
8.3. Misconception 3: Only High-End Scanners Can Clear the Code
- Reality: Many OBD-II scanners, including mid-range models, can read and clear Mercedes-Benz specific fault codes. Ensure the scanner is compatible with your vehicle.
8.4. Misconception 4: It’s a Critical Issue That Immediately Affects Driving
- Reality: The B181E2A code primarily affects convenience and security features. While it can be annoying, it usually does not directly impact the vehicle’s drivability.
8.5. Misconception 5: DIY Fixes Are Always Cheaper and Better
- Reality: While DIY repairs can save money, incorrect diagnoses or repairs can lead to further damage and higher costs. Know your limits and seek professional help when needed.
9. Real-World Case Studies
Examining real-world case studies can provide valuable insights into diagnosing and resolving the B181E2A fault code.
9.1. Case Study 1: Wiring Harness Corrosion
- Vehicle: 2012 Mercedes-Benz C300
- Symptom: Persistent “Hood Open” warning and B181E2A code.
- Diagnosis: Visual inspection revealed corrosion in the wiring harness near the hood hinge.
- Solution: Replaced the corroded section of the wiring harness.
- Outcome: The code was cleared, and the warning disappeared.
9.2. Case Study 2: Misaligned Hood Latch
- Vehicle: 2015 Mercedes-Benz E350
- Symptom: Intermittent “Hood Open” warning and B181E2A code.
- Diagnosis: The hood latch was misaligned, preventing the switch from fully engaging.
- Solution: Adjusted the hood latch mechanism.
- Outcome: The code was cleared, and the warning disappeared.
9.3. Case Study 3: Faulty Front SAM
- Vehicle: 2018 Mercedes-Benz GLC300
- Symptom: Constant “Hood Open” warning and B181E2A code, even after replacing the switch.
- Diagnosis: Advanced diagnostics revealed a faulty front SAM.
- Solution: Replaced and programmed the front SAM.
- Outcome: The code was cleared, and the warning disappeared.
9.4. Case Study 4: Aftermarket Alarm System Interference
- Vehicle: 2014 Mercedes-Benz CLA250
- Symptom: Intermittent “Hood Open” warning and B181E2A code after installing an aftermarket alarm system.
- Diagnosis: The aftermarket alarm system was interfering with the hood latch circuit.
- Solution: Modified the alarm system wiring to prevent interference.
- Outcome: The code was cleared, and the warning disappeared.
9.5. Case Study 5: Rodent Damage
- Vehicle: 2016 Mercedes-Benz S550
- Symptom: Persistent “Hood Open” warning and B181E2A code.
- Diagnosis: Inspection revealed rodent damage to the wiring harness.
- Solution: Repaired the damaged wiring harness.
- Outcome: The code was cleared, and the warning disappeared.
10. The Future of Automotive Diagnostics
Automotive diagnostics is continually evolving with advancements in technology. Here are some future trends:
10.1. AI-Powered Diagnostics
- Description: Artificial intelligence (AI) will play a more significant role in diagnosing complex issues. AI algorithms can analyze vast amounts of data to identify patterns and predict potential problems.
- Impact: Faster and more accurate diagnoses, reducing downtime and repair costs.
10.2. Remote Diagnostics
- Description: Remote diagnostics will become more prevalent, allowing technicians to diagnose and repair vehicles from anywhere in the world.
- Impact: Increased convenience and accessibility to expert services, especially in remote areas.
10.3. Augmented Reality (AR)
- Description: AR technology will provide technicians with real-time, interactive guidance during the repair process.
- Impact: Improved efficiency and accuracy, reducing the risk of errors.
10.4. Over-the-Air (OTA) Updates
- Description: OTA updates will allow manufacturers to remotely update vehicle software, addressing bugs and improving performance.
- Impact: Fewer trips to the service center and enhanced vehicle performance.
10.5. Predictive Maintenance
- Description: Predictive maintenance will use sensor data to anticipate potential failures and schedule maintenance proactively.
- Impact: Reduced downtime and extended vehicle lifespan.
11. Keeping Up with Mercedes-Benz Technology
Staying current with Mercedes-Benz technology is essential for effective diagnostics and repairs. Here are some resources:
11.1. Official Mercedes-Benz Resources
- Mercedes-Benz Technical Information (MBTI): Provides access to service manuals, wiring diagrams, and technical bulletins.
- Mercedes-Benz Training Academy: Offers training courses on the latest Mercedes-Benz technologies.
11.2. Online Forums and Communities
- MBWorld.org: A popular online forum for Mercedes-Benz owners and enthusiasts.
- BenzWorld.org: Another active forum with a wealth of technical information.
11.3. Professional Organizations
- ASE (Automotive Service Excellence): Offers certification programs for automotive technicians.
- SAE International: Provides access to technical papers and standards related to automotive engineering.
11.4. Industry Publications
- Automotive Engineering International: Covers the latest advancements in automotive technology.
- Motor Magazine: Provides technical information and repair tips for professional technicians.
12. FAQ: B181E2A Mercedes Fault Code
Here are some frequently asked questions about the B181E2A Mercedes fault code:
Q1: What does the B181E2A fault code mean?
- A: The B181E2A fault code indicates a problem with the right engine hood contact switch circuit.
Q2: What are the common symptoms of the B181E2A fault code?
- A: Common symptoms include a persistent “Hood Open” warning, audible alerts, and alarm system issues.
Q3: What are the potential causes of the B181E2A fault code?
- A: Potential causes include a faulty hood contact switch, wiring issues, and front SAM problems.
Q4: How do I diagnose the B181E2A fault code?
- A: Diagnose the code by performing a visual inspection, using a diagnostic tool, and testing the hood contact switch and wiring harness.
Q5: What tools are needed to diagnose and repair the B181E2A fault code?
- A: Essential tools include a diagnostic tool, multimeter, wiring diagrams, and basic hand tools.
Q6: Can I fix the B181E2A fault code myself?
- A: Depending on your technical skills and experience, you may be able to fix the code yourself. However, complex issues may require professional assistance.
Q7: How much does it cost to repair the B181E2A fault code?
- A: The cost of repair varies depending on the cause of the code. Replacing a faulty switch may cost $100-$300, while replacing the front SAM can cost $500-$1500.
Q8: How do I prevent the B181E2A fault code from recurring?
- A: Prevent recurrence by performing regular maintenance, protecting the wiring, and avoiding water damage.
Q9: Can AutoExplain help me diagnose and repair the B181E2A fault code?
- A: Yes, AutoExplain offers remote diagnostic support, expert consultation, and access to technical information to help you resolve the B181E2A fault code.
Q10: Where can I find reliable technical information about Mercedes-Benz vehicles?
- A: You can find reliable information from official Mercedes-Benz resources, online forums, and professional organizations.
The B181E2A Mercedes fault code can be a frustrating issue, but with the right diagnostic approach and repair solutions, it can be effectively resolved. Remember to follow a systematic process, use the appropriate tools, and consult with experts when needed.
Encountering a B181E2A fault code or other complex automotive issues? Don’t waste time struggling with confusing diagnostics. Contact AutoExplain today via WhatsApp at +1(936)2896695 or email us at [email protected]. Let our experienced technicians provide you with the expert support and guidance you need to get your Mercedes-Benz back on the road quickly and efficiently. Visit our office at 4590 Angus Road, New York, United States, or explore our website at AutoExplain for more information.

BMW FSC Codes Explained: Full FSC Code List for F-Series
What is a Stage 3 Remap?

The Best Car Tuning Software in 2026: A Comprehensive Guide for Professionals


