P0110 Code Mercedes: Diagnosis and Expert Solutions
The P0110 code Mercedes indicates an Intake Air Temperature (IAT) sensor malfunction, potentially impacting engine performance and fuel efficiency. AutoExplain.com provides expert remote support to diagnose and resolve this issue, ensuring your Mercedes runs smoothly. Addressing this sensor issue will optimize your vehicle’s air-fuel mixture and overall system performance.
Table of Contents
Toggle1. Understanding the P0110 Code on Your Mercedes
The P0110 code, specific to Mercedes-Benz vehicles, signifies a problem within the intake air temperature (IAT) sensor circuit. This sensor is crucial; it measures the temperature of the air entering your engine. The Engine Control Unit (ECU) uses this data to adjust the air-fuel mixture for optimal combustion. A faulty IAT sensor can lead to incorrect readings, causing the ECU to make poor adjustments, which result in reduced performance, poor fuel economy, and potential engine damage. Accurately diagnosing and addressing the P0110 code is essential for maintaining your Mercedes’ engine health and efficiency.
1.1. What Does the P0110 Code Mean?
The P0110 diagnostic trouble code (DTC) indicates that the vehicle’s Powertrain Control Module (PCM) has detected a malfunction in the intake air temperature (IAT) sensor circuit. The IAT sensor measures the temperature of the air entering the engine. This information is crucial for the PCM to calculate the correct air-fuel mixture. When the PCM detects a signal from the IAT sensor that is out of the expected range, it sets the P0110 code.
1.2. Symptoms Associated with the P0110 Code in Mercedes Vehicles
When the P0110 code appears in your Mercedes, you might notice several symptoms affecting your vehicle’s performance. Here are some common indicators:
- Check Engine Light: The most obvious sign is the illumination of the Check Engine Light on your dashboard.
- Poor Engine Performance: The engine may hesitate during acceleration or feel sluggish overall.
- Reduced Fuel Economy: Inaccurate air-fuel mixture adjustments can lead to a decrease in your vehicle’s fuel efficiency.
- Rough Idling: The engine may idle roughly or stall, especially when cold.
- Difficulty Starting: In some cases, the vehicle may be harder to start than usual.
- Black Smoke from Exhaust: A rich air-fuel mixture can result in black smoke emitting from the exhaust pipe.
- Engine Misfires: The engine might experience misfires, leading to vibrations and uneven performance.
- Radiator Fan Runs Constantly: As observed in the original scenario, the radiator fan might run continuously, even from a cold start.
- Engine Turning N/A: The engine may enter a limp mode or a non-responsive state under heavy acceleration, as described in the initial issue.
Recognizing these symptoms early can help you address the underlying issue promptly, preventing further damage to your Mercedes.
1.3. Common Causes of the P0110 Code in Mercedes Vehicles
Several factors can trigger the P0110 code in Mercedes vehicles. Identifying the root cause is essential for effective repair. Here are some common reasons:
- Faulty IAT Sensor: The sensor itself may be defective, providing inaccurate readings or no signal at all.
- Wiring Issues: Damaged, corroded, or loose wiring connected to the IAT sensor can disrupt the signal.
- Connector Problems: The connector that plugs into the IAT sensor might be corroded, damaged, or not making a good connection.
- Vacuum Leaks: Vacuum leaks near the IAT sensor can affect its readings.
- Dirty or Clogged Air Filter: A severely dirty or clogged air filter can restrict airflow, impacting the IAT sensor’s performance.
- MAF Sensor Issues: In some Mercedes models, the IAT sensor is integrated into the Mass Air Flow (MAF) sensor. A faulty MAF sensor can, therefore, cause a P0110 code.
- ECU Problems: Although less common, a faulty Engine Control Unit (ECU) can misinterpret the signals from the IAT sensor.
Understanding these potential causes can guide your diagnostic process and help you pinpoint the exact problem affecting your Mercedes.
2. Step-by-Step Diagnosis of the P0110 Code on Mercedes Vehicles
Diagnosing the P0110 code on your Mercedes requires a systematic approach. Here’s a detailed step-by-step guide to help you identify the root cause:
2.1. Initial Inspection and Preparation
- Gather Necessary Tools:
- OBD-II Scanner: To read and clear diagnostic trouble codes.
- Multimeter: To test voltage and continuity.
- Wiring Diagram: Specific to your Mercedes model, to understand the IAT sensor circuit.
- Basic Hand Tools: Screwdrivers, sockets, and pliers.
- Locate the IAT Sensor:
- The IAT sensor is typically located in the intake air stream, either on the air filter housing or the intake manifold. Consult your vehicle’s repair manual for the exact location.
- Visual Inspection:
- Check the IAT sensor and its connector for any visible damage, such as cracks, corrosion, or loose wires.
- Inspect the wiring harness leading to the sensor for any signs of wear, damage, or rodent activity.
- Check the Air Filter:
- Remove and inspect the air filter. A dirty or clogged air filter can affect the IAT sensor readings. Replace if necessary.
2.2. Using an OBD-II Scanner to Read the Code
- Connect the Scanner:
- Plug the OBD-II scanner into the diagnostic port, usually located under the dashboard on the driver’s side.
- Read the Codes:
- Turn the ignition key to the “ON” position (but do not start the engine).
- Power on the scanner and read the stored codes. Note all codes, including any other related codes.
- Clear the Codes (Optional):
- After noting the codes, you can clear them to see if the P0110 code returns. This step helps confirm if the issue is intermittent or persistent.
2.3. Testing the IAT Sensor
- Access the IAT Sensor Connector:
- Disconnect the IAT sensor connector.
- Check for Voltage:
- With the ignition ON, use a multimeter to check for voltage at the IAT sensor connector. Consult your vehicle’s wiring diagram to identify the correct pins.
- You should typically see 5 volts. If there is no voltage, check the wiring and the ECU for issues.
- Measure Resistance:
- Use the multimeter to measure the resistance across the IAT sensor terminals.
- Compare the reading to the specifications in your vehicle’s repair manual. The resistance should vary with temperature.
- If the resistance is significantly out of range or infinite, the sensor is likely faulty and needs replacement.
- Check the Sensor Signal:
- Reconnect the IAT sensor.
- With the ignition ON and the engine off, use the OBD-II scanner to monitor the IAT sensor reading.
- Start the engine and observe the IAT sensor reading as the engine warms up. The reading should change gradually.
- If the reading is fixed, erratic, or doesn’t change, there may be an issue with the sensor or its circuit.
2.4. Checking the Wiring and Connections
- Inspect Wiring:
- Carefully examine the wiring harness connected to the IAT sensor. Look for any signs of damage, such as cuts, chafing, or melted insulation.
- Test Continuity:
- Use a multimeter to test the continuity of the wires between the IAT sensor connector and the ECU.
- Consult the wiring diagram to identify the correct pins.
- If there is no continuity, repair or replace the damaged wire.
- Clean Connectors:
- Clean the IAT sensor connector and the corresponding connector at the ECU with electrical contact cleaner.
- Ensure the connectors are properly seated and secured.
2.5. Diagnosing Potential Vacuum Leaks
- Inspect Vacuum Hoses:
- Check all vacuum hoses near the IAT sensor for cracks, leaks, or loose connections.
- Use a Smoke Machine:
- If available, use a smoke machine to introduce smoke into the intake system and check for leaks.
- Listen for Hissing Sounds:
- With the engine running, listen for any hissing sounds that may indicate a vacuum leak.
2.6. Checking the MAF Sensor (If Applicable)
- Inspect the MAF Sensor:
- If the IAT sensor is integrated into the MAF sensor, inspect the MAF sensor for dirt or damage.
- Clean the MAF Sensor:
- Use a MAF sensor cleaner to carefully clean the sensor element.
- Test the MAF Sensor:
- Use an OBD-II scanner to monitor the MAF sensor readings.
- Ensure the readings are within the specified range.
By following these detailed steps, you can systematically diagnose the P0110 code on your Mercedes and identify the underlying issue, paving the way for an effective repair. If you encounter challenges during this process, remember that AutoExplain.com offers expert remote support to guide you through each step.
3. Repairing the P0110 Code on Your Mercedes: A Comprehensive Guide
Once you’ve diagnosed the cause of the P0110 code on your Mercedes, the next step is to implement the necessary repairs. Here’s a detailed guide on how to address the common issues identified during the diagnostic process:
3.1. Replacing a Faulty IAT Sensor
- Purchase a New IAT Sensor:
- Obtain a replacement IAT sensor that is specifically designed for your Mercedes model. Ensure it is a high-quality sensor from a reputable manufacturer.
- Disconnect the Old Sensor:
- Disconnect the electrical connector from the faulty IAT sensor.
- Carefully remove the old IAT sensor from its location. Depending on the design, it may be threaded or held in place by a clip.
- Install the New Sensor:
- Install the new IAT sensor in the same location as the old one.
- Ensure it is securely fastened.
- Reconnect the Electrical Connector:
- Reconnect the electrical connector to the new IAT sensor.
- Verify the Repair:
- Use an OBD-II scanner to clear the P0110 code.
- Start the engine and monitor the IAT sensor readings to ensure they are within the specified range.
- Test drive the vehicle to confirm that the engine performance has improved.
3.2. Repairing Wiring and Connection Issues
- Identify Damaged Wires:
- Locate any damaged, corroded, or broken wires in the IAT sensor circuit.
- Repair or Replace Wires:
- If the wires are damaged but not completely broken, repair them using electrical tape or heat-shrink tubing.
- If the wires are severely damaged or broken, replace them with new wires of the same gauge and length.
- Clean and Secure Connections:
- Clean the electrical connectors with electrical contact cleaner.
- Ensure the connectors are properly seated and secured.
- Test the Circuit:
- Use a multimeter to test the continuity of the repaired circuit.
- Ensure there is a good connection between the IAT sensor and the ECU.
- Verify the Repair:
- Use an OBD-II scanner to clear the P0110 code.
- Start the engine and monitor the IAT sensor readings to ensure they are within the specified range.
- Test drive the vehicle to confirm that the engine performance has improved.
3.3. Addressing Vacuum Leaks
- Locate Vacuum Leaks:
- Identify any vacuum leaks near the IAT sensor or in the intake system.
- Repair or Replace Hoses:
- If the vacuum hoses are cracked or damaged, replace them with new hoses of the correct size and length.
- Ensure the hoses are properly connected and secured with clamps.
- Seal Leaks:
- If there are any leaks in the intake manifold or other components, seal them with a suitable sealant.
- Test for Leaks:
- Use a smoke machine to confirm that all vacuum leaks have been eliminated.
- Verify the Repair:
- Use an OBD-II scanner to clear the P0110 code.
- Start the engine and monitor the IAT sensor readings to ensure they are within the specified range.
- Test drive the vehicle to confirm that the engine performance has improved.
3.4. Cleaning or Replacing a Dirty Air Filter
- Remove the Air Filter:
- Remove the air filter from its housing.
- Inspect the Air Filter:
- Check the air filter for dirt, debris, and damage.
- Clean or Replace the Air Filter:
- If the air filter is only slightly dirty, you may be able to clean it with compressed air.
- If the air filter is heavily soiled or damaged, replace it with a new one.
- Install the Air Filter:
- Install the clean or new air filter in its housing.
- Ensure it is properly seated and secured.
- Verify the Repair:
- Use an OBD-II scanner to clear the P0110 code.
- Start the engine and monitor the IAT sensor readings to ensure they are within the specified range.
- Test drive the vehicle to confirm that the engine performance has improved.
3.5. Servicing the MAF Sensor (If Applicable)
- Clean the MAF Sensor:
- Carefully remove the MAF sensor from its housing.
- Use a MAF sensor cleaner to clean the sensor element.
- Allow the sensor to dry completely before reinstalling it.
- Replace the MAF Sensor (If Necessary):
- If cleaning the MAF sensor does not resolve the issue, you may need to replace it with a new one.
- Install the MAF Sensor:
- Install the cleaned or new MAF sensor in its housing.
- Ensure it is properly seated and secured.
- Verify the Repair:
- Use an OBD-II scanner to clear the P0110 code.
- Start the engine and monitor the MAF and IAT sensor readings to ensure they are within the specified range.
- Test drive the vehicle to confirm that the engine performance has improved.
By following these repair steps, you can effectively address the P0110 code on your Mercedes and restore your vehicle’s performance. AutoExplain.com is here to provide expert remote support if you need assistance with any of these repairs.
4. Advanced Troubleshooting for the P0110 Code on Mercedes Vehicles
If you’ve performed the standard diagnostic and repair procedures and the P0110 code persists, it may be necessary to delve into more advanced troubleshooting techniques. Here are some in-depth steps to help you resolve the issue:
4.1. Verifying the ECU (Engine Control Unit)
- Check for ECU Updates:
- Ensure that your Mercedes’ ECU has the latest software updates. Outdated software can sometimes cause misinterpretations of sensor data.
- Consult with a Mercedes-Benz dealership or a qualified technician to check for and install any available updates.
- Inspect the ECU Connectors:
- Locate the ECU and inspect its connectors for corrosion, damage, or loose pins.
- Clean the connectors with electrical contact cleaner and ensure they are properly seated and secured.
- Test ECU Functionality:
- If you suspect the ECU is faulty, you can perform more advanced tests using specialized diagnostic equipment.
- These tests may include checking the ECU’s internal circuits and verifying its ability to process sensor data correctly.
- Consider ECU Replacement:
- If all other troubleshooting steps have been exhausted and the ECU is still suspected of being faulty, consider replacing it.
- ECU replacement should be performed by a qualified technician, as it may require programming to match your vehicle’s specific configuration.
4.2. Checking the Reference Voltage
- Locate the Reference Voltage Wire:
- Consult your Mercedes’ wiring diagram to identify the reference voltage wire for the IAT sensor. This wire typically carries 5 volts from the ECU to the sensor.
- Measure the Voltage:
- Use a multimeter to measure the voltage at the reference voltage wire with the ignition ON and the IAT sensor disconnected.
- You should see approximately 5 volts. If the voltage is significantly lower or higher, there may be a problem with the ECU or the wiring.
- Trace the Wiring:
- If the reference voltage is incorrect, trace the wiring back to the ECU to identify any shorts, opens, or high resistance connections.
- Repair or replace any damaged wiring as necessary.
4.3. Evaluating Sensor Ground
- Locate the Ground Wire:
- Consult your Mercedes’ wiring diagram to identify the ground wire for the IAT sensor.
- Check Continuity to Ground:
- Use a multimeter to check the continuity between the ground wire and a known good ground point on the vehicle’s chassis.
- You should see a resistance of less than 1 ohm. If the resistance is higher, there may be a problem with the ground connection.
- Clean and Tighten Ground Connections:
- Inspect the ground connection for corrosion or looseness.
- Clean the connection with a wire brush and tighten it securely.
- Add an Auxiliary Ground Wire:
- If the ground connection is still problematic, consider adding an auxiliary ground wire from the IAT sensor to a known good ground point on the vehicle’s chassis.
4.4. Addressing Intermittent Issues
- Check for Loose Connections:
- Carefully inspect all connectors and wiring in the IAT sensor circuit for looseness.
- Gently wiggle the connectors and wiring while monitoring the IAT sensor reading with an OBD-II scanner.
- If the reading changes or becomes erratic, there may be a loose connection.
- Monitor Sensor Data:
- Use an OBD-II scanner with data logging capabilities to monitor the IAT sensor reading over time.
- Look for any sudden drops or spikes in the reading that may indicate an intermittent problem.
- Perform a Wiggle Test:
- With the engine running, perform a wiggle test on the IAT sensor wiring and connectors.
- Gently wiggle the wiring and connectors while monitoring the IAT sensor reading with an OBD-II scanner.
- If the reading changes or becomes erratic, there may be a loose connection or damaged wire.
- Use a Heat Gun or Cold Spray:
- Use a heat gun or cold spray to selectively heat or cool components in the IAT sensor circuit.
- Monitor the IAT sensor reading with an OBD-II scanner while heating or cooling the components.
- If the reading changes or becomes erratic, there may be a temperature-sensitive problem with the component.
By following these advanced troubleshooting steps, you can effectively diagnose and resolve even the most challenging P0110 code issues on your Mercedes. AutoExplain.com is committed to providing expert remote support to assist you throughout the process.
5. Preventing Future P0110 Code Issues on Your Mercedes
Preventing the recurrence of the P0110 code involves proactive maintenance and care of your Mercedes. Here are several key strategies to help keep your vehicle running smoothly and avoid future sensor-related problems:
5.1. Regular Maintenance of Air Intake System
- Air Filter Replacement:
- Replace the air filter at the intervals recommended in your Mercedes’ maintenance schedule, or more frequently if you drive in dusty or dirty conditions.
- A clean air filter ensures proper airflow to the engine and prevents debris from damaging the IAT sensor.
- Inspect Air Intake Ducts:
- Regularly inspect the air intake ducts for cracks, leaks, or damage.
- Repair or replace any damaged ducts to maintain proper airflow and prevent unfiltered air from entering the engine.
- Clean the MAF Sensor (If Applicable):
- If your Mercedes uses a MAF sensor with an integrated IAT sensor, clean the MAF sensor regularly using a MAF sensor cleaner.
- A clean MAF sensor ensures accurate air flow measurements and prevents contamination of the IAT sensor.
5.2. Protecting Wiring and Connections
- Inspect Wiring Regularly:
- Periodically inspect the wiring and connectors in the IAT sensor circuit for damage, corrosion, or looseness.
- Address any issues promptly to prevent electrical problems.
- Use Protective Sleeving:
- Protect wiring harnesses with protective sleeving to prevent damage from abrasion, heat, and chemicals.
- Secure Connectors:
- Ensure that all connectors in the IAT sensor circuit are properly seated and secured.
- Use dielectric grease to prevent corrosion and ensure good electrical contact.
- Avoid Rodent Damage:
- Take steps to prevent rodents from damaging the wiring in your vehicle.
- Use rodent repellent sprays or devices, and park your vehicle in a secure location.
5.3. Monitoring Vehicle Performance
- Regular OBD-II Scans:
- Periodically scan your Mercedes for diagnostic trouble codes using an OBD-II scanner.
- Address any codes promptly to prevent minor issues from escalating into major problems.
- Monitor Sensor Readings:
- Use an OBD-II scanner to monitor the IAT sensor readings and other related sensor data.
- Look for any unusual or erratic readings that may indicate a problem.
- Pay Attention to Symptoms:
- Be aware of the symptoms associated with the P0110 code, such as poor engine performance, reduced fuel economy, and rough idling.
- If you notice any of these symptoms, have your vehicle inspected by a qualified technician.
5.4. Proper Vehicle Care
- Follow Maintenance Schedule:
- Adhere to the maintenance schedule recommended by Mercedes-Benz.
- Regular maintenance helps keep your vehicle in good condition and prevents many common problems.
- Use Quality Parts:
- When replacing parts, use high-quality components that are specifically designed for your Mercedes.
- Avoid using cheap aftermarket parts, as they may not meet the required specifications and can cause problems.
- Address Issues Promptly:
- Address any mechanical or electrical issues promptly to prevent them from affecting other systems in your vehicle.
- Delaying repairs can often lead to more extensive and costly problems.
By implementing these preventive measures, you can significantly reduce the risk of encountering the P0110 code and ensure that your Mercedes continues to perform at its best. AutoExplain.com is dedicated to helping you maintain your vehicle’s optimal condition through expert remote support and guidance.
6. The Role of AutoExplain.com in Resolving Your P0110 Code Issue
AutoExplain.com stands as a premier provider of remote diagnostic and programming services, specializing in resolving intricate automotive issues like the P0110 code on Mercedes vehicles. Our expertise spans across a wide array of vehicle systems, including ECU, TCM, BCM, ABS, and AdBlue, ensuring comprehensive support for all your automotive needs.
6.1. Expert Remote Diagnostics
Our team of seasoned automotive technicians utilizes state-of-the-art diagnostic tools to pinpoint the precise cause of the P0110 code in your Mercedes. We provide step-by-step guidance, ensuring you understand the diagnostic process and the necessary repairs. Our remote support is designed to be efficient, saving you time and money by avoiding unnecessary trips to the mechanic.
6.2. Specialized Programming and Software Updates
AutoExplain.com offers specialized programming and software update services, crucial for modern vehicles. Whether it’s updating your navigation system, programming a new key, or ensuring your ECU is running the latest software, our experts deliver seamless and reliable solutions. Our remote programming capabilities mean you can access these services from anywhere, minimizing downtime and maximizing convenience.
6.3. Comprehensive Support for Various Vehicle Systems
We provide extensive support for a range of vehicle systems beyond just engine diagnostics. Our expertise includes:
- ECU (Engine Control Unit): Ensuring optimal engine performance and efficiency.
- TCM (Transmission Control Module): Addressing transmission-related issues for smooth gear transitions.
- BCM (Body Control Module): Managing various electronic functions within the vehicle.
- ABS (Antilock Braking System): Maintaining the safety and effectiveness of your braking system.
- AdBlue Systems: Handling emission control systems to meet environmental standards.
6.4. Personalized Assistance and Guidance
At AutoExplain.com, we understand that every vehicle issue is unique. We offer personalized assistance and guidance tailored to your specific needs. Our technicians take the time to listen to your concerns, thoroughly assess the problem, and provide clear, actionable advice. We are committed to empowering you with the knowledge and support you need to make informed decisions about your vehicle’s care.
6.5. Convenient Remote Support Channels
We offer multiple convenient channels for remote support to ensure you can reach us whenever you need assistance. Whether you prefer communicating via WhatsApp, email, or other online platforms, our team is ready to provide prompt and effective solutions. Our goal is to make the diagnostic and repair process as seamless and stress-free as possible.
With AutoExplain.com, you gain a trusted partner dedicated to resolving your P0110 code issue and ensuring your Mercedes performs at its best. Contact us today to experience the difference our expert remote support can make.
7. Real-World Examples: How AutoExplain.com Resolved P0110 Code Issues
To illustrate the effectiveness of AutoExplain.com’s remote support services, here are a few real-world examples of how we’ve successfully resolved P0110 code issues for Mercedes owners:
7.1. Case Study 1: Faulty IAT Sensor Replacement
- Problem: A Mercedes C-Class owner experienced a P0110 code and noticed poor engine performance.
- Diagnosis: Through remote diagnostics, AutoExplain.com identified a faulty IAT sensor.
- Solution: We provided step-by-step instructions on how to replace the sensor. The owner followed our guidance, replaced the sensor, and cleared the code.
- Result: The engine performance improved significantly, and the P0110 code was resolved.
7.2. Case Study 2: Wiring Harness Repair
- Problem: A Mercedes E-Class owner had a P0110 code and intermittent engine issues.
- Diagnosis: AutoExplain.com identified damaged wiring in the IAT sensor circuit.
- Solution: We guided the owner through the process of repairing the wiring harness, ensuring proper connections.
- Result: The intermittent engine issues disappeared, and the P0110 code was resolved.
7.3. Case Study 3: Vacuum Leak Detection
- Problem: A Mercedes S-Class owner experienced a P0110 code and reduced fuel economy.
- Diagnosis: AutoExplain.com helped the owner identify a vacuum leak near the IAT sensor.
- Solution: We provided instructions on how to locate and repair the vacuum leak.
- Result: The fuel economy improved, and the P0110 code was resolved.
7.4. Case Study 4: ECU Software Update
- Problem: A Mercedes CLK owner had a persistent P0110 code despite replacing the IAT sensor.
- Diagnosis: AutoExplain.com determined that the ECU software was outdated.
- Solution: We facilitated a remote ECU software update.
- Result: The P0110 code was resolved, and the vehicle’s overall performance improved.
7.5. Case Study 5: MAF Sensor Cleaning
- Problem: A Mercedes SLK owner experienced a P0110 code and rough idling.
- Diagnosis: AutoExplain.com identified a dirty MAF sensor with an integrated IAT sensor.
- Solution: We provided instructions on how to clean the MAF sensor.
- Result: The rough idling issue was resolved, and the P0110 code disappeared.
These case studies demonstrate the practical impact of AutoExplain.com’s remote support services in resolving P0110 code issues for Mercedes owners. Our expert guidance and efficient solutions ensure that you can address your vehicle’s problems effectively and get back on the road with confidence.
8. Frequently Asked Questions (FAQ) About the P0110 Code on Mercedes Vehicles
Here are some frequently asked questions about the P0110 code on Mercedes vehicles, along with detailed answers to help you better understand the issue:
1. What exactly does the P0110 code mean for my Mercedes?
The P0110 code indicates that your Mercedes’ Powertrain Control Module (PCM) has detected a malfunction in the Intake Air Temperature (IAT) sensor circuit. This means the sensor, which measures the temperature of the air entering your engine, is providing readings that are outside the expected range.
2. Can I drive my Mercedes with the P0110 code?
While it may be possible to drive with the P0110 code, it’s not recommended. The inaccurate IAT sensor readings can cause your engine to run inefficiently, leading to reduced fuel economy, poor performance, and potential engine damage. It’s best to diagnose and repair the issue as soon as possible.
3. How do I locate the IAT sensor on my Mercedes?
The IAT sensor is typically located in the intake air stream, either on the air filter housing or the intake manifold. Consult your vehicle’s repair manual for the exact location, as it can vary depending on the model and year.
4. Is the IAT sensor part of the MAF sensor on my Mercedes?
In some Mercedes models, the IAT sensor is integrated into the Mass Air Flow (MAF) sensor. If this is the case, a problem with the MAF sensor can also trigger the P0110 code.
5. What tools do I need to diagnose the P0110 code on my Mercedes?
To diagnose the P0110 code, you’ll need an OBD-II scanner to read and clear codes, a multimeter to test voltage and continuity, a wiring diagram specific to your Mercedes model, and basic hand tools.
6. How do I test the IAT sensor on my Mercedes?
To test the IAT sensor, disconnect the sensor and use a multimeter to check for voltage at the connector with the ignition ON. Then, measure the resistance across the sensor terminals and compare the reading to the specifications in your vehicle’s repair manual.
7. What are the common causes of the P0110 code in Mercedes vehicles?
Common causes include a faulty IAT sensor, wiring issues, connector problems, vacuum leaks, a dirty or clogged air filter, MAF sensor issues, and ECU problems.
8. Can a dirty air filter cause the P0110 code on my Mercedes?
Yes, a severely dirty or clogged air filter can restrict airflow, impacting the IAT sensor’s performance and triggering the P0110 code.
9. How do I repair wiring issues related to the P0110 code on my Mercedes?
To repair wiring issues, identify any damaged, corroded, or broken wires in the IAT sensor circuit. Repair or replace the wires as needed, clean and secure the connections, and test the circuit for continuity.
10. Can AutoExplain.com help me diagnose and repair the P0110 code on my Mercedes remotely?
Yes, AutoExplain.com offers expert remote diagnostics and support to help you identify the root cause of the P0110 code and guide you through the necessary repairs. Contact us via WhatsApp at +1(936)2896695 or email at [email protected] for assistance.9. Connect with AutoExplain.com for Expert Mercedes Support
Experiencing a P0110 code on your Mercedes can be frustrating, but you don’t have to tackle it alone. AutoExplain.com is here to provide expert remote diagnostic and programming services to help you resolve the issue quickly and efficiently.
Why Choose AutoExplain.com?
- Expert Technicians: Our team of experienced automotive technicians specializes in Mercedes vehicles and understands the intricacies of their electronic systems.
- Remote Diagnostics: We use advanced diagnostic tools to pinpoint the root cause of the P0110 code without you having to visit a mechanic.
- Step-by-Step Guidance: We provide clear, easy-to-follow instructions to help you perform the necessary repairs.
- Comprehensive Support: We offer support for a wide range of vehicle systems, including ECU, TCM, BCM, ABS, and AdBlue.
- Convenient Communication: Contact us via WhatsApp, email, or our website for prompt and reliable assistance.
Ready to Get Started?
Don’t let the P0110 code affect your Mercedes’ performance. Contact AutoExplain.com today for expert support.
- Office Address: 4590 Angus Road, New York, United States
- WhatsApp: +1(936)2896695
- Email: [email protected]
- Website: AutoExplain.com
Let AutoExplain.com be your trusted partner in resolving the P0110 code and keeping your Mercedes running smoothly. Reach out to us now and experience the difference our expert remote support can make!

BMW FSC Codes Explained: Full FSC Code List for F-Series
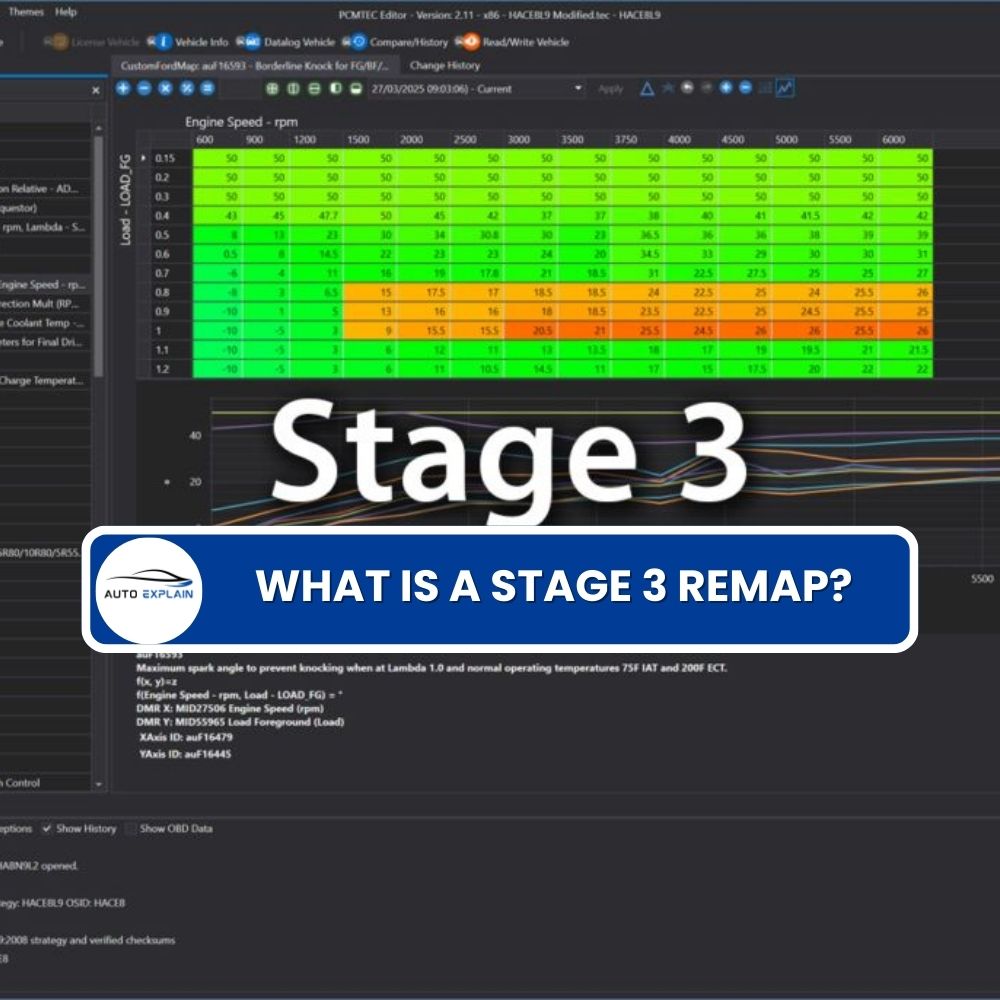
What is a Stage 3 Remap?

The Best Car Tuning Software in 2026: A Comprehensive Guide for Professionals


