Code P0019 Mercedes: Diagnosis, Causes, and Solutions
Code P0019 Mercedes indicates a crankshaft/camshaft position correlation issue (Bank 2 Sensor B). This article, brought to you by AutoExplain.com, provides a comprehensive guide to diagnosing and resolving this trouble code, ensuring optimal engine performance. Addressing the error promptly is essential to prevent potential engine damage and maintain smooth vehicle operation, with expert assistance available. Let’s explore the essential elements, potential solutions, and how AutoExplain.com can support you in resolving this complex engine synchronization issue for peak performance.
Table of Contents
Toggle1. Understanding Mercedes P0019 Code
The P0019 diagnostic trouble code (DTC) signifies a discrepancy between the crankshaft position sensor (CKP) and camshaft position sensor (CMP) signals in a Mercedes-Benz engine. This fault code is triggered when the Powertrain Control Module (PCM) detects that the signals from the CKP and CMP sensors on Bank 2, Sensor B are not aligned as expected. Bank 2 refers to the side of the engine opposite cylinder #1, and Sensor B typically indicates the exhaust camshaft sensor. Precise coordination between the crankshaft and camshaft positions is critical for proper engine timing, fuel injection, and overall performance, and AutoExplain.com provides valuable insights to ensure your Mercedes operates efficiently.
1.1. Crankshaft and Camshaft Position Sensors
The crankshaft position sensor (CKP) and camshaft position sensor (CMP) are essential components in modern internal combustion engines. These sensors work together to monitor the rotational positions of the crankshaft and camshaft(s), providing critical data to the engine control unit (ECU) or powertrain control module (PCM). This information is crucial for precise control of fuel injection, ignition timing, and other engine management functions. Understanding these components is vital for diagnosing issues like the P0019 code, and AutoExplain.com offers in-depth knowledge to help you with this process.
- Crankshaft Position Sensor (CKP):
- Function: The CKP sensor monitors the position and rotational speed of the crankshaft. It is typically located near the crankshaft pulley or flywheel.
- Operation: The sensor detects the passing of teeth or notches on a reluctor ring attached to the crankshaft. As the crankshaft rotates, the sensor generates a signal that the ECU/PCM uses to determine the crankshaft’s position and speed.
- Importance: This data is crucial for determining when to fire the spark plugs and inject fuel, ensuring proper combustion and engine performance.
- Camshaft Position Sensor (CMP):
- Function: The CMP sensor monitors the position of the camshaft(s). It is usually located on the cylinder head near the camshaft.
- Operation: Similar to the CKP sensor, the CMP sensor detects the passing of teeth or notches on a reluctor ring attached to the camshaft. The sensor generates a signal that the ECU/PCM uses to determine the camshaft’s position.
- Importance: The CMP sensor helps the ECU/PCM identify the beginning of the intake stroke for each cylinder, allowing for sequential fuel injection and precise valve timing.
- Harmonious Operation:
- The CKP and CMP sensors must work in harmony to ensure proper engine timing. The ECU/PCM uses the signals from both sensors to synchronize fuel injection and ignition timing with the position of the pistons and valves.
- Any discrepancy between the signals from the CKP and CMP sensors can lead to various engine problems, including misfires, reduced performance, and the setting of diagnostic trouble codes like P0019.
- Sensor Types:
- Hall Effect Sensors: These sensors use a magnetic field and a semiconductor material to generate a voltage signal when a tooth or notch passes by.
- Magnetic Reluctance Sensors: These sensors generate an AC voltage signal as the teeth or notches pass by, altering the magnetic field.
1.2. Role of the Powertrain Control Module (PCM)
The Powertrain Control Module (PCM) is the central computer in a modern vehicle, responsible for managing and coordinating various engine and transmission functions. The PCM receives data from numerous sensors throughout the vehicle, including the CKP and CMP sensors, and uses this information to make real-time adjustments to optimize engine performance, fuel efficiency, and emissions. Understanding the PCM’s role is crucial in diagnosing and resolving issues indicated by the P0019 code, and AutoExplain.com offers the expertise you need.
- Key Functions of the PCM:
- Fuel Injection Control:
- The PCM uses data from the CKP and CMP sensors to determine the precise timing and duration of fuel injection.
- By knowing the exact position of the crankshaft and camshaft, the PCM can ensure that fuel is injected at the optimal moment for each cylinder, maximizing combustion efficiency and reducing emissions.
- Ignition Timing Control:
- The PCM controls the ignition timing based on the crankshaft position.
- It adjusts the timing to ensure that the spark plugs fire at the correct moment, optimizing power output and fuel economy.
- Valve Timing Control (in engines with variable valve timing):
- In engines equipped with variable valve timing (VVT) systems, the PCM uses data from the CMP sensors to control the position of the camshafts.
- By adjusting the camshaft angles, the PCM can optimize valve timing for different driving conditions, improving performance and fuel efficiency.
- Monitoring and Diagnostics:
- The PCM continuously monitors the signals from various sensors, including the CKP and CMP sensors, to detect any abnormalities or discrepancies.
- If the PCM detects that the signals from the CKP and CMP sensors are not aligned as expected, it will set a diagnostic trouble code (DTC) like P0019.
- The PCM also stores other relevant data, such as freeze frame data, which can help technicians diagnose the problem.
- Fuel Injection Control:
- PCM and Code P0019:
- When the PCM detects a misalignment between the CKP and CMP signals, it indicates that the timing between the crankshaft and camshaft is not correct.
- This misalignment can be caused by various factors, including a stretched timing chain, a faulty sensor, or a problem with the VVT system.
- The PCM’s ability to detect and report these issues through DTCs like P0019 is essential for maintaining the engine’s health and performance.
- Communication with Other Modules:
- The PCM communicates with other control modules in the vehicle, such as the transmission control module (TCM), anti-lock braking system (ABS), and body control module (BCM).
- This communication allows the various systems in the vehicle to work together seamlessly, improving overall performance and safety.
- Importance of Accurate PCM Programming:
- The PCM relies on accurate programming to function correctly.
- If the PCM’s software is outdated or corrupted, it may not be able to interpret sensor signals correctly or control engine functions properly.
- In some cases, reprogramming the PCM may be necessary to resolve issues related to DTCs like P0019.
1.3. Symptoms of a P0019 Code
Recognizing the symptoms associated with the P0019 code is vital for early detection and resolution of the underlying issue. These symptoms can range from subtle changes in engine performance to more noticeable problems that affect drivability, and AutoExplain.com provides detailed insights to help you identify these warning signs.
- Illuminated Check Engine Light (MIL):
- The most common and immediate symptom of a P0019 code is the activation of the check engine light on the dashboard.
- The Malfunction Indicator Lamp (MIL) illuminates to alert the driver that the PCM has detected a problem with the engine.
- Reduced Engine Performance:
- A P0019 code can cause a noticeable decrease in engine power and acceleration.
- The engine may feel sluggish or unresponsive, especially during acceleration.
- Rough Idle:
- The engine may exhibit a rough or unstable idle, characterized by vibrations or fluctuations in RPM.
- This can be more noticeable when the vehicle is stopped or idling.
- Engine Misfires:
- Misfires occur when one or more cylinders fail to fire correctly, leading to a loss of power and rough running.
- A P0019 code can cause misfires due to incorrect timing of fuel injection and ignition.
- Difficulty Starting the Engine:
- In some cases, a P0019 code can make it difficult to start the engine.
- The engine may crank for an extended period before starting, or it may not start at all.
- Engine Stalling:
- The engine may stall unexpectedly, especially at low speeds or when idling.
- This can be a dangerous symptom, particularly in traffic.
- Unusual Engine Noises:
- In some cases, a P0019 code can be accompanied by unusual engine noises, such as rattling or knocking sounds.
- These noises may indicate a problem with the timing chain or other engine components.
- Poor Fuel Economy:
- Incorrect engine timing can lead to reduced fuel efficiency.
- Drivers may notice that they need to fill up the fuel tank more frequently than usual.
1.4. Common Causes of P0019 Error
The P0019 error code can stem from a variety of underlying issues within the engine’s timing system. Identifying the root cause is essential for effective diagnosis and repair, and AutoExplain.com provides expert insights to help you pinpoint the problem.
- Timing Chain Issues:
- Stretched Timing Chain: Over time, the timing chain can stretch due to wear and tear. A stretched timing chain can cause the camshaft and crankshaft to become misaligned, triggering the P0019 code.
- Worn Timing Chain Guides or Tensioners: The timing chain relies on guides and tensioners to maintain proper tension and alignment. If these components are worn or damaged, the timing chain can skip teeth or become misaligned.
- Camshaft and Crankshaft Sensor Problems:
- Faulty Camshaft Position Sensor (CMP): A malfunctioning CMP sensor can send incorrect signals to the PCM, leading to a P0019 code.
- Faulty Crankshaft Position Sensor (CKP): Similarly, a malfunctioning CKP sensor can provide inaccurate data to the PCM, resulting in the P0019 code.
- Damaged Sensor Wiring: Damaged, corroded, or loose wiring to the CMP or CKP sensors can disrupt the signals and trigger the P0019 code.
- Variable Valve Timing (VVT) Issues:
- VVT Solenoid Malfunctions: The VVT system uses solenoids to control the flow of oil to the camshaft phasers. If a VVT solenoid is faulty or clogged, it can cause the camshaft timing to be incorrect.
- Camshaft Phaser Problems: The camshaft phasers are responsible for adjusting the camshaft timing. If a phaser is damaged or not functioning correctly, it can lead to a P0019 code.
- Oil Pressure Problems:
- Low Oil Pressure: The VVT system relies on adequate oil pressure to function correctly. Low oil pressure can prevent the VVT system from adjusting the camshaft timing, leading to a P0019 code.
- Clogged Oil Passages: Clogged oil passages can restrict the flow of oil to the VVT system, causing similar issues.
- Mechanical Problems:
- Damaged Crankshaft or Camshaft Sprockets: Damaged or worn sprockets can cause the timing chain to slip or become misaligned.
- Engine Mechanical Damage: In rare cases, internal engine damage, such as bent valves or damaged pistons, can affect the timing and trigger a P0019 code.
- PCM Issues:
- PCM Malfunction: Although rare, a malfunctioning PCM can incorrectly interpret the signals from the CMP and CKP sensors, leading to a P0019 code.
- PCM Programming Errors: In some cases, incorrect PCM programming can cause the P0019 code to appear.
2. Diagnosing the P0019 Code
Diagnosing the P0019 code in a Mercedes requires a systematic approach to identify the root cause of the problem. Proper diagnosis involves a combination of visual inspections, sensor testing, and potentially more advanced diagnostic procedures, and AutoExplain.com can guide you through each step.
2.1. Tools and Equipment Needed
Having the right tools and equipment is essential for accurately diagnosing and repairing a P0019 code in a Mercedes. These tools will help you perform visual inspections, sensor testing, and other diagnostic procedures, and AutoExplain.com can provide recommendations based on your specific needs.
- OBD-II Scanner:
- An OBD-II scanner is essential for reading diagnostic trouble codes (DTCs) and retrieving freeze frame data.
- Freeze frame data provides a snapshot of the engine conditions when the P0019 code was set, which can help narrow down the possible causes.
- Multimeter:
- A multimeter is used to test the voltage, continuity, and resistance of electrical circuits.
- It is necessary for testing the CMP and CKP sensors, as well as their wiring.
- Oscilloscope:
- An oscilloscope can be used to visualize the waveforms of the CMP and CKP sensors.
- This can help identify signal irregularities that a multimeter might miss.
- Timing Light:
- A timing light is used to verify the ignition timing.
- It can help confirm whether the crankshaft and camshaft are properly aligned.
- Compression Tester:
- A compression tester is used to measure the compression in each cylinder.
- This can help identify internal engine problems that may be affecting the timing.
- Oil Pressure Gauge:
- An oil pressure gauge is used to measure the engine oil pressure.
- Low oil pressure can affect the VVT system and trigger a P0019 code.
- Inspection Camera (Borescope):
- An inspection camera can be used to visually inspect the timing chain, sprockets, and other internal engine components.
- This can help identify damage or wear without disassembling the engine.
- Specialized Mercedes Diagnostic Software (e.g., XENTRY/DAS):
- Mercedes-specific diagnostic software provides advanced diagnostic capabilities, including access to manufacturer-specific DTCs and diagnostic procedures.
- This software can also be used to perform component actuations and adaptations.
- Hand Tools:
- A basic set of hand tools, including sockets, wrenches, screwdrivers, and pliers, is necessary for performing visual inspections and removing components.
- Service Manual:
- A service manual provides detailed information on the vehicle’s systems and components, including wiring diagrams, diagnostic procedures, and repair instructions.
2.2. Step-by-Step Diagnostic Procedure
A methodical diagnostic approach is crucial when tackling a P0019 code in a Mercedes. By following a step-by-step procedure, you can efficiently narrow down the potential causes and identify the root of the problem, with expert advice from AutoExplain.com.
- Initial Scan and Data Retrieval:
- Use an OBD-II scanner to read and record all diagnostic trouble codes (DTCs) present in the PCM.
- Note any other codes that may be present, as they could be related to the P0019 code.
- Retrieve freeze frame data, which provides a snapshot of the engine conditions when the P0019 code was set.
- Visual Inspection:
- Visually inspect the CMP and CKP sensors for any signs of damage, such as cracks, corrosion, or loose connections.
- Check the wiring and connectors for the CMP and CKP sensors for damage, corrosion, or loose connections.
- Inspect the timing chain, sprockets, and guides for any signs of wear or damage.
- Sensor Testing:
- Use a multimeter to test the CMP and CKP sensors for proper voltage, continuity, and resistance.
- Compare the readings to the manufacturer’s specifications.
- If possible, use an oscilloscope to visualize the waveforms of the CMP and CKP sensors.
- Look for any irregularities in the waveforms that may indicate a faulty sensor.
- Timing Verification:
- Use a timing light to verify the ignition timing.
- Ensure that the timing is within the manufacturer’s specifications.
- If the timing is incorrect, it may indicate a problem with the timing chain or VVT system.
- VVT System Testing:
- Use a Mercedes-specific diagnostic tool (e.g., XENTRY/DAS) to test the VVT system.
- Perform component actuations to check the functionality of the VVT solenoids and camshaft phasers.
- Monitor the oil pressure in the VVT system to ensure that it is within the manufacturer’s specifications.
- Compression Testing:
- Perform a compression test on each cylinder to check for internal engine problems.
- Low compression in one or more cylinders may indicate a problem with the valves or pistons.
- Oil Pressure Testing:
- Use an oil pressure gauge to measure the engine oil pressure.
- Low oil pressure can affect the VVT system and trigger a P0019 code.
- PCM Testing:
- If all other tests have failed to identify the cause of the P0019 code, the PCM may be faulty.
- Consult a qualified technician to test and, if necessary, replace the PCM.
- Component Removal and Inspection:
- Remove the components for inspection.
- Visually inspect the timing chain for any signs of damage or wear.
- Replace if needed.
2.3. Interpreting Test Results
Interpreting the results of your diagnostic tests is crucial for accurately identifying the cause of the P0019 code. Understanding what the test results indicate will help you make informed decisions about the necessary repairs, and AutoExplain.com can provide expert guidance in this process.
- CMP and CKP Sensor Tests:
- Voltage, Continuity, and Resistance Tests:
- If the voltage, continuity, or resistance readings for the CMP or CKP sensors are outside of the manufacturer’s specifications, it indicates that the sensor is likely faulty and needs to be replaced.
- Ensure that you are using the correct testing procedures and specifications for your specific vehicle model.
- Waveform Analysis (Oscilloscope):
- An oscilloscope can provide a visual representation of the sensor signals.
- Look for any irregularities in the waveforms, such as missing pulses, distorted signals, or incorrect amplitude.
- These irregularities can indicate a faulty sensor or a problem with the sensor wiring.
- Voltage, Continuity, and Resistance Tests:
- Timing Verification:
- Timing Light Test:
- If the timing light indicates that the ignition timing is outside of the manufacturer’s specifications, it suggests that the crankshaft and camshaft are not properly aligned.
- This can be caused by a stretched timing chain, worn timing chain guides or tensioners, or a problem with the VVT system.
- Timing Light Test:
- VVT System Tests:
- Component Actuation:
- Use a Mercedes-specific diagnostic tool to actuate the VVT solenoids and camshaft phasers.
- If the components do not respond correctly to the actuation commands, it indicates a problem with the VVT system.
- Oil Pressure Monitoring:
- Monitor the oil pressure in the VVT system to ensure that it is within the manufacturer’s specifications.
- Low oil pressure can prevent the VVT system from functioning correctly, leading to a P0019 code.
- Component Actuation:
- Compression Test:
- Low Compression Readings:
- If the compression test reveals low compression in one or more cylinders, it indicates an internal engine problem.
- Possible causes include worn piston rings, damaged valves, or a blown head gasket.
- These problems can affect the timing and trigger a P0019 code.
- Low Compression Readings:
- Oil Pressure Test:
- Low Oil Pressure:
- If the oil pressure is below the manufacturer’s specifications, it can affect the VVT system and trigger a P0019 code.
- Possible causes of low oil pressure include a worn oil pump, clogged oil filter, or internal engine damage.
- Low Oil Pressure:
3. Repairing the P0019 Code
Once you have accurately diagnosed the cause of the P0019 code in your Mercedes, the next step is to perform the necessary repairs. The specific repairs will depend on the underlying cause of the problem, and AutoExplain.com offers expert advice and guidance to ensure you get the job done right.
3.1. Common Repair Procedures
Several common repair procedures can address the underlying causes of the P0019 code in a Mercedes. Depending on your diagnostic findings, one or more of these procedures may be necessary to resolve the issue, and AutoExplain.com can provide detailed instructions and support.
- Replacing the Camshaft Position Sensor (CMP):
- Procedure:
- Disconnect the negative battery cable.
- Locate the CMP sensor on the cylinder head.
- Disconnect the electrical connector from the CMP sensor.
- Remove the CMP sensor from the cylinder head.
- Install the new CMP sensor.
- Connect the electrical connector to the CMP sensor.
- Connect the negative battery cable.
- Clear the P0019 code and test the vehicle.
- Procedure:
- Replacing the Crankshaft Position Sensor (CKP):
- Procedure:
- Disconnect the negative battery cable.
- Locate the CKP sensor near the crankshaft pulley or flywheel.
- Disconnect the electrical connector from the CKP sensor.
- Remove the CKP sensor.
- Install the new CKP sensor.
- Connect the electrical connector to the CKP sensor.
- Connect the negative battery cable.
- Clear the P0019 code and test the vehicle.
- Procedure:
- Replacing the Timing Chain, Guides, and Tensioners:
- Procedure:
- Disconnect the negative battery cable.
- Remove the engine’s front cover.
- Align the engine to the timing marks
- Remove the timing chain tensioner.
- Remove the timing chain guides.
- Install the new timing chain, guides, and tensioner.
- Verify that the timing marks are properly aligned.
- Reinstall the engine’s front cover.
- Connect the negative battery cable.
- Clear the P0019 code and test the vehicle.
- Procedure:
- Repairing or Replacing the VVT Solenoids:
- Procedure:
- Disconnect the negative battery cable.
- Locate the VVT solenoids on the cylinder head.
- Disconnect the electrical connectors from the VVT solenoids.
- Remove the VVT solenoids.
- Clean or replace the VVT solenoids as necessary.
- Install the VVT solenoids.
- Connect the electrical connectors to the VVT solenoids.
- Connect the negative battery cable.
- Clear the P0019 code and test the vehicle.
- Procedure:
- Flushing or Cleaning the Engine Oil Passages:
- Procedure:
- Drain the engine oil.
- Remove the oil pan.
- Inspect the oil passages for any signs of sludge or debris.
- Use a specialized cleaning solution to flush out the oil passages.
- Reinstall the oil pan.
- Refill the engine with fresh oil.
- Clear the P0019 code and test the vehicle.
- Procedure:
3.2. Step-by-Step Repair Instructions
Detailed, step-by-step instructions are essential for carrying out repairs effectively. These instructions will guide you through each procedure, ensuring you complete the job correctly, and AutoExplain.com offers comprehensive repair guidance.
3.2.1. Replacing a Faulty Camshaft Position Sensor (CMP)
- Tools Needed:
- New CMP sensor
- Socket set
- Wrench set
- Screwdriver
- Torque wrench
- Procedure:
- Disconnect the Battery: Begin by disconnecting the negative terminal of the battery. This will prevent any electrical accidents during the repair.
- Locate the CMP Sensor: The CMP sensor is usually located on the cylinder head, near the camshaft. Refer to your vehicle’s service manual for the exact location.
- Disconnect the Electrical Connector: Carefully disconnect the electrical connector from the CMP sensor. Be sure to release any retaining clips or locks.
- Remove the Old Sensor: Use a socket or wrench to remove the CMP sensor from the cylinder head. Note the orientation of the sensor for proper installation of the new one.
- Install the New Sensor: Install the new CMP sensor into the cylinder head, ensuring it is properly aligned. Tighten the sensor to the torque specifications provided in the service manual.
- Reconnect the Electrical Connector: Reconnect the electrical connector to the CMP sensor, making sure it is securely attached.
- Reconnect the Battery: Reconnect the negative terminal of the battery.
- Clear the DTC: Use an OBD-II scanner to clear the P0019 code and any other related DTCs.
- Test the Vehicle: Start the engine and let it run for a few minutes to ensure that the new CMP sensor is functioning correctly. Monitor the engine for any signs of problems.
- Verify Repair: Use an OBD-II scanner to read and record all diagnostic trouble codes (DTCs) present in the PCM.
- If DTCs are not present, it indicates that the repair is successful
- If DTCs are present, repeat the diagnosis procedure to identify the issue.
3.2.2. Addressing Timing Chain Issues
- Tools Needed:
- New timing chain kit (including chain, sprockets, guides, and tensioner)
- Socket set
- Wrench set
- Torque wrench
- Crankshaft pulley holder
- Camshaft locking tools
- Piston stop tool
- Procedure:
- Preparation: Disconnect the negative battery terminal and remove any components obstructing access to the timing chain cover (e.g., belts, pulleys, hoses).
- Remove the Timing Chain Cover: Carefully remove the timing chain cover. You may need to remove other engine components to access it.
- Set the Engine to TDC: Rotate the crankshaft until the engine is at Top Dead Center (TDC) on the compression stroke for cylinder #1. Verify the alignment of timing marks on the crankshaft and camshaft sprockets.
- Secure the Camshafts: Use camshaft locking tools to prevent the camshafts from rotating during the timing chain replacement.
- Remove the Old Timing Chain: Remove the old timing chain, tensioner, and guides. Inspect the sprockets for wear or damage, and replace them if necessary.
- Install the New Timing Chain: Install the new timing chain, tensioner, and guides, ensuring that the timing marks on the sprockets align correctly.
- Tension the Timing Chain: Adjust the timing chain tensioner to the proper specification.
- Verify Timing Alignment: Double-check the alignment of the timing marks on the crankshaft and camshaft sprockets.
- Reassemble: Reinstall the timing chain cover and any other components that were removed.
- Final Steps: Reconnect the negative battery terminal, clear any DTCs, and start the engine to verify the repair.
3.3. Post-Repair Verification
After completing the necessary repairs for a P0019 code, it is crucial to verify that the problem has been resolved and that the engine is functioning correctly. This post-repair verification process ensures that the issue is fully addressed and prevents any potential recurrence, and AutoExplain.com can provide the insights you need.
- Clear Diagnostic Trouble Codes (DTCs):
- Use an OBD-II scanner to clear the P0019 code and any other related DTCs that may have been stored in the PCM.
- Clearing the codes will allow you to monitor the system and see if the P0019 code returns.
- Test Drive the Vehicle:
- Take the vehicle for a test drive under various driving conditions to ensure that the engine is running smoothly and that there are no signs of the original problem.
- Pay attention to the engine’s performance, idle quality, and any unusual noises.
- Monitor Engine Performance:
- Use an OBD-II scanner to monitor the engine’s performance parameters, such as the CMP and CKP sensor signals, fuel trims, and ignition timing.
- Ensure that these parameters are within the manufacturer’s specifications.
- Check for Code Recurrence:
- After the test drive, use an OBD-II scanner to check for any new or recurring DTCs.
- If the P0019 code returns, it indicates that there is still an underlying problem that needs to be addressed.
- Inspect for Leaks:
- After performing any repairs that involved removing or replacing engine components, inspect for any leaks of oil, coolant, or other fluids.
- Address any leaks immediately to prevent further problems.
- Verify System Readiness:
- Use an OBD-II scanner to check the status of the vehicle’s emissions monitors.
- Ensure that all monitors are set to “ready,” which indicates that the vehicle has completed the necessary self-tests and is ready for an emissions test.
- Review Freeze Frame Data:
- If the P0019 code returns, review the freeze frame data to gain additional insights into the conditions that triggered the code.
- This information can help you narrow down the possible causes and perform further diagnostics.
4. Preventing Future Issues
Preventing future issues related to the P0019 code involves proactive maintenance and care of your Mercedes’ engine. Regular maintenance, timely inspections, and attention to potential warning signs can help avoid the problems that trigger this code, and AutoExplain.com offers valuable tips to keep your engine running smoothly.
4.1. Regular Maintenance
Regular maintenance is crucial for preventing a wide range of engine problems, including those that can trigger the P0019 code. Following the manufacturer’s recommended maintenance schedule can help ensure that your Mercedes’ engine remains in good condition and operates efficiently, and AutoExplain.com can help you stay on track.
- Oil Changes:
- Regular oil changes are essential for lubricating engine components and preventing wear.
- Follow the manufacturer’s recommended oil change intervals and use the correct type of oil for your vehicle.
- Filter Replacements:
- Replace the engine air filter, fuel filter, and oil filter at the recommended intervals.
- Clean filters help ensure that the engine receives clean air and fuel, which is essential for optimal performance and efficiency.
- Timing Chain Inspection:
- Inspect the timing chain, guides, and tensioners at regular intervals to check for wear or damage.
- Replace these components as necessary to prevent timing chain problems.
- VVT System Maintenance:
- Keep the VVT system clean and properly maintained.
- Use high-quality engine oil and follow the manufacturer’s recommendations for VVT system maintenance.
- Coolant System Service:
- Regularly flush and refill the coolant system to prevent corrosion and overheating.
- Use the correct type of coolant for your vehicle.
- Spark Plug Replacement:
- Replace the spark plugs at the recommended intervals to ensure proper ignition and combustion.
- Use the correct type of spark plugs for your vehicle.
- Fuel System Cleaning:
- Periodically clean the fuel injectors and fuel system to remove deposits and ensure proper fuel delivery.
- Battery Maintenance:
- Keep the battery terminals clean and corrosion-free.
- Have the battery tested regularly to ensure that it is in good condition.
4.2. Monitoring Engine Health
Monitoring the health of your Mercedes’ engine is essential for detecting potential problems early and preventing them from escalating into more serious issues. Regular inspections and attention to potential warning signs can help you keep your engine running smoothly, and AutoExplain.com can provide the expertise you need.
- Regular Inspections:
- Perform regular visual inspections of the engine and its components.
- Look for any signs of leaks, damage, or wear.
- Listen for Unusual Noises:
- Pay attention to any unusual noises coming from the engine, such as rattling, knocking, or hissing sounds.
- These noises may indicate a problem with the engine components.
- Monitor Fluid Levels:
- Regularly check the levels of engine oil, coolant, brake fluid, and power steering fluid.
- Low fluid levels may indicate a leak or other problem.
- Check for Warning Lights:
- Pay attention to any warning lights that illuminate on the dashboard.
- These lights may indicate a problem with the engine or other vehicle systems.
- Monitor Fuel Economy:
- Keep track of your vehicle’s fuel economy.
- A sudden drop in fuel economy may indicate a problem with the engine.
- Use an OBD-II Scanner:
- Periodically use an OBD-II scanner to check for any stored diagnostic trouble codes (DTCs).
- Addressing these codes early can prevent more serious problems from developing.
- Review Maintenance Records:
- Keep detailed records of all maintenance and repairs performed on your vehicle.
- This information can help you identify potential problems and track the performance of your engine over time.
4.3. Driving Habits
Your driving habits can significantly impact the health and longevity of your Mercedes’ engine. Adopting safe and responsible driving practices can help prevent unnecessary wear and tear on engine components and reduce the risk of problems like the P0019 code, and AutoExplain.com offers tips to help you drive smarter.
- Avoid Aggressive Driving:
- Avoid aggressive driving habits such as rapid acceleration, hard braking, and high-speed cornering.
- These habits can put excessive stress on engine components and lead to premature wear.
- Warm Up the Engine:
- Allow the engine to warm up for a few minutes before driving, especially in cold weather.
- This allows the oil to circulate and lubricate the engine components properly.
- Avoid Short Trips:
- Avoid making frequent short trips, as they can prevent the engine from reaching its optimal operating temperature.
- This can lead to increased wear and tear on engine components.
- Use the Correct Gear:
- Use the correct gear for the driving conditions.
- Avoid lugging the engine or over-revving it.
- Maintain Proper Tire Inflation:
- Maintain proper tire inflation to reduce stress on the engine and improve fuel economy.
- Avoid Overloading the Vehicle:
- Avoid overloading the vehicle, as this

BMW FSC Codes Explained: Full FSC Code List for F-Series
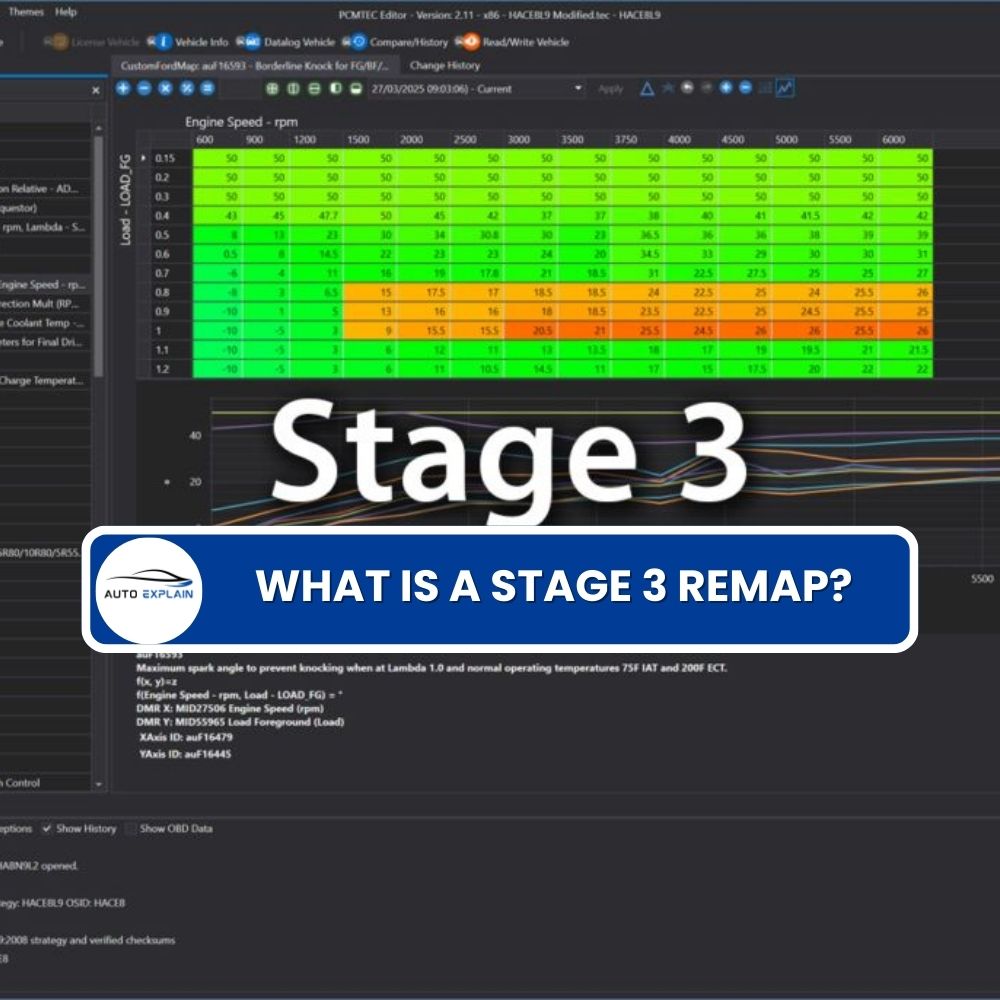
What is a Stage 3 Remap?

The Best Car Tuning Software in 2026: A Comprehensive Guide for Professionals


