Mercedes Sprinter dash codes can be perplexing, but AutoExplain is here to provide clarity and solutions. Understanding these dashboard warnings is crucial for maintaining your Sprinter van’s performance and safety, and our expert remote support can swiftly diagnose and rectify underlying issues, ensuring you get back on the road quickly. Trust AutoExplain for your Mercedes Sprinter diagnostic needs.
1. Decoding Mercedes Sprinter Dash Codes: An Introduction
The Mercedes Sprinter, renowned for its reliability and versatility, is still prone to issues that trigger warning lights. These lights are communicated through Mercedes Sprinter dash codes, each indicating a specific problem within the vehicle’s systems. Recognizing these codes and their meanings is the first step toward effective troubleshooting and repair.
Modern vehicles like the Mercedes Sprinter are equipped with a complex network of sensors and control units. These components constantly monitor the vehicle’s operation and report any anomalies to the central control unit, which then displays a corresponding code on the dashboard. Understanding these codes is essential for both vehicle owners and technicians to quickly identify and address potential problems. Ignoring dash codes can lead to more significant and costly repairs down the line, so it’s crucial to take them seriously and seek professional help when needed.
2. Understanding the Color-Coding System
Mercedes-Benz, including the Sprinter model, employs a color-coded system for its dashboard warning lights, similar to a traffic light:
- Green: Indicates that a system is functioning correctly or is currently in use.
- Yellow/Amber: Signals a potential issue that requires attention. While not immediately critical, it’s advisable to investigate the problem promptly.
- Red: Indicates a serious problem that requires immediate attention. It may be unsafe to continue driving the vehicle.
 Mercedes Sprinter dashboard lights indicating an issue
Alt text: Mercedes Sprinter dashboard showing a red warning light, indicating an urgent issue requiring immediate attention.
3. Common Mercedes Sprinter Dash Codes and Their Meanings
Here’s a comprehensive guide to some of the most common Mercedes Sprinter dash codes:
3.1. Brake System Warnings
3.1.1. Brake Fluid Level Low
- Indicator: A symbol resembling a circle with an exclamation mark inside, often accompanied by the word “BRAKE.”
- Meaning: The brake fluid level in the master cylinder is low.
- Possible Causes: Leak in the brake lines, worn brake pads, or a faulty brake fluid level sensor.
- Troubleshooting: Check the brake fluid level and add fluid if necessary. Inspect brake lines and calipers for leaks. If the problem persists, have the brake system professionally inspected.
- Severity: High. Low brake fluid can significantly reduce braking performance.
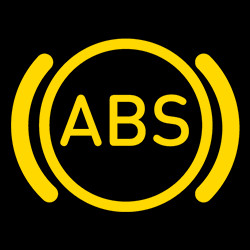
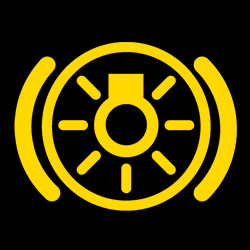
3.1.2. ABS (Anti-lock Braking System) Warning
- Indicator: “ABS” illuminated on the dashboard.
- Meaning: The ABS system is not functioning correctly.
- Possible Causes: Faulty wheel speed sensors, malfunctioning ABS control module, or wiring issues.
- Troubleshooting: Check wheel speed sensors for damage or debris. Scan the ABS system with a diagnostic tool to identify specific fault codes.
- Severity: Medium. The vehicle can still be driven with conventional braking, but ABS assistance is unavailable.
 ABS warning light illuminated on a Mercedes Sprinter dashboard
Alt text: Mercedes Sprinter ABS warning light, indicating a problem with the anti-lock braking system.
3.1.3. Brake Pad Wear
- Indicator: A circle with dashed lines on either side.
- Meaning: The brake pads are worn and need replacement.
- Possible Causes: Normal wear and tear of brake pads.
- Troubleshooting: Inspect the brake pads for thickness. Replace the brake pads if they are below the recommended minimum thickness.
- Severity: Medium. Continuing to drive with worn brake pads can damage the rotors.
 Brake pad wear warning light on a Mercedes Sprinter
Alt text: Mercedes Sprinter brake pad wear indicator, signaling the need for brake pad replacement.
3.1.4. Parking Brake Engaged
- Indicator: The word “PARK” or a “P” inside a circle.
- Meaning: The parking brake is engaged.
- Possible Causes: Parking brake not fully released.
- Troubleshooting: Ensure the parking brake is fully released before driving. If the light remains on, inspect the parking brake mechanism.
- Severity: Low, if it goes off when disengaging. High, if it remains on. Driving with the parking brake engaged can cause damage.
3.2. Engine-Related Warnings
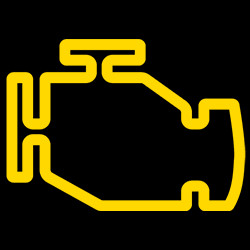
3.2.1. Check Engine Light (CEL)
- Indicator: A symbol resembling an engine.
- Meaning: Indicates a wide range of engine-related issues.
- Possible Causes: Faulty oxygen sensors, loose fuel cap, catalytic converter problems, or issues with the ignition system.
- Troubleshooting: Use an OBD-II scanner to retrieve the specific diagnostic trouble code (DTC). Address the issue based on the DTC.
- Severity: Varies. The severity depends on the underlying issue causing the CEL.
 Check engine light on a Mercedes Sprinter dashboard
Alt text: Mercedes Sprinter check engine light, indicating an issue with the engine or related systems.
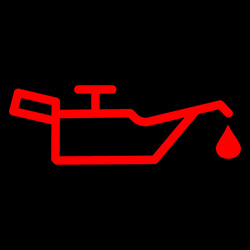
3.2.2. Low Engine Oil Pressure
- Indicator: A symbol resembling an oil can.
- Meaning: The engine oil pressure is too low.
- Possible Causes: Low oil level, faulty oil pump, or a leak in the oil system.
- Troubleshooting: Check the oil level and add oil if necessary. If the light persists, have the oil pump and oil system inspected.
- Severity: High. Low oil pressure can cause severe engine damage.
 Low engine oil warning light on a Mercedes Sprinter
Alt text: Mercedes Sprinter low engine oil pressure warning, indicating the need to check the engine oil level.
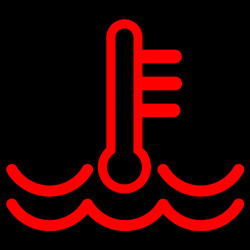
3.2.3. Engine Overheating
- Indicator: A thermometer symbol.
- Meaning: The engine is overheating.
- Possible Causes: Low coolant level, faulty thermostat, radiator problems, or a malfunctioning water pump.
- Troubleshooting: Check the coolant level and add coolant if necessary. Inspect the radiator and cooling system components for leaks or damage.
- Severity: High. Overheating can cause severe engine damage.
 Engine overheating warning light on a Mercedes Sprinter
Alt text: Mercedes Sprinter engine overheating warning light, signaling the engine is running too hot.
3.2.4. Glow Plug Indicator
- Indicator: A coiled wire symbol.
- Meaning: Indicates that the glow plugs are heating up, especially in diesel engines. If it remains on or flashes, it indicates a problem.
- Possible Causes: Faulty glow plugs, glow plug relay issues, or wiring problems.
- Troubleshooting: Use a diagnostic tool to check the glow plug system for faults. Replace faulty glow plugs or relays as needed.
- Severity: Medium. Cold starting issues and increased emissions.
 Glow plug warning light on a Mercedes Sprinter
Alt text: Mercedes Sprinter glow plug indicator, used in diesel engines to aid cold starts.
3.3. Emission Control System Warnings
3.3.1. Diesel Particulate Filter (DPF) Warning
- Indicator: A symbol resembling a filter.
- Meaning: The DPF is clogged and needs regeneration.
- Possible Causes: Short trips at low speeds, which prevent the DPF from regenerating.
- Troubleshooting: Perform a forced DPF regeneration if possible. Drive at higher speeds for an extended period to allow the DPF to clean itself.
- Severity: Medium. A clogged DPF can reduce engine performance and fuel efficiency.
 DPF warning light on a Mercedes Sprinter
Alt text: Mercedes Sprinter DPF warning light, indicating a clogged diesel particulate filter.
3.3.2. AdBlue (Diesel Exhaust Fluid) Warning
- Indicator: A symbol resembling a fluid container.
- Meaning: The AdBlue level is low, or there is an issue with the AdBlue system.
- Possible Causes: Low AdBlue level, faulty AdBlue injector, or problems with the NOx sensor.
- Troubleshooting: Refill the AdBlue tank. If the light persists, have the AdBlue system professionally inspected.
- Severity: Medium to High. The vehicle may enter a limp mode if the AdBlue system is not functioning correctly.
 AdBlue warning light on a Mercedes Sprinter
Alt text: Mercedes Sprinter AdBlue warning light, signaling low diesel exhaust fluid or system issues.
3.4. Other Important Warnings
3.4.1. Low Tire Pressure Warning
- Indicator: A horseshoe-shaped symbol with an exclamation mark.
- Meaning: One or more tires have low pressure.
- Possible Causes: Punctures, leaks, or temperature changes.
- Troubleshooting: Check the tire pressures and inflate them to the recommended levels. Inspect the tires for damage.
- Severity: Low to Medium. Low tire pressure can affect handling and fuel efficiency.
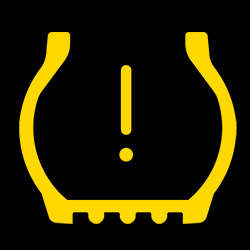 Low tire pressure warning light on a Mercedes Sprinter
Alt text: Mercedes Sprinter low tire pressure warning, advising to check and inflate tires.
3.4.2. Battery Charge Warning
- Indicator: A battery symbol.
- Meaning: The battery is not charging correctly.
- Possible Causes: Faulty alternator, loose or corroded battery connections, or a failing battery.
- Troubleshooting: Check the battery connections and alternator output. Have the battery tested for its condition.
- Severity: High. The vehicle may stall or not start if the battery is not charging.
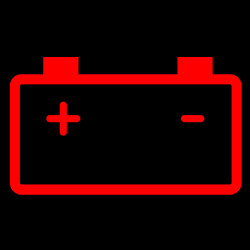 Battery charge warning light on a Mercedes Sprinter
Alt text: Mercedes Sprinter battery charge warning light, indicating a charging system malfunction.
3.4.3. Power Steering Warning
- Indicator: A steering wheel symbol with an exclamation mark.
- Meaning: There is a problem with the power steering system.
- Possible Causes: Low power steering fluid, faulty power steering pump, or issues with the power steering control module.
- Troubleshooting: Check the power steering fluid level and add fluid if necessary. Inspect the power steering pump and system components for leaks or damage.
- Severity: Medium. The vehicle can still be steered, but it will require more effort.
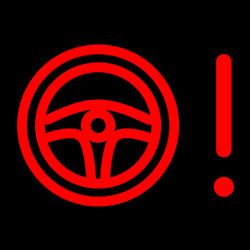 Power steering warning light on a Mercedes Sprinter
Alt text: Mercedes Sprinter power steering warning light, signifying a problem with the steering assist system.
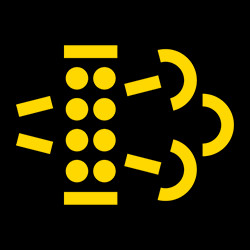
3.4.4. Bulb Failure Warning
- Indicator: A light bulb symbol with an exclamation mark.
- Meaning: One or more of the vehicle’s bulbs has failed.
- Possible Causes: Burned-out bulb.
- Troubleshooting: Check all exterior lights and replace any burned-out bulbs.
- Severity: Low to Medium. Reduced visibility and potential safety hazard.
 Bulb failure warning light on a Mercedes Sprinter
Alt text: Mercedes Sprinter bulb failure warning light, indicating a burned-out exterior light.
3.4.5. Airbag/SRS Warning
- Indicator: “SRS” or an airbag symbol.
- Meaning: There is a problem with the Supplemental Restraint System (SRS), which includes airbags.
- Possible Causes: Faulty airbag sensor, wiring issues, or a malfunctioning SRS control module.
- Troubleshooting: Have the SRS system professionally inspected.
- Severity: High. The airbags may not deploy in an accident.
 Airbag warning light on a Mercedes Sprinter
Alt text: Mercedes Sprinter airbag/SRS warning light, indicating a malfunction in the airbag system.
3.4.6. Electronic Stability Program (ESP) Warning
- Indicator: “ESP” or a car skidding symbol.
- Meaning: There is a problem with the Electronic Stability Program.
- Possible Causes: Faulty wheel speed sensors, steering angle sensor issues, or a malfunctioning ESP control module.
- Troubleshooting: Have the ESP system professionally inspected.
- Severity: Medium. Reduced stability control in critical driving situations.
 ESP warning light on a Mercedes Sprinter
Alt text: Mercedes Sprinter ESP warning light, indicating an issue with the electronic stability program.
3.4.7. Attention Assist Warning
- Indicator: A coffee cup symbol.
- Meaning: The Attention Assist system has detected that the driver may be drowsy.
- Possible Causes: Driver fatigue.
- Troubleshooting: Take a break and rest.
- Severity: Low to Medium. Driver fatigue can increase the risk of accidents.
 Attention Assist warning light on a Mercedes Sprinter
Alt text: Mercedes Sprinter Attention Assist warning, suggesting the driver may be fatigued and needs rest.
4. Advanced Diagnostic Procedures
While a basic understanding of dash codes is helpful, diagnosing complex issues often requires advanced tools and expertise. Here’s an overview of some advanced diagnostic procedures:
- OBD-II Scanning:
- Connect an OBD-II scanner to the vehicle’s diagnostic port.
- Retrieve and record all stored diagnostic trouble codes (DTCs).
- Research the meaning of each DTC to understand the potential problem areas.
- Live Data Analysis:
- Use the OBD-II scanner to monitor live data from various sensors and systems.
- Analyze the data for anomalies or out-of-range values that may indicate a problem.
- Component Testing:
- Use specialized testing equipment to check the functionality of individual components, such as sensors, actuators, and control modules.
- Follow the manufacturer’s diagnostic procedures to ensure accurate testing.
- Wiring Diagram Analysis:
- Consult wiring diagrams to trace circuits and identify potential wiring issues, such as shorts, opens, or high resistance.
- Use a multimeter to check for continuity and voltage at various points in the circuit.
- Software Updates and Programming:
- Ensure that the vehicle’s control modules have the latest software updates.
- Reprogram control modules if necessary, following the manufacturer’s procedures.
5. When to Seek Professional Help from AutoExplain
While some issues can be resolved with basic troubleshooting, others require professional intervention. Contact AutoExplain for expert remote support in the following situations:
- You are unsure about the meaning of a specific dash code.
- You have attempted basic troubleshooting steps, but the problem persists.
- The dash code indicates a serious issue that requires immediate attention.
- You lack the necessary tools or expertise to perform advanced diagnostic procedures.
- You suspect a problem with the vehicle’s control modules or software.
- You need assistance with software updates or programming.
AutoExplain offers remote diagnostic and programming services to help you resolve complex issues quickly and efficiently. Our team of experienced technicians can remotely access your vehicle’s diagnostic system, analyze the data, and provide step-by-step instructions for resolving the problem. We can also assist with software updates, programming, and other advanced procedures.
6. Mercedes Sprinter Specific Diagnostic Trouble Codes (DTCs)
Here’s a detailed table of Mercedes Sprinter-specific Diagnostic Trouble Codes (DTCs), their descriptions, potential causes, and recommended solutions. This information is invaluable for technicians and owners looking to diagnose and fix issues effectively.
| DTC Code |
Description |
Possible Causes |
Recommended Solutions |
| P0001 |
Fuel Volume Regulator Control Circuit/Open |
Wiring issues, faulty fuel volume regulator, ECM failure |
Check wiring, replace fuel volume regulator, test ECM |
| P0016 |
Crankshaft Position – Camshaft Position Correlation |
Timing chain stretched, faulty camshaft/crankshaft sensors, timing issues |
Check timing chain, replace sensors, verify timing |
| P0101 |
Mass Air Flow (MAF) Sensor Performance |
Dirty MAF sensor, vacuum leaks, faulty MAF sensor |
Clean MAF sensor, check for vacuum leaks, replace MAF sensor |
| P0171 |
System Too Lean (Bank 1) |
Vacuum leaks, faulty O2 sensor, low fuel pressure |
Check for vacuum leaks, replace O2 sensor, test fuel pressure |
| P0299 |
Turbocharger Underboost |
Leaks in air intake, faulty turbocharger, wastegate issues |
Check air intake for leaks, inspect turbocharger, test wastegate |
| P0401 |
Exhaust Gas Recirculation (EGR) Insufficient Flow |
Clogged EGR valve, faulty EGR solenoid, vacuum leaks |
Clean EGR valve, replace EGR solenoid, check for vacuum leaks |
| P0420 |
Catalyst System Efficiency Below Threshold (Bank 1) |
Faulty catalytic converter, O2 sensor issues, exhaust leaks |
Replace catalytic converter, replace O2 sensors, check for exhaust leaks |
| P0670 |
Glow Plug Control Module Circuit |
Faulty glow plug control module, wiring issues, blown fuse |
Replace glow plug control module, check wiring, replace fuse |
| P2002 |
Diesel Particulate Filter Efficiency Below Threshold |
Clogged DPF, faulty DPF sensor, exhaust leaks |
Regenerate DPF, replace DPF sensor, check for exhaust leaks |
| P2032 |
Reductant Level Sensor Circuit Low |
Low DEF level, faulty DEF sensor, wiring issues |
Refill DEF, replace DEF sensor, check wiring |
| P2263 |
Turbocharger Boost System Performance |
Leaks in air intake, faulty turbocharger, wastegate issues |
Check air intake for leaks, inspect turbocharger, test wastegate |
| P2453 |
Diesel Particulate Filter Pressure Sensor Range/Performance |
Faulty DPF sensor, clogged DPF, wiring issues |
Replace DPF sensor, regenerate DPF, check wiring |
| P2563 |
Turbocharger Boost Control Position Sensor Circuit |
Faulty boost control sensor, wiring issues, turbocharger issues |
Replace boost control sensor, check wiring, inspect turbocharger |
| U0100 |
Lost Communication With ECM/PCM |
Wiring issues, ECM failure, CAN bus issues |
Check wiring, test ECM, diagnose CAN bus |
| U0155 |
Lost Communication With Instrument Panel Cluster (IPC) Control Module |
Wiring issues, faulty IPC, CAN bus issues |
Check wiring, test IPC, diagnose CAN bus |
This table is designed to help you quickly identify potential issues and guide you towards the appropriate solutions. Always consult the vehicle’s service manual for detailed diagnostic procedures and safety precautions. When in doubt, professional assistance from AutoExplain can ensure the job is done right.
7. Step-by-Step Troubleshooting Guide for Common Issues
Here’s a practical, step-by-step guide to help diagnose and troubleshoot some common Mercedes Sprinter dash code issues. These guides provide a structured approach to identifying and resolving problems effectively.
7.1. Troubleshooting a Check Engine Light (CEL)
- Connect an OBD-II Scanner:
- Plug the scanner into the OBD-II port, usually located under the dashboard.
- Turn the ignition to the “ON” position without starting the engine.
- Follow the scanner’s instructions to read the Diagnostic Trouble Codes (DTCs).
- Record the DTCs:
- Write down all the codes that appear. Some scanners provide a brief description of the code.
- If the scanner doesn’t provide descriptions, research each code online using reliable sources.
- Inspect the Fuel Cap:
- A loose or faulty fuel cap is a common cause of a CEL.
- Remove the fuel cap and inspect it for cracks or damage.
- Reinstall the fuel cap, ensuring it clicks tightly.
- Check for Obvious Issues:
- Look for any visible issues in the engine bay, such as disconnected hoses or damaged wiring.
- Listen for any unusual noises coming from the engine.
- Address Common Codes:
- P0171 (System Too Lean, Bank 1): Check for vacuum leaks. Inspect intake hoses and connections.
- P0420 (Catalyst System Efficiency Below Threshold): This may indicate a failing catalytic converter.
- P0401 (Exhaust Gas Recirculation (EGR) Insufficient Flow): Inspect and clean the EGR valve.
- Clear the Codes and Test:
- Use the OBD-II scanner to clear the DTCs.
- Start the engine and drive the vehicle to see if the CEL reappears.
- If the CEL returns, proceed to more detailed diagnostics or seek professional help.
- Professional Assistance:
- If you’re unsure or the problem persists, contact AutoExplain for remote diagnostic assistance.
7.2. Troubleshooting Low Tire Pressure Warning
- Check Tire Pressures:
- Use a reliable tire pressure gauge to check the pressure in all tires, including the spare.
- Record the pressure for each tire.
- Compare to Recommended Levels:
- Find the recommended tire pressure on the sticker inside the driver’s side doorjamb or in the vehicle’s manual.
- Compare the measured pressures to the recommended levels.
- Inflate Tires as Needed:
- Use an air compressor to inflate any tires that are below the recommended pressure.
- Inflate the tires slightly above the recommended level to compensate for potential leaks.
- Inspect for Damage:
- Carefully inspect each tire for punctures, cuts, or bulges.
- Check the valve stems for leaks by applying soapy water; bubbles indicate a leak.
- Reset the TPMS (Tire Pressure Monitoring System):
- After adjusting the tire pressures, reset the TPMS. The procedure varies by model; consult the vehicle’s manual.
- Typically, this involves navigating through the vehicle’s infotainment system or pressing a reset button.
- Monitor the Warning Light:
- Drive the vehicle for a short distance to see if the warning light turns off.
- If the light remains on or reappears, there may be a persistent leak or a faulty TPMS sensor.
- Professional Assistance:
- If the problem continues, contact AutoExplain for remote diagnostic assistance. A faulty TPMS sensor may require replacement and programming.
7.3. Troubleshooting ABS Warning Light
- Initial Inspection:
- Ensure that the ABS warning light is the only light illuminated.
- Check if the brake fluid level is adequate. Low brake fluid can sometimes trigger the ABS light.
- Connect an OBD-II Scanner:
- Plug the scanner into the OBD-II port and turn on the ignition.
- Read and record any ABS-specific DTCs.
- Check Wheel Speed Sensors:
- Wheel speed sensors are a common cause of ABS issues. Inspect each sensor for damage or loose connections.
- Use the scanner to check live data from each sensor while rotating the wheels manually. Inconsistent readings indicate a faulty sensor.
- Inspect ABS Module Connections:
- Locate the ABS control module, usually in the engine bay.
- Check the wiring harness and connections for corrosion or damage.
- Ensure the connections are secure.
- Address Common Codes:
- C0031, C0034, C0037, C0040 (Wheel Speed Sensor Circuit): These codes indicate a problem with a specific wheel speed sensor. Replace the faulty sensor.
- C0110 (ABS Pump Motor Circuit): This may indicate a problem with the ABS pump motor or its circuit.
- Clear the Codes and Test:
- Clear the DTCs with the scanner.
- Drive the vehicle to see if the ABS light turns off. Perform a test brake to ensure the ABS system is functioning correctly.
- Professional Assistance:
- If the ABS light remains on or the problem persists, contact AutoExplain for remote diagnostic assistance. The ABS module may require reprogramming or replacement.
7.4. Troubleshooting DPF Warning Light
- Understand the DPF:
- The Diesel Particulate Filter (DPF) captures soot and particulate matter from the exhaust.
- It periodically regenerates, burning off the accumulated soot.
- Check Driving Habits:
- Short trips at low speeds prevent the DPF from regenerating.
- Ensure that the vehicle is driven at higher speeds for at least 20-30 minutes to initiate passive regeneration.
- Attempt Forced Regeneration:
- Use an OBD-II scanner that supports forced DPF regeneration.
- Follow the scanner’s instructions to initiate the regeneration process.
- Ensure the vehicle is parked in a well-ventilated area during regeneration, as it produces high temperatures.
- Inspect DPF Sensors:
- Check the DPF pressure sensors for damage or blockages.
- Ensure the sensor connections are secure.
- Address Common Codes:
- P2453 (Diesel Particulate Filter Pressure Sensor Range/Performance): Indicates a problem with the DPF pressure sensor.
- P2002 (Diesel Particulate Filter Efficiency Below Threshold): Indicates that the DPF is not functioning correctly.
- Clear the Codes and Test:
- Clear the DTCs with the scanner.
- Drive the vehicle to see if the DPF light turns off.
- Professional Assistance:
- If the DPF light remains on or the problem persists, contact AutoExplain for remote diagnostic assistance. The DPF may require professional cleaning or replacement.
7.5. Troubleshooting AdBlue Warning Light
- Check AdBlue Level:
- Ensure that the AdBlue (Diesel Exhaust Fluid) tank is filled to the recommended level.
- Use a funnel to avoid spills when refilling the tank.
- Inspect for Leaks:
- Check the AdBlue tank, lines, and injector for leaks.
- Look for crystallized AdBlue around the tank and lines, which indicates a leak.
- Check AdBlue Quality:
- Ensure that the AdBlue is fresh and not contaminated.
- Contaminated AdBlue can cause system malfunctions.
- Inspect the AdBlue Injector:
- The AdBlue injector can become clogged. Inspect and clean the injector if necessary.
- Use a specialized cleaner designed for AdBlue systems.
- Address Common Codes:
- P2032 (Reductant Level Sensor Circuit Low): Indicates a problem with the AdBlue level sensor.
- P20E8 (Reductant Dosing System Pressure Too Low): Indicates a problem with the AdBlue dosing system.
- Clear the Codes and Test:
- Clear the DTCs with the scanner.
- Drive the vehicle to see if the AdBlue light turns off.
- Professional Assistance:
- If the AdBlue light remains on or the problem persists, contact AutoExplain for remote diagnostic assistance. The AdBlue system may require professional servicing or component replacement.
8. Preventative Maintenance Tips to Avoid Dash Code Issues
Preventative maintenance is crucial for avoiding many of the issues that trigger Mercedes Sprinter dash codes. Regular servicing and proactive care can keep your Sprinter running smoothly and reduce the likelihood of warning lights. Here are some essential tips:
- Regular Oil Changes:
- Follow the manufacturer’s recommended oil change intervals.
- Use the correct type of oil specified for your Sprinter model.
- Regular oil changes keep the engine lubricated and prevent wear, reducing the risk of low oil pressure and other engine-related issues.
- Check Fluid Levels Regularly:
- Periodically check and top up all fluid levels, including brake fluid, coolant, power steering fluid, and windshield washer fluid.
- Low fluid levels can trigger warning lights and lead to system malfunctions.
- Inspect and Maintain Brakes:
- Regularly inspect the brake pads, rotors, and lines for wear and damage.
- Replace brake pads and rotors as needed to maintain optimal braking performance.
- Check the brake fluid level and condition; replace brake fluid every two years to prevent moisture buildup.
- Check Tire Pressures:
- Check tire pressures monthly and adjust as needed to maintain the recommended levels.
- Proper tire pressure improves fuel efficiency, handling, and tire life.
- Inspect tires for wear and damage, and rotate them regularly to ensure even wear.
- Maintain the Battery:
- Keep the battery terminals clean and free of corrosion.
- Have the battery tested periodically to ensure it is holding a charge.
- Replace the battery every 3-5 years, or as needed.
- Service the Cooling System:
- Flush and refill the cooling system every two years to prevent corrosion and maintain optimal cooling performance.
- Inspect the radiator, hoses, and water pump for leaks and damage.
- Replace any worn or damaged components promptly.
- Maintain the Fuel System:
- Use high-quality fuel and avoid running the fuel tank too low.
- Replace the fuel filter at the recommended intervals to prevent clogs and ensure optimal fuel delivery.
- Consider using a fuel system cleaner periodically to remove deposits and improve fuel efficiency.
- Service the DPF and AdBlue Systems:
- For diesel Sprinters, ensure the DPF regenerates regularly by driving at higher speeds for extended periods.
- Keep the AdBlue tank filled with fresh, high-quality DEF.
- Inspect the AdBlue system for leaks and ensure the injector is functioning correctly.
- Check and Replace Filters:
- Replace the air filter, cabin filter, and fuel filter at the recommended intervals.
- Clean filters improve engine performance, air quality, and fuel efficiency.
- Regular Inspections:
- Schedule regular inspections with a qualified mechanic to identify potential issues early.
- Address any minor problems promptly to prevent them from escalating into major repairs.
By following these preventative maintenance tips, you can significantly reduce the likelihood of encountering Mercedes Sprinter dash codes and ensure your vehicle remains reliable and safe.
9. The Benefits of Remote Diagnostic and Programming Services from AutoExplain
AutoExplain offers remote diagnostic and programming services that provide numerous benefits for Mercedes Sprinter owners and technicians. Our services are designed to help you resolve complex issues quickly, efficiently, and cost-effectively. Here are some key advantages:
- Expert Diagnostics from Anywhere:
- Our experienced technicians can remotely access your vehicle’s diagnostic system from anywhere in the world.
- This eliminates the need to bring your Sprinter to a physical repair shop, saving you time and hassle.
- Fast and Efficient Troubleshooting:
- Remote diagnostics allow us to quickly identify the root cause of the problem.
- We can analyze live data, read diagnostic trouble codes (DTCs), and perform component testing remotely.
- This enables us to provide you with accurate and effective solutions in a timely manner.
- Cost-Effective Solutions:
- Remote services often cost less than traditional repair shop visits.
- You avoid the expense of towing your vehicle to a shop and the potential for unnecessary repairs.
- Our transparent pricing ensures you know exactly what you’re paying for.
- Access to Specialized Expertise:
- AutoExplain has a team of highly trained technicians with extensive experience in Mercedes Sprinter vehicles.
- We stay up-to-date with the latest diagnostic techniques and repair procedures.
- You can trust us to provide you with the best possible service and support.
- Software Updates and Programming:
- We can remotely perform software updates and programming for your Sprinter’s control modules.
- This ensures that your vehicle is running the latest software versions, which can improve performance and prevent future issues.
- We can also assist with key programming and other specialized procedures.
- Convenient and Flexible Service:
- Our remote services are available at your convenience.
- You can schedule a diagnostic session at a time that works best for you.
- We provide clear, step-by-step instructions and support throughout the process.
- Reduced Downtime:
- Remote diagnostics and programming minimize the amount of time your vehicle is out of service.
- We can often resolve issues in a single session, getting you back on the road quickly.
- Comprehensive Support:
- AutoExplain offers comprehensive support throughout the diagnostic and repair process.
- We are available to answer your questions, provide guidance, and ensure that you are completely satisfied with our services.
10. Frequently Asked Questions (FAQs)
Q1: What does it mean when my Mercedes Sprinter displays a dash code?
A dash code is an error message displayed on your dashboard, indicating a problem with one or more of your vehicle’s systems. Each code corresponds to a specific issue that needs attention.
Q2: Can I diagnose the problem myself using the dash code?
While the dash code provides a starting point, it often requires further investigation to pinpoint the exact cause. Basic troubleshooting steps can be performed, but professional diagnostic tools and expertise are often necessary.
If you encounter any issues related to error codes, feel free to contact AutoExplain through WhatsApp at +1 (936) 289 6695 for the best support.


