2006 Mercedes C230 Code P0016 P0017: Diagnosis Guide
The 2006 Mercedes C230 codes P0016 and P0017 can indicate problems with camshaft and crankshaft timing. AutoExplain.com is here to provide expert guidance to resolve these issues efficiently. With our remote support, you can quickly identify and fix the underlying problems, restoring your Mercedes’ performance, including addressing timing misalignment and sensor malfunctions.
Table of Contents
Toggle1. Understanding the 2006 Mercedes C230 P0016 and P0017 Codes
The P0016 and P0017 codes in a 2006 Mercedes C230 relate to camshaft position and crankshaft position correlation. These codes suggest that the Engine Control Unit (ECU) has detected a misalignment between the camshaft and crankshaft timing on Bank 1. Let’s dive deeper into the specifics of these codes.
1.1. What P0016 and P0017 Mean
- P0016: Crankshaft Position – Camshaft Position Correlation (Bank 1 Sensor A)
- P0017: Crankshaft Position – Camshaft Position Correlation (Bank 1 Sensor B)
These codes indicate the ECU is not seeing the expected relationship between the crankshaft and camshaft positions. “Bank 1” refers to the side of the engine containing cylinder number 1. “Sensor A” typically refers to the intake camshaft, while “Sensor B” refers to the exhaust camshaft.
1.2. Common Symptoms
When these codes appear, you might observe several symptoms:
- Check Engine Light (CEL) illumination
- Reduced engine power and torque
- Rough idling or stalling
- Increased fuel consumption
- Difficulty starting the engine
- Unusual engine noises
1.3. Severity of the Problem
The severity can range from moderate to severe. Ignoring these codes can lead to:
- Further engine damage
- Increased repair costs
- Potential engine failure
1.4. Common Causes
Several potential issues can trigger these codes:
- Timing Chain Issues: A stretched or worn timing chain can cause timing misalignment.
- Camshaft and Crankshaft Sensor Problems: Faulty or damaged sensors can provide incorrect readings.
- Camshaft Adjuster (Phaser) Issues: Malfunctioning camshaft adjusters can disrupt timing.
- Oil Flow Problems: Low oil pressure or blocked oil passages can affect the camshaft adjusters.
- Balance Shaft Issues: In M272 engines, balance shaft sprocket failure is a known problem.
- ECU Issues: Rarely, a faulty ECU can cause these codes.
2. Preliminary Checks
Before diving into complex diagnostics, perform these initial checks to streamline the troubleshooting process.
2.1. Visual Inspection
Start with a thorough visual inspection:
- Timing Chain: Check for visible wear, slack, or damage.
- Wiring and Connectors: Inspect the wiring and connectors for the camshaft and crankshaft sensors for damage, corrosion, or loose connections.
- Oil Level and Condition: Ensure the oil level is correct and the oil is clean. Dirty or low oil can affect the camshaft adjusters.
2.2. Scan for Other Codes
Use an OBD-II scanner to check for any other related trouble codes. Additional codes can provide valuable insights into the underlying issue.
2.3. Check Camshaft and Crankshaft Sensors
Inspect the camshaft and crankshaft sensors:
- Sensor Condition: Look for physical damage or contamination.
- Sensor Mounting: Ensure the sensors are securely mounted.
2.4. Battery Voltage
Confirm that the battery voltage is within the proper range (typically 12.6V or higher with the engine off). Low voltage can cause false readings from sensors.
3. Detailed Diagnostic Steps
Follow these detailed steps to accurately diagnose the root cause of the P0016 and P0017 codes in your 2006 Mercedes C230.
3.1. Verify the Codes
Use a reliable OBD-II scanner to confirm the presence of the P0016 and P0017 codes. Clear the codes and perform a test drive to see if they return.
3.2. Check Camshaft and Crankshaft Sensor Signals
Use an oscilloscope to examine the signals from the camshaft and crankshaft sensors.
- Signal Pattern: Compare the signal patterns to known good patterns.
- Signal Strength: Ensure the signals are strong and consistent.
- Signal Timing: Verify that the signals align correctly with each other.
Camshaft Position Sensor Waveform.
3.3. Timing Chain Inspection
A stretched timing chain is a common cause of these codes.
- Visual Inspection: Remove the valve cover and inspect the timing chain for slack or wear.
- Timing Marks: Check the alignment of the timing marks on the camshaft and crankshaft pulleys. Misalignment indicates a stretched timing chain.
- Chain Wear: Use a specialized tool to measure timing chain stretch.
3.4. Camshaft Adjuster (Phaser) Testing
The camshaft adjusters, or phasers, control camshaft timing.
- Actuator Test: Use a diagnostic tool to activate the camshaft adjusters and check their response.
- Oil Flow: Ensure there is adequate oil flow to the adjusters. Low oil pressure or blocked oil passages can affect their operation.
- Adjuster Condition: Inspect the adjusters for damage or wear.
3.5. Oil Pressure Test
Low oil pressure can impact the performance of the camshaft adjusters.
- Oil Pressure Gauge: Connect an oil pressure gauge to the engine and measure the oil pressure at idle and higher RPMs.
- Specifications: Compare the readings to the manufacturer’s specifications.
3.6. Balance Shaft Inspection (M272 Engine)
The M272 engine is known for balance shaft sprocket failure.
- Symptoms: Listen for unusual engine noises, such as rattling or knocking.
- Visual Inspection: Use an inspection camera to examine the balance shaft sprocket for wear or damage.
- Professional Diagnosis: This often requires specialized tools and expertise.
3.7. ECU Testing
Although rare, a faulty ECU can cause these codes.
- ECU Condition: Check the ECU for physical damage or corrosion.
- Software Update: Ensure the ECU has the latest software updates.
- Professional Testing: Consult with a qualified technician to test the ECU.
4. Repair Procedures
Once you’ve identified the root cause, follow these repair procedures to resolve the P0016 and P0017 codes.
4.1. Replacing Camshaft and Crankshaft Sensors
If the sensors are faulty, replace them with new, high-quality sensors.
- Removal: Disconnect the electrical connector and remove the old sensor.
- Installation: Install the new sensor and tighten it to the specified torque.
- Verification: Clear the codes and perform a test drive.
4.2. Timing Chain Replacement
Replacing a stretched timing chain requires precision and care.
- Preparation: Gather all necessary tools and parts, including a new timing chain, guides, and tensioner.
- Disassembly: Remove the valve cover, timing chain cover, and other necessary components.
- Timing Marks: Align the timing marks on the camshaft and crankshaft pulleys.
- Installation: Install the new timing chain, guides, and tensioner.
- Reassembly: Reassemble all components, ensuring proper alignment and torque.
- Verification: Clear the codes and perform a test drive.
4.3. Camshaft Adjuster (Phaser) Replacement
If the camshaft adjuster is faulty, replace it.
- Removal: Remove the valve cover and disconnect the adjuster.
- Installation: Install the new adjuster and tighten it to the specified torque.
- Verification: Clear the codes and perform a test drive.
4.4. Balance Shaft Repair (M272 Engine)
Balance shaft repair is a complex and time-consuming task.
- Engine Removal: Remove the engine from the vehicle.
- Disassembly: Disassemble the engine to access the balance shaft.
- Replacement: Replace the balance shaft sprocket with a new, updated part.
- Reassembly: Reassemble the engine and reinstall it in the vehicle.
- Verification: Clear the codes and perform a test drive.
4.5. Oil System Maintenance
Maintaining proper oil flow is crucial for the camshaft adjusters.
- Oil Change: Perform regular oil changes using high-quality oil and filters.
- Oil Flush: Consider an oil flush to remove sludge and deposits.
- Oil Pressure Check: Regularly check the oil pressure to ensure it meets the manufacturer’s specifications.
4.6. ECU Repair or Replacement
If the ECU is faulty, it may need to be repaired or replaced.
- Repair: Consult with a qualified technician to repair the ECU.
- Replacement: Replace the ECU with a new or remanufactured unit.
- Programming: The new ECU may need to be programmed to match the vehicle.
5. Step-by-Step Guide to Diagnose and Repair P0016/P0017
Here is a step-by-step guide to help you diagnose and repair the P0016 and P0017 codes on your 2006 Mercedes C230:
- Preliminary Checks:
- Perform a visual inspection of the engine, wiring, and connectors.
- Scan for other trouble codes.
- Check the camshaft and crankshaft sensors.
- Verify battery voltage.
- Verify the Codes:
- Use an OBD-II scanner to confirm the presence of P0016 and P0017.
- Clear the codes and perform a test drive.
- Check Sensor Signals:
- Use an oscilloscope to examine the signals from the camshaft and crankshaft sensors.
- Compare the signal patterns to known good patterns.
- Verify signal strength and timing.
- Timing Chain Inspection:
- Remove the valve cover and inspect the timing chain for slack or wear.
- Check the alignment of the timing marks.
- Measure timing chain stretch.
- Camshaft Adjuster Testing:
- Use a diagnostic tool to activate the camshaft adjusters.
- Ensure there is adequate oil flow to the adjusters.
- Inspect the adjusters for damage or wear.
- Oil Pressure Test:
- Connect an oil pressure gauge and measure the oil pressure.
- Compare the readings to the manufacturer’s specifications.
- Balance Shaft Inspection (M272 Engine):
- Listen for unusual engine noises.
- Use an inspection camera to examine the balance shaft sprocket.
- ECU Testing:
- Check the ECU for physical damage.
- Ensure the ECU has the latest software updates.
- Repair Procedures:
- Replace faulty camshaft and crankshaft sensors.
- Replace a stretched timing chain.
- Replace faulty camshaft adjusters.
- Repair the balance shaft (M272 Engine).
- Maintain the oil system.
- Repair or replace the ECU.
- Verification:
- Clear the codes and perform a test drive to ensure the problem is resolved.
6. Advanced Diagnostic Techniques
For more complex cases, consider these advanced diagnostic techniques.
6.1. Using a Scan Tool
A high-quality scan tool can provide valuable data for diagnosing P0016 and P0017.
- Live Data: Monitor live data from the camshaft and crankshaft sensors, as well as the camshaft adjusters.
- Actuator Tests: Perform actuator tests to check the functionality of the camshaft adjusters.
- Freeze Frame Data: Analyze freeze frame data to understand the conditions when the codes were triggered.
6.2. Performing a Compression Test
A compression test can help identify internal engine problems that may be contributing to the codes.
- Test Procedure: Perform a compression test on each cylinder, following the manufacturer’s specifications.
- Interpretation: Low compression in one or more cylinders can indicate worn piston rings, damaged valves, or other internal engine problems.
6.3. Smoke Testing
Smoke testing can help identify vacuum leaks that may be affecting engine performance and triggering the codes.
- Test Procedure: Introduce smoke into the intake system and look for leaks.
- Interpretation: Vacuum leaks can cause lean air-fuel mixtures and affect engine timing.
7. Tools and Equipment Needed
Having the right tools and equipment is essential for diagnosing and repairing P0016 and P0017.
- OBD-II Scanner: For reading and clearing trouble codes.
- Oscilloscope: For examining sensor signals.
- Timing Chain Tool Kit: For replacing the timing chain.
- Camshaft Adjuster Socket: For removing and installing the camshaft adjusters.
- Oil Pressure Gauge: For measuring oil pressure.
- Inspection Camera: For inspecting the balance shaft sprocket.
- Compression Tester: For performing a compression test.
- Smoke Tester: For identifying vacuum leaks.
- Basic Hand Tools: Wrenches, sockets, screwdrivers, etc.
- Multimeter: For electrical testing.
8. Preventive Maintenance
Preventive maintenance can help prevent the recurrence of P0016 and P0017.
- Regular Oil Changes: Use high-quality oil and filters, and follow the manufacturer’s recommended oil change intervals.
- Timing Chain Inspection: Periodically inspect the timing chain for wear or slack.
- Sensor Inspection: Check the camshaft and crankshaft sensors for damage or contamination.
- Oil System Maintenance: Maintain proper oil flow to the camshaft adjusters.
- Software Updates: Ensure the ECU has the latest software updates.
9. Real-World Examples and Case Studies
Here are a couple of real-world examples and case studies that illustrate how P0016 and P0017 can be diagnosed and repaired.
9.1. Case Study 1: Stretched Timing Chain
- Vehicle: 2006 Mercedes C230 with 180,000 miles
- Symptoms: P0016 and P0017 codes, reduced engine power, rough idling
- Diagnosis: Visual inspection revealed a stretched timing chain. The timing marks were misaligned, and the chain had excessive slack.
- Repair: The timing chain, guides, and tensioner were replaced.
- Outcome: The codes were cleared, and the engine performance was restored.
9.2. Case Study 2: Faulty Camshaft Adjuster
- Vehicle: 2006 Mercedes C230 with 150,000 miles
- Symptoms: P0016 and P0017 codes, reduced engine power, increased fuel consumption
- Diagnosis: Testing with a scan tool revealed that the camshaft adjuster was not responding properly.
- Repair: The faulty camshaft adjuster was replaced.
- Outcome: The codes were cleared, and the engine performance was restored.
10. When to Seek Professional Help
While some repairs can be done DIY, certain situations require professional help.
- Complex Diagnostics: If you’re unable to diagnose the problem with the available tools and information.
- Balance Shaft Repair: Balance shaft repair on M272 engines is a complex task that requires specialized tools and expertise.
- ECU Issues: ECU repair or replacement requires specialized programming and diagnostic skills.
- Safety Concerns: If you’re not comfortable working on the engine or are concerned about safety.
AutoExplain.com is here to provide expert technical support. Contact us via WhatsApp at +1(936)2896695 or email at [email protected] for assistance. Our team of experienced technicians can help you diagnose and repair P0016 and P0017 efficiently. Our office is located at 4590 Angus Road, New York, United States. Visit our website AutoExplain.com for more information.
11. The Role of AutoExplain.com in Diagnostics
AutoExplain.com offers unparalleled support for diagnosing and resolving intricate automotive issues such as the P0016 and P0017 codes in your 2006 Mercedes C230. Our proficiency in remote diagnostics and software solutions guarantees a precise and effective resolution.
11.1. Remote Diagnostic Services
Our remote diagnostic services provide real-time assistance from skilled technicians. Using cutting-edge diagnostic tools, we pinpoint the fundamental causes of the P0016 and P0017 codes, guiding you through each diagnostic stage to ensure thoroughness.
11.2. Software Solutions
We provide cutting-edge software solutions to address ECU-related issues. Whether it’s software updates, reprogramming, or troubleshooting, our proficiency ensures your Mercedes C230 operates at its best.
11.3. Expert Technical Support
AutoExplain.com goes beyond basic diagnostics, providing complete technical support and detailed advice. Whether you’re a seasoned technician or a DIY enthusiast, our team is here to assist. Contact us via WhatsApp at +1(936)2896695 or email at [email protected] for prompt support. Our office is situated at 4590 Angus Road, New York, United States. Visit our website AutoExplain.com for more details.
12. Understanding Camshaft and Crankshaft Relationship
The relationship between the camshaft and crankshaft is essential for engine operation.
12.1. Basic Principles
The crankshaft is connected to the pistons, which move up and down to convert combustion energy into rotational motion. The camshaft controls the opening and closing of the intake and exhaust valves. Precise coordination between the crankshaft and camshaft is necessary for proper engine timing.
12.2. Timing Components
Key components that maintain timing include:
- Timing Chain or Belt: Connects the crankshaft and camshaft, ensuring they rotate in sync.
- Timing Gears or Sprockets: Attached to the crankshaft and camshaft, these gears (or sprockets) have timing marks that must align correctly.
- Tensioners and Guides: These maintain proper tension on the timing chain or belt, preventing slack and ensuring accurate timing.
12.3. How Timing Works
The crankshaft rotates twice for every one rotation of the camshaft in a four-stroke engine. This 2:1 ratio ensures that the valves open and close at the correct times relative to the piston’s position. When the timing is off, the engine’s performance suffers, leading to issues like reduced power, rough idling, and the P0016 and P0017 codes.
13. Deep Dive into Camshaft Adjusters (Phasers)
Camshaft adjusters, also known as phasers, are critical components in modern engines that allow for variable valve timing (VVT).
13.1. What are Camshaft Adjusters?
Camshaft adjusters are devices that can alter the timing of the camshaft relative to the crankshaft. This allows the engine to optimize valve timing for different operating conditions, improving fuel efficiency, power, and emissions.
13.2. How They Work
Camshaft adjusters typically use oil pressure to advance or retard the camshaft timing. The ECU controls the adjusters by opening and closing oil control valves (OCVs) that direct oil flow to the adjuster mechanism.
13.3. Types of Camshaft Adjusters
- Vane-Type: These use vanes inside a housing to change the camshaft angle.
- Helical-Type: These use a helical gear to move the camshaft axially, changing the timing.
13.4. Common Problems
- Oil Leaks: Leaks can reduce oil pressure to the adjuster, affecting its performance.
- Sludge Buildup: Sludge can block oil passages, preventing the adjuster from moving freely.
- OCV Failure: A faulty oil control valve can prevent the adjuster from functioning.
- Wear and Tear: Over time, the adjuster mechanism can wear out, leading to inaccurate timing.
13.5. Testing Camshaft Adjusters
- Actuator Test: Use a scan tool to activate the adjuster and monitor its response.
- Oil Flow Test: Check for adequate oil flow to the adjuster.
- Visual Inspection: Look for signs of damage or wear.
14. Addressing Balance Shaft Issues in M272 Engines
The M272 engine, found in the 2006 Mercedes C230, is known for a specific issue related to the balance shaft.
14.1. What is the Balance Shaft?
The balance shaft is a rotating component designed to counteract the vibrations produced by the engine. It helps to smooth out engine operation and reduce noise.
14.2. The M272 Issue
Some M272 engines have a design flaw where the teeth on the balance shaft sprocket wear prematurely. This wear can cause timing misalignment and trigger the P0016 and P0017 codes.
14.3. Symptoms of Balance Shaft Failure
- Unusual Engine Noises: Rattling or knocking sounds, especially at idle.
- Rough Idling: The engine may vibrate excessively at idle.
- Reduced Power: The engine may lack power, especially at low RPMs.
- Check Engine Light: The P0016 and P0017 codes may be present.
14.4. Diagnosis
- Visual Inspection: Use an inspection camera to examine the balance shaft sprocket for wear.
- Engine Disassembly: In severe cases, the engine may need to be disassembled to inspect the balance shaft.
14.5. Repair
The repair involves replacing the balance shaft sprocket with an updated part. This typically requires removing the engine from the vehicle and disassembling it.
14.6. Prevention
While there’s no guaranteed way to prevent balance shaft failure, regular oil changes and using high-quality oil can help reduce wear.
15. Understanding the Role of Oil Pressure
Oil pressure plays a vital role in the proper functioning of the engine, especially for components like camshaft adjusters.
15.1. Why Oil Pressure Matters
Oil pressure ensures that critical engine components receive adequate lubrication and hydraulic force. Proper oil pressure is necessary for:
- Lubrication: Reducing friction and wear on moving parts.
- Cooling: Dissipating heat from engine components.
- Hydraulic Force: Actuating components like camshaft adjusters.
15.2. Factors Affecting Oil Pressure
- Oil Level: Low oil level can reduce oil pressure.
- Oil Viscosity: Using the wrong viscosity oil can affect oil pressure.
- Oil Pump: A worn or damaged oil pump can reduce oil pressure.
- Oil Filter: A clogged oil filter can restrict oil flow and reduce oil pressure.
- Oil Leaks: Leaks can reduce oil pressure.
- Engine Wear: Worn bearings and other components can reduce oil pressure.
15.3. Testing Oil Pressure
- Oil Pressure Gauge: Connect an oil pressure gauge to the engine and measure the oil pressure at idle and higher RPMs.
- Specifications: Compare the readings to the manufacturer’s specifications.
15.4. Maintaining Oil Pressure
- Regular Oil Changes: Use high-quality oil and filters, and follow the manufacturer’s recommended oil change intervals.
- Check Oil Level: Regularly check the oil level and add oil as needed.
- Inspect for Leaks: Check for oil leaks and repair them promptly.
- Use Correct Oil Viscosity: Use the oil viscosity recommended by the manufacturer.
Oil Pressure Gauge Measuring Oil Pressure.
16. The Importance of High-Quality Sensors
The camshaft and crankshaft sensors are critical for providing accurate information to the ECU.
16.1. What Do Sensors Do?
The camshaft and crankshaft sensors provide the ECU with information about the position and speed of the camshaft and crankshaft. This information is used to control fuel injection, ignition timing, and other engine functions.
16.2. Types of Sensors
- Hall Effect Sensors: These use a magnetic field to detect the position of the camshaft or crankshaft.
- Magnetic Reluctance Sensors: These use a coil and a toothed wheel to generate a signal.
16.3. Common Sensor Problems
- Failure: Sensors can fail due to heat, vibration, or contamination.
- Damage: Sensors can be physically damaged.
- Contamination: Sensors can be contaminated by oil or debris.
- Wiring Issues: Wiring and connectors can become damaged or corroded.
16.4. Choosing High-Quality Sensors
- OEM Sensors: Original Equipment Manufacturer (OEM) sensors are designed to meet the manufacturer’s specifications.
- Reputable Brands: Choose sensors from reputable brands known for quality and reliability.
- Correct Fit: Ensure the sensor is the correct fit for your vehicle.
16.5. Testing Sensors
- Visual Inspection: Look for physical damage or contamination.
- Resistance Test: Use a multimeter to measure the resistance of the sensor.
- Signal Test: Use an oscilloscope to examine the sensor signal.
17. Potential Issues with Wiring and Connectors
Wiring and connector problems can often lead to sensor malfunction and the triggering of diagnostic codes.
17.1. Common Wiring Issues
- Corrosion: Corrosion can build up on terminals, causing poor connections.
- Damage: Wires can be cut, frayed, or crushed.
- Loose Connections: Connectors can become loose, causing intermittent problems.
- Short Circuits: Wires can short to ground or to each other.
17.2. Common Connector Issues
- Loose Fit: Connectors may not fit tightly, causing intermittent connections.
- Broken Latches: Latches that secure the connector can break, causing it to come loose.
- Contamination: Dirt, oil, or moisture can contaminate the connector.
17.3. Diagnosing Wiring and Connector Problems
- Visual Inspection: Look for signs of damage or corrosion.
- Continuity Test: Use a multimeter to check for continuity in the wiring.
- Voltage Test: Use a multimeter to check for proper voltage at the connector.
- Wire Harness Inspection: Inspect the wire harness for damage or wear.
17.4. Repairing Wiring and Connector Problems
- Cleaning: Clean corroded terminals with a wire brush or contact cleaner.
- Repairing Wires: Repair damaged wires by splicing in new sections.
- Replacing Connectors: Replace damaged connectors with new ones.
- Securing Connections: Ensure connectors are properly secured and latched.
18. Understanding the ECU’s Role in Engine Management
The Engine Control Unit (ECU) is the brain of the engine, controlling various functions to optimize performance and emissions.
18.1. What Does the ECU Do?
The ECU uses data from sensors to control:
- Fuel Injection: The amount of fuel injected into the engine.
- Ignition Timing: The timing of the spark plugs.
- Idle Speed: The engine’s idle speed.
- Camshaft Timing: The position of the camshaft adjusters.
- Emissions Control: The operation of the emissions control system.
18.2. How the ECU Uses Sensor Data
The ECU uses data from the camshaft and crankshaft sensors to determine the position and speed of the camshaft and crankshaft. This information is used to calculate the correct fuel injection and ignition timing.
18.3. ECU Problems
- Failure: The ECU can fail due to electrical problems, overheating, or physical damage.
- Software Issues: The ECU software can become corrupted or outdated.
- Wiring Problems: Wiring and connector problems can affect the ECU’s ability to communicate with sensors and actuators.
18.4. Diagnosing ECU Problems
- Scan Tool: Use a scan tool to read trouble codes and monitor live data.
- Visual Inspection: Look for physical damage or corrosion.
- Wiring Inspection: Check the wiring and connectors for damage or corrosion.
- Professional Testing: Consult with a qualified technician to test the ECU.
18.5. Repairing ECU Problems
- Repair: Consult with a qualified technician to repair the ECU.
- Replacement: Replace the ECU with a new or remanufactured unit.
- Programming: The new ECU may need to be programmed to match the vehicle.
19. The Impact of Fuel Quality and Maintenance
Fuel quality and regular maintenance significantly influence engine health and performance.
19.1. Importance of Fuel Quality
Using high-quality fuel is crucial for preventing engine problems. Low-quality fuel can contain contaminants that can damage fuel injectors, valves, and other engine components.
19.2. Effects of Poor Fuel Quality
- Clogged Fuel Injectors: Contaminants can clog fuel injectors, reducing fuel flow.
- Valve Deposits: Deposits can build up on valves, affecting their ability to seal properly.
- Reduced Performance: Poor fuel quality can reduce engine power and fuel efficiency.
- Increased Emissions: Poor fuel quality can increase emissions.
19.3. Regular Maintenance Practices
- Fuel Filter Replacement: Replace the fuel filter regularly to remove contaminants from the fuel.
- Fuel Injector Cleaning: Clean fuel injectors periodically to remove deposits.
- Use Fuel Additives: Use fuel additives to help keep the fuel system clean.
19.4. Other Maintenance Tips
- Air Filter Replacement: Replace the air filter regularly to ensure proper airflow to the engine.
- Spark Plug Replacement: Replace spark plugs according to the manufacturer’s recommendations.
- Check Hoses and Belts: Inspect hoses and belts for cracks, leaks, or wear.
20. Best Practices for Code Clearing and Verification
After performing repairs, it’s essential to clear the diagnostic codes and verify that the issue has been resolved.
20.1. Clearing Diagnostic Codes
- Using a Scan Tool: Use an OBD-II scanner to clear the diagnostic codes.
- Disconnecting the Battery: Disconnecting the battery for a few minutes can also clear the codes, but this may also reset other vehicle systems.
20.2. Verifying the Repair
- Test Drive: Perform a test drive to see if the codes return.
- Monitor Live Data: Use a scan tool to monitor live data from the camshaft and crankshaft sensors.
- Visual Inspection: Check for leaks or other signs of problems.
20.3. Addressing Recurring Codes
If the codes return, it indicates that the underlying issue has not been resolved. Review the diagnostic steps and perform additional tests to identify the root cause.
20.4. Seeking Professional Assistance
If you’re unable to resolve the issue, seek professional assistance from a qualified technician.
AutoExplain.com is here to provide expert technical support. Contact us via WhatsApp at +1(936)2896695 or email at [email protected] for assistance. Our team of experienced technicians can help you diagnose and repair P0016 and P0017 efficiently. Our office is located at 4590 Angus Road, New York, United States. Visit our website AutoExplain.com for more information.
21. FAQ: 2006 Mercedes C230 Code P0016 P0017
Here are some frequently asked questions about the P0016 and P0017 codes in a 2006 Mercedes C230.
- What do the P0016 and P0017 codes mean?
These codes indicate a misalignment between the camshaft and crankshaft timing on Bank 1.
- What are the common symptoms of these codes?
Common symptoms include a check engine light, reduced engine power, rough idling, and increased fuel consumption.
- What are the common causes of these codes?
Common causes include a stretched timing chain, faulty camshaft or crankshaft sensors, and malfunctioning camshaft adjusters.
- Can I fix these codes myself?
Some repairs, such as replacing sensors, can be done DIY. However, more complex repairs, such as replacing the timing chain or balance shaft, require professional help.
- How do I diagnose these codes?
Use an OBD-II scanner to read the codes, inspect the timing chain, test the camshaft and crankshaft sensors, and check the camshaft adjusters.
- What tools do I need to diagnose and repair these codes?
You’ll need an OBD-II scanner, oscilloscope, timing chain tool kit, camshaft adjuster socket, oil pressure gauge, and basic hand tools.
- How often should I change my oil?
Follow the manufacturer’s recommended oil change intervals, typically every 5,000 to 7,500 miles.
- Can low oil pressure cause these codes?
Yes, low oil pressure can affect the performance of the camshaft adjusters and trigger these codes.
- What is the M272 engine balance shaft issue?
The M272 engine is known for a design flaw where the teeth on the balance shaft sprocket wear prematurely, causing timing misalignment.
- When should I seek professional help?
Seek professional help if you’re unable to diagnose the problem, if the repair is complex, or if you’re concerned about safety.
If you’re facing difficulties diagnosing or repairing the P0016 and P0017 codes on your 2006 Mercedes C230, don’t hesitate to contact AutoExplain.com. Our expert team is ready to provide remote technical support via WhatsApp at +1(936)2896695 or email at [email protected]. Visit our website AutoExplain.com for more information. Our office is located at 4590 Angus Road, New York, United States.
22. Call to Action: Get Expert Assistance from AutoExplain.com
Experiencing the P0016 or P0017 code on your 2006 Mercedes C230 can be frustrating, but you don’t have to tackle it alone. AutoExplain.com offers expert remote technical support to help you diagnose and resolve these issues quickly and efficiently.
Our team of experienced technicians is equipped with the latest diagnostic tools and knowledge to guide you through the troubleshooting process. Whether you’re a seasoned mechanic or a DIY enthusiast, we can provide the support you need to get your Mercedes back on the road.
Contact us today via WhatsApp at +1(936)2896695 or email at [email protected] to get started. Our office is located at 4590 Angus Road, New York, United States. Visit our website AutoExplain.com for more information and to explore our full range of services.
Let AutoExplain.com be your trusted partner in automotive diagnostics and repair. We’re committed to providing top-notch service and support to keep your vehicle running smoothly.

BMW FSC Codes Explained: Full FSC Code List for F-Series
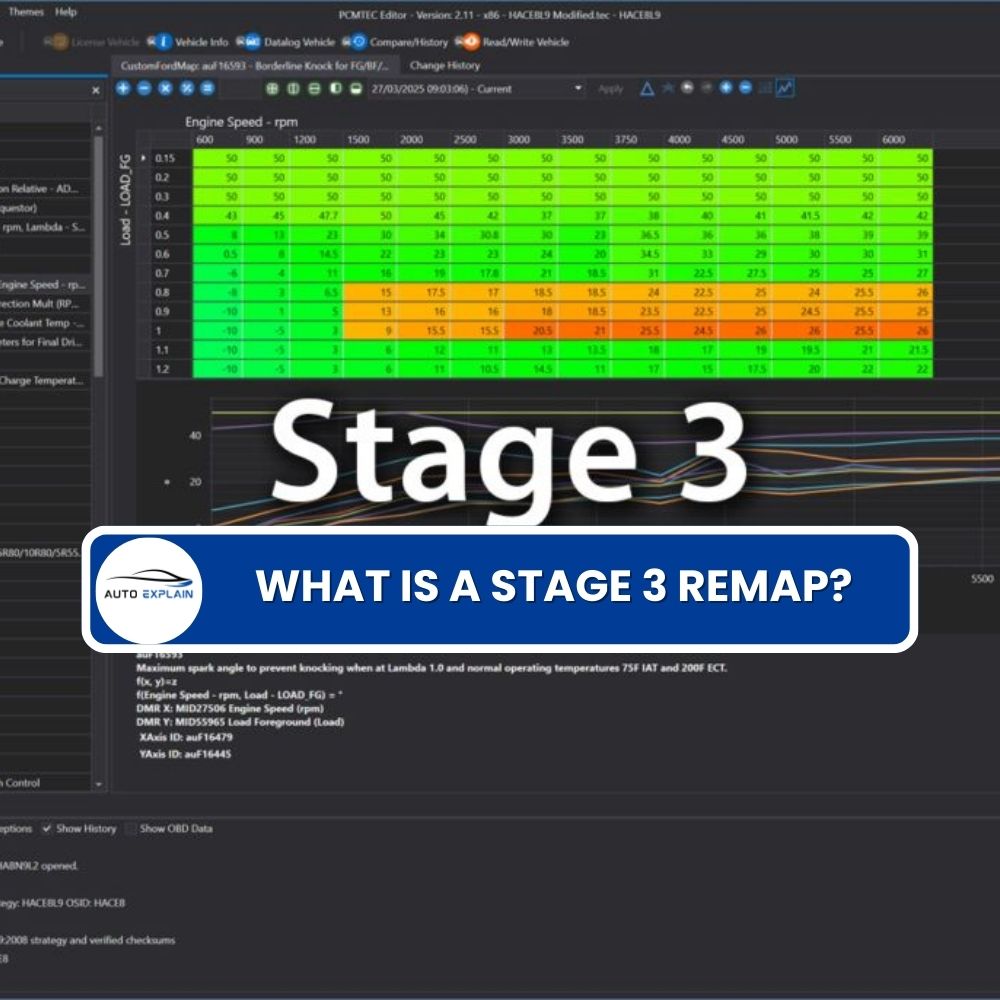
What is a Stage 3 Remap?

The Best Car Tuning Software in 2026: A Comprehensive Guide for Professionals


