Mercedes 9016 Fault Code: Expert Diagnosis & Solutions
The Mercedes 9016 fault code, often related to sensor issues, can be a diagnostic challenge. AutoExplain.com provides in-depth troubleshooting and remote support to swiftly resolve electrical and electronic system problems in your Mercedes-Benz. Discover reliable solutions and expert guidance to effectively address Mercedes diagnostic trouble codes and ensure optimal vehicle performance.
Table of Contents
Toggle1. Understanding the Mercedes 9016 Fault Code
The Mercedes-Benz 9016 fault code can indicate a variety of sensor-related problems, especially with the restraint system. The exact meaning of this code may vary depending on the specific Mercedes-Benz model and year, the diagnostic tool used, and the relevant control unit. It is essential to accurately identify the root cause to ensure effective repairs.
- Common Interpretations:
- Sensor fault in the restraint system
- Communication issues within the vehicle’s network
- Electrical problems affecting sensor performance
- Internal error within a control unit
- Impact on Vehicle Systems:
- Restraint system malfunctions (airbags, seatbelts)
- Compromised safety features
- Warning lights and error messages on the dashboard
- Possible limitations in vehicle performance
1.1. Decoding the Error Message
The Mercedes 9016 fault code requires careful interpretation to avoid misdiagnosis. Here’s a breakdown of what to consider:
- Specific Control Unit: Identify which control unit is reporting the code (e.g., SRS, ESP, etc.).
- Sensor Identification: Pinpoint the exact sensor associated with the code.
- Diagnostic Tool: Understand that different tools may provide slightly different descriptions of the code.
1.2. Related Diagnostic Trouble Codes
Several related diagnostic trouble codes (DTCs) may accompany the 9016 fault code, providing additional context. These include:
- B1016: General sensor fault
- C1000: ESP system fault
- U0100: Communication bus error
2. Common Causes of the 9016 Fault Code
The Mercedes 9016 fault code can arise from several underlying issues. Here’s a breakdown of the most frequent causes:
- Faulty Sensor:
- Description: The sensor itself may be defective due to age, wear, or physical damage.
- Symptoms: Inaccurate readings, system malfunction, error messages.
- Example: A damaged lateral acceleration sensor affecting ESP.
- Wiring Issues:
- Description: Damaged, corroded, or poorly connected wiring can disrupt sensor signals.
- Symptoms: Intermittent faults, incorrect sensor data, system failures.
- Example: A chafed wire causing a short circuit in the ABS sensor circuit.
- Connector Problems:
- Description: Loose or corroded connectors can impede signal transmission.
- Symptoms: Erratic sensor behavior, system errors, warning lights.
- Example: A loose connector on the airbag control module.
- Control Unit Failure:
- Description: A malfunctioning control unit (ECU) can generate false fault codes.
- Symptoms: Multiple unrelated error codes, system-wide malfunctions, communication errors.
- Example: An ECU with internal damage due to voltage spikes.
- Software Issues:
- Description: Outdated or corrupted software can cause misinterpretation of sensor data.
- Symptoms: Incorrect fault codes, system instability, performance issues.
- Example: An outdated ABS module software causing false sensor readings.
- Environmental Factors:
- Description: Exposure to moisture, extreme temperatures, or vibrations can damage sensors and wiring.
- Symptoms: Intermittent faults, corrosion, system malfunctions.
- Example: A wheel speed sensor damaged by road salt.
- Power Supply Problems:
- Description: Insufficient or unstable power supply can affect sensor performance.
- Symptoms: Intermittent faults, low voltage warnings, system errors.
- Example: A failing battery causing voltage drops to critical sensors.
- CAN Bus Issues:
- Description: Problems with the Controller Area Network (CAN) bus can disrupt communication between control units and sensors.
- Symptoms: Communication errors, multiple system faults, unresponsive modules.
- Example: A faulty CAN bus transceiver preventing communication with the engine ECU.
- Mechanical Damage:
- Description: Physical damage to the vehicle can directly impact sensors and related components.
- Symptoms: Obvious physical damage, sensor malfunctions, system failures.
- Example: A damaged ride height sensor due to an accident.
Understanding these common causes is crucial for effective troubleshooting and repair. If you encounter these issues, AutoExplain.com can provide expert remote support and guidance to help you diagnose and resolve the 9016 fault code efficiently.
2.1. Identifying Sensor-Specific Issues
When diagnosing the 9016 code, pinpointing the exact sensor involved is critical. Here are key areas to consider:
- Wheel Speed Sensors:
- Location: Located at each wheel hub.
- Function: Measure wheel speed for ABS, ESP, and traction control systems.
- Common Issues: Damage from road debris, corrosion, wiring faults.
- ABS Sensors:
- Location: Integrated with wheel speed sensors.
- Function: Provide data for the Anti-lock Braking System (ABS).
- Common Issues: Sensor contamination, wiring breaks, connector corrosion.
- Yaw Rate Sensors:
- Location: Typically under the driver’s seat or center console.
- Function: Measure the vehicle’s rotation rate for ESP and stability control.
- Common Issues: Sensor drift, calibration errors, wiring issues.
- Lateral Acceleration Sensors:
- Location: Usually near the yaw rate sensor.
- Function: Measure lateral acceleration forces for ESP and stability control.
- Common Issues: Sensor failure, calibration errors, wiring problems.
- Brake Pressure Sensors:
- Location: Integrated into the brake hydraulic system.
- Function: Measure brake pressure for ABS and ESP.
- Common Issues: Sensor leaks, electrical faults, calibration errors.
- Steering Angle Sensors:
- Location: Located on the steering column.
- Function: Measure the steering wheel angle for ESP and power steering systems.
- Common Issues: Calibration issues, sensor failure, wiring problems.
- Ride Height Sensors:
- Location: Attached to the suspension components.
- Function: Measure the vehicle’s ride height for adaptive suspension systems.
- Common Issues: Physical damage, sensor failure, wiring corrosion.
2.2. Common Wiring and Connector Problems
Wiring and connector issues are frequent contributors to the 9016 fault code. Key areas to inspect include:
- Visual Inspection:
- Description: Check for any signs of physical damage, corrosion, or loose connections.
- Tools: Flashlight, magnifying glass.
- Continuity Testing:
- Description: Use a multimeter to verify the continuity of the wiring harness.
- Tools: Multimeter, wiring diagrams.
- Voltage Testing:
- Description: Measure the voltage at the sensor connector to ensure proper power supply.
- Tools: Multimeter, wiring diagrams.
- Connector Cleaning:
- Description: Clean corroded connectors with electrical contact cleaner.
- Tools: Electrical contact cleaner, small brush.
- Harness Repair:
- Description: Repair or replace damaged wiring harnesses to ensure reliable signal transmission.
- Tools: Wire strippers, crimpers, soldering iron, heat shrink tubing.
3. Diagnosing the 9016 Fault Code: Step-by-Step Guide
Diagnosing the Mercedes 9016 fault code requires a systematic approach to accurately identify the root cause. Here is a detailed, step-by-step guide:
3.1. Initial Assessment
- Step 1: Record the Fault Code
- Use a diagnostic scanner to read and record all fault codes present in the vehicle’s system.
- Note the specific control unit reporting the 9016 code.
- Step 2: Gather Information
- Collect information about the vehicle, including the model year, engine type, and any recent repairs or issues.
- Check for any relevant Technical Service Bulletins (TSBs) or recalls related to the 9016 code.
- Step 3: Visual Inspection
- Perform a thorough visual inspection of the sensor and its wiring.
- Look for signs of damage, corrosion, or loose connections.
3.2. Sensor Testing
- Step 4: Identify the Sensor
- Determine the specific sensor associated with the 9016 code.
- Refer to the vehicle’s service manual or wiring diagrams for sensor location and specifications.
- Step 5: Resistance Test
- Disconnect the sensor and use a multimeter to measure its resistance.
- Compare the measured value to the manufacturer’s specifications.
- A significant deviation indicates a faulty sensor.
- Step 6: Signal Test
- With the sensor connected, use an oscilloscope or multimeter to measure the sensor’s output signal while simulating vehicle operation.
- Check for proper signal amplitude, frequency, and stability.
- An abnormal signal suggests a sensor malfunction.
3.3. Wiring and Connector Inspection
- Step 7: Check Wiring Continuity
- Disconnect the sensor and the control unit.
- Use a multimeter to test the continuity of each wire in the circuit.
- A lack of continuity indicates a broken wire.
- Step 8: Inspect Connectors
- Check the sensor and control unit connectors for corrosion, damage, or loose pins.
- Clean corroded connectors with electrical contact cleaner and ensure they are properly seated.
- Step 9: Voltage Drop Test
- Perform a voltage drop test on the power and ground circuits to identify excessive resistance.
- Connect the multimeter in series with the circuit and measure the voltage drop while the system is operating.
- A high voltage drop indicates a wiring or connector problem.
3.4. Control Unit and Software Checks
- Step 10: Control Unit Inspection
- Inspect the control unit for signs of physical damage or corrosion.
- Check the control unit connectors for proper seating and pin integrity.
- Step 11: Software Update
- Check for available software updates for the control unit.
- Update the software to the latest version to address any known issues.
- Step 12: Control Unit Reset
- Perform a control unit reset or adaptation procedure to clear any stored errors and recalibrate the system.
3.5. Advanced Diagnostics
- Step 13: CAN Bus Testing
- Use a diagnostic scanner to monitor CAN bus communication between the control unit and the sensor.
- Check for error messages, data inconsistencies, or communication timeouts.
- A CAN bus problem can disrupt sensor data transmission.
- Step 14: Component Substitution
- If the sensor is suspected to be faulty, substitute it with a known good sensor.
- Monitor the system for proper operation.
- If the fault code disappears, the original sensor is likely the cause.
- Step 15: Data Logging
- Use a diagnostic scanner to log sensor data during vehicle operation.
- Analyze the data to identify any anomalies or patterns that may indicate a problem.
3.6. Verification and Repair
- Step 16: Verify Repair
- After performing the necessary repairs, clear the fault codes and test the system.
- Verify that the 9016 code does not reappear.
- Step 17: Road Test
- Conduct a road test to ensure the system is functioning correctly under various driving conditions.
- Monitor sensor data and system performance.
- Step 18: Final Inspection
- Perform a final inspection to ensure all connections are secure and wiring is properly routed.
By following this step-by-step guide, you can effectively diagnose and resolve the Mercedes 9016 fault code. For expert assistance and remote support, contact AutoExplain.com via WhatsApp at +1(936)2896695 or email at [email protected].
4. Repairing the 9016 Fault Code: Practical Solutions
Once you’ve diagnosed the root cause of the Mercedes 9016 fault code, implementing the right repair strategy is essential. Here are practical solutions for common issues:
4.1. Replacing a Faulty Sensor
- Step 1: Identify the Correct Sensor
- Ensure you have the correct replacement sensor for your specific Mercedes-Benz model and year.
- Check the part number against the original sensor to confirm compatibility.
- Step 2: Disconnect the Old Sensor
- Disconnect the negative battery terminal to prevent electrical shorts.
- Disconnect the wiring harness from the faulty sensor.
- Step 3: Remove the Old Sensor
- Remove any mounting hardware (bolts, clips, etc.) securing the sensor.
- Carefully remove the sensor from its location.
- Step 4: Install the New Sensor
- Install the new sensor in the same orientation as the old one.
- Secure it with the appropriate mounting hardware.
- Step 5: Connect the Wiring Harness
- Reconnect the wiring harness to the new sensor, ensuring a secure connection.
- Step 6: Reconnect the Battery
- Reconnect the negative battery terminal.
- Step 7: Clear Fault Codes
- Use a diagnostic scanner to clear the 9016 fault code.
- Step 8: Test the System
- Start the vehicle and test the system to ensure the new sensor is functioning correctly.
4.2. Repairing Wiring and Connectors
- Step 1: Inspect the Wiring
- Thoroughly inspect the wiring harness for damage, corrosion, or breaks.
- Pay close attention to areas near connectors and moving parts.
- Step 2: Repair Damaged Wires
- Cut out the damaged section of wire.
- Splice in a new section of wire using crimp connectors or solder.
- Protect the splice with heat shrink tubing.
- Step 3: Clean Corroded Connectors
- Disconnect the connector.
- Clean the terminals with electrical contact cleaner and a small brush.
- Apply dielectric grease to prevent future corrosion.
- Step 4: Replace Damaged Connectors
- If the connector is severely damaged, replace it with a new one.
- Ensure the new connector is properly wired and secured.
- Step 5: Secure the Wiring Harness
- Secure the wiring harness with zip ties or clips to prevent chafing and movement.
4.3. Updating Control Unit Software
- Step 1: Check for Updates
- Use a diagnostic scanner to check for available software updates for the control unit.
- Visit the manufacturer’s website or consult a service manual for update information.
- Step 2: Connect a Battery Stabilizer
- Connect a battery stabilizer to maintain a constant voltage during the update process.
- Step 3: Follow Update Instructions
- Carefully follow the manufacturer’s instructions for updating the software.
- Do not interrupt the update process.
- Step 4: Verify the Update
- After the update is complete, verify that the new software version is installed.
- Clear any fault codes and test the system.
4.4. Recalibrating Sensors
- Step 1: Access Calibration Mode
- Use a diagnostic scanner to access the sensor calibration mode.
- Follow the scanner’s instructions for initiating the calibration process.
- Step 2: Follow Calibration Steps
- Follow the on-screen instructions for performing the calibration procedure.
- This may involve specific vehicle movements or sensor adjustments.
- Step 3: Verify Calibration
- After the calibration is complete, verify that the sensor readings are within the specified range.
- Clear any fault codes and test the system.
4.5. Addressing CAN Bus Issues
- Step 1: Inspect CAN Bus Wiring
- Inspect the CAN bus wiring for damage, corrosion, or shorts.
- Pay close attention to the termination resistors at each end of the bus.
- Step 2: Test CAN Bus Voltage
- Use a multimeter to test the voltage on the CAN high and CAN low wires.
- The voltage should be within the manufacturer’s specifications.
- Step 3: Check CAN Bus Resistance
- Disconnect the battery and measure the resistance across the CAN high and CAN low wires.
- The resistance should be approximately 60 ohms.
- Step 4: Replace Faulty Components
- Replace any faulty CAN bus components, such as transceivers or control units.
By implementing these practical solutions, you can effectively repair the Mercedes 9016 fault code and restore your vehicle’s performance. AutoExplain.com offers expert remote support and guidance to help you navigate these repairs. Contact us via WhatsApp at +1(936)2896695 or email at [email protected] for assistance.
5. Tools and Equipment for Diagnosing and Repairing the 9016 Fault Code
Having the right tools and equipment is crucial for accurately diagnosing and effectively repairing the Mercedes 9016 fault code. Here’s a comprehensive list of essential items:
- Diagnostic Scanner:
- Purpose: Reads and clears fault codes, displays live sensor data, and performs system tests.
- Features: OBD-II compatibility, Mercedes-Benz specific diagnostics, bi-directional control.
- Examples: Autel MaxiSys, Snap-on Solus, iCarsoft MB V3.0.
- Multimeter:
- Purpose: Measures voltage, current, resistance, and continuity.
- Features: Digital display, auto-ranging, diode test, frequency measurement.
- Examples: Fluke 115, Klein Tools MM400, Extech EX330.
- Oscilloscope:
- Purpose: Displays electrical signals as waveforms, allowing for detailed analysis of sensor outputs.
- Features: High bandwidth, multiple channels, waveform capture.
- Examples: Hantek DSO5102P, Siglent SDS1104X-E, Tektronix TBS1052B.
- Wiring Diagrams and Service Manuals:
- Purpose: Provides detailed information on wiring layouts, sensor locations, and repair procedures.
- Features: Vehicle-specific diagrams, troubleshooting guides, component specifications.
- Examples: Mitchell OnDemand, Alldata, Mercedes-Benz WIS/ASRA.
- Electrical Contact Cleaner:
- Purpose: Cleans corroded electrical connectors and terminals.
- Features: Quick-drying, residue-free, safe for plastics.
- Examples: CRC Lectra-Motive, WD-40 Specialist Electrical Contact Cleaner.
- Wiring Repair Kit:
- Purpose: Repairs damaged wiring harnesses and connectors.
- Features: Wire strippers, crimpers, soldering iron, heat shrink tubing, connectors, terminals.
- Examples: EWCS Wire Repair Kit, Waytek Wire Electrical Repair Kit.
- Battery Stabilizer:
- Purpose: Maintains a constant voltage during software updates and diagnostic procedures.
- Features: Automatic voltage regulation, overcurrent protection, short circuit protection.
- Examples: Schumacher Electric INC-100, NOCO Genius GB70.
- Torque Wrench:
- Purpose: Tightens bolts and nuts to the specified torque.
- Features: Adjustable torque range, accurate measurement, durable construction.
- Examples: CDI Torque Products, Snap-on TechAngle.
- Socket Set and Wrench Set:
- Purpose: Removes and installs various bolts and nuts.
- Features: Metric and SAE sizes, durable construction, comfortable grip.
- Examples: Craftsman, Gearwrench, Snap-on.
- Protective Gear:
- Purpose: Protects hands, eyes, and body during repairs.
- Features: Safety glasses, gloves, work clothes.
By having these tools and equipment on hand, you can efficiently and accurately diagnose and repair the Mercedes 9016 fault code. For expert guidance and support, contact AutoExplain.com via WhatsApp at +1(936)2896695 or email at [email protected].
6. Preventing the 9016 Fault Code: Maintenance Tips
Preventing the Mercedes 9016 fault code involves proactive maintenance and care. Here are essential tips to help keep your vehicle’s systems in optimal condition:
6.1. Regular Sensor Inspections
- Visual Checks:
- Regularly inspect sensors for physical damage, corrosion, or loose connections.
- Pay attention to sensors exposed to harsh environments, such as wheel speed sensors.
- Professional Inspections:
- Have a qualified technician inspect sensors during routine maintenance services.
- Early detection of potential issues can prevent major failures.
6.2. Wiring and Connector Maintenance
- Clean Connectors:
- Clean electrical connectors with contact cleaner to prevent corrosion.
- Apply dielectric grease to protect against moisture and contaminants.
- Inspect Wiring Harnesses:
- Check wiring harnesses for chafing, cracking, or damage.
- Repair or replace damaged wiring promptly.
- Secure Wiring:
- Ensure wiring harnesses are properly secured to prevent movement and vibration.
- Use zip ties or clips to keep wiring away from hot or moving parts.
6.3. Software Updates
- Stay Updated:
- Keep your vehicle’s control unit software up to date.
- Software updates often include bug fixes and performance improvements that can prevent sensor-related issues.
- Professional Updates:
- Have a qualified technician perform software updates using Mercedes-Benz diagnostic tools.
6.4. Proper Vehicle Care
- Avoid Harsh Conditions:
- Avoid driving through deep water, mud, or snow, which can damage sensors and wiring.
- Gentle Handling:
- Handle sensors and wiring carefully during repairs or maintenance.
- Avoid bending or stressing connectors and wires.
- Quality Parts:
- Use high-quality replacement parts when servicing your vehicle.
- Inferior parts may not meet the manufacturer’s specifications and can cause problems.
6.5. Routine Maintenance
- Regular Servicing:
- Follow the manufacturer’s recommended maintenance schedule.
- Regular servicing includes inspections and replacements of critical components.
- Fluid Checks:
- Check and maintain proper fluid levels, such as brake fluid and power steering fluid.
- Contaminated or low fluid levels can affect sensor performance.
6.6. Addressing Issues Promptly
- Warning Signs:
- Pay attention to warning lights or error messages on the dashboard.
- Address any issues promptly to prevent further damage.
- Professional Diagnosis:
- Have a qualified technician diagnose any unusual symptoms or performance issues.
- Early diagnosis can prevent minor problems from escalating into major repairs.
By following these maintenance tips, you can significantly reduce the risk of encountering the Mercedes 9016 fault code and keep your vehicle running smoothly. For expert advice and remote support, contact AutoExplain.com via WhatsApp at +1(936)2896695 or email at [email protected].
7. Real-World Case Studies: Resolving the 9016 Fault Code
Examining real-world case studies provides valuable insights into diagnosing and resolving the Mercedes 9016 fault code. Here are a few examples:
7.1. Case Study 1: Faulty Wheel Speed Sensor
- Vehicle: 2015 Mercedes-Benz C300
- Symptoms: ABS warning light, ESP malfunction, 9016 fault code
- Diagnosis:
- Diagnostic scanner revealed a 9016 fault code related to the right front wheel speed sensor.
- Visual inspection showed no obvious damage to the sensor or wiring.
- Resistance testing of the sensor revealed an open circuit, indicating a faulty sensor.
- Solution:
- Replaced the right front wheel speed sensor.
- Cleared the fault codes.
- Performed a road test to verify proper ABS and ESP operation.
- Outcome:
- ABS warning light and ESP malfunction were resolved.
- Vehicle operated normally.
7.2. Case Study 2: Corroded Connector
- Vehicle: 2012 Mercedes-Benz E350
- Symptoms: Intermittent ABS warning light, 9016 fault code
- Diagnosis:
- Diagnostic scanner showed a 9016 fault code related to the left rear ABS sensor.
- Visual inspection revealed corrosion on the ABS sensor connector.
- Voltage drop test indicated excessive resistance in the connector.
- Solution:
- Cleaned the corroded connector with electrical contact cleaner.
- Applied dielectric grease to protect against future corrosion.
- Secured the connector to ensure a tight fit.
- Outcome:
- Intermittent ABS warning light was resolved.
- Vehicle operated reliably.
7.3. Case Study 3: Software Glitch
- Vehicle: 2017 Mercedes-Benz GLC300
- Symptoms: ESP malfunction, 9016 fault code
- Diagnosis:
- Diagnostic scanner showed a 9016 fault code related to the yaw rate sensor.
- Sensor testing and wiring checks revealed no issues.
- Consulted Mercedes-Benz service bulletin, which indicated a known software glitch.
- Solution:
- Updated the ESP control unit software to the latest version.
- Performed a yaw rate sensor calibration.
- Outcome:
- ESP malfunction was resolved.
- Vehicle operated normally.
7.4. Case Study 4: Damaged Wiring Harness
- Vehicle: 2014 Mercedes-Benz CLA250
- Symptoms: ABS and ESP warning lights, 9016 fault code
- Diagnosis:
- Diagnostic scanner revealed a 9016 fault code related to the right front wheel speed sensor.
- Visual inspection uncovered a damaged wiring harness near the wheel well.
- Continuity testing confirmed a broken wire in the harness.
- Solution:
- Repaired the damaged wiring harness by splicing in a new section of wire.
- Protected the splice with heat shrink tubing.
- Secured the wiring harness to prevent future damage.
- Outcome:
- ABS and ESP warning lights were resolved.
- Vehicle operated without issues.
These case studies illustrate the importance of thorough diagnostics and targeted repairs when addressing the Mercedes 9016 fault code. AutoExplain.com offers expert remote support and guidance to help you navigate these challenges. Contact us via WhatsApp at +1(936)2896695 or email at [email protected] for assistance.
8. The Role of AutoExplain.com in Resolving Mercedes Fault Codes
AutoExplain.com stands out as a premier resource for diagnosing and resolving complex automotive issues, including the Mercedes 9016 fault code. Here’s how AutoExplain.com can assist you:
- Expert Remote Support:
- Real-time Assistance: Access expert technicians via WhatsApp +1(936)2896695 or email ([email protected]) for real-time guidance.
- Step-by-Step Troubleshooting: Receive step-by-step instructions tailored to your specific situation.
- Comprehensive Diagnostic Information:
- Detailed Guides: Benefit from detailed diagnostic guides and repair procedures.
- Fault Code Database: Access a comprehensive database of Mercedes-Benz fault codes and their meanings.
- Wiring Diagrams and Technical Documents:
- Access to Resources: Obtain wiring diagrams, service manuals, and technical documents to aid in your diagnosis and repair efforts.
- Software Updates and Programming:
- Remote Programming: Get assistance with control unit software updates and programming.
- Latest Software: Ensure your vehicle’s systems are running the latest software versions.
- Component Testing and Verification:
- Testing Procedures: Receive guidance on how to properly test and verify the functionality of sensors and other components.
- Data Analysis: Analyze sensor data to identify anomalies and potential issues.
- Cost-Effective Solutions:
- Reduce Downtime: Minimize vehicle downtime with efficient and accurate diagnostics.
- Avoid Unnecessary Repairs: Avoid costly and unnecessary repairs by identifying the root cause of the problem.
- Preventive Maintenance Advice:
- Maintenance Tips: Receive personalized maintenance tips to prevent future issues and keep your vehicle in optimal condition.
- Proactive Care: Implement proactive maintenance strategies to reduce the risk of encountering fault codes.
AutoExplain.com offers a comprehensive suite of services designed to help you diagnose and resolve the Mercedes 9016 fault code quickly and effectively. Whether you’re a professional technician or a DIY enthusiast, our expert team is here to support you every step of the way.
For expert assistance and remote support, contact AutoExplain.com:
- WhatsApp: +1(936)2896695
- Email: [email protected]
- Office Address: 4590 Angus Road, New York, United States
- Website: AutoExplain.com
9. FAQ: Addressing Common Questions About the 9016 Fault Code
Here are some frequently asked questions (FAQs) related to the Mercedes 9016 fault code, along with detailed answers to help you better understand and address the issue:
Q1: What does the Mercedes 9016 fault code mean?
A: The Mercedes 9016 fault code generally indicates a sensor-related issue. The specific meaning can vary depending on the control unit reporting the code and the vehicle model. It often relates to the restraint system, such as airbag sensors or seatbelt pretensioners, but can also indicate issues with wheel speed sensors, yaw rate sensors, or other critical components.
Q2: What are the common causes of the 9016 fault code?
A: Common causes include:
- Faulty sensor
- Wiring issues (damaged, corroded, or broken wires)
- Connector problems (loose or corroded connectors)
- Control unit failure
- Software issues
- Environmental factors (moisture, extreme temperatures)
Q3: How can I diagnose the 9016 fault code?
A: Follow these steps to diagnose the 9016 fault code:
- Use a diagnostic scanner to read and record the fault code.
- Gather information about the vehicle and any recent repairs.
- Perform a visual inspection of the sensor, wiring, and connectors.
- Test the sensor resistance and output signal.
- Check wiring continuity and voltage.
- Inspect the control unit for damage or corrosion.
- Check for software updates and perform a control unit reset.
Q4: What tools do I need to diagnose and repair the 9016 fault code?
A: Essential tools include:
- Diagnostic scanner
- Multimeter
- Oscilloscope
- Wiring diagrams and service manuals
- Electrical contact cleaner
- Wiring repair kit
- Socket set and wrench set
Q5: Can I fix the 9016 fault code myself, or do I need a professional?
A: Whether you can fix the 9016 fault code yourself depends on your technical skills and experience. Simple issues like cleaning connectors or replacing a sensor can often be done by DIY enthusiasts. However, more complex issues like wiring repairs, software updates, or control unit replacements may require professional expertise.
Q6: How much does it cost to repair the 9016 fault code?
A: The cost to repair the 9016 fault code can vary widely depending on the cause of the problem and the parts and labor required. Simple repairs like cleaning connectors may cost under $100, while more complex repairs like replacing a control unit can cost several hundred dollars or more.
Q7: How can I prevent the 9016 fault code from recurring?
A: To prevent the 9016 fault code from recurring:
- Regularly inspect sensors, wiring, and connectors.
- Clean connectors with electrical contact cleaner.
- Keep your vehicle’s software up to date.
- Follow the manufacturer’s recommended maintenance schedule.
- Address any warning signs or symptoms promptly.
Q8: What should I do if I need help diagnosing or repairing the 9016 fault code?
A: If you need assistance, contact AutoExplain.com for expert remote support. Our team of experienced technicians can provide step-by-step guidance and help you resolve the issue quickly and effectively.
Q9: Where can I find reliable information about Mercedes-Benz fault codes?
A: Reliable sources of information include:
- Mercedes-Benz service manuals
- Technical service bulletins (TSBs)
- Online forums and communities for Mercedes-Benz owners
- Professional diagnostic databases and resources
- AutoExplain.com
Q10: How can AutoExplain.com help me with the 9016 fault code?
A: AutoExplain.com offers expert remote support to help you diagnose and resolve the 9016 fault code. Our services include:
- Real-time assistance from experienced technicians
- Step-by-step troubleshooting guidance
- Access to wiring diagrams and technical documents
- Assistance with software updates and programming
- Component testing and verification
- Cost-effective solutions
Contact AutoExplain.com via WhatsApp at +1(936)2896695 or email at [email protected] for expert assistance and support.
By addressing these common questions, you can gain a better understanding of the Mercedes 9016 fault code and how to effectively diagnose and resolve it. AutoExplain.com is here to provide the expertise and support you need to keep your vehicle running smoothly.

BMW FSC Codes Explained: Full FSC Code List for F-Series
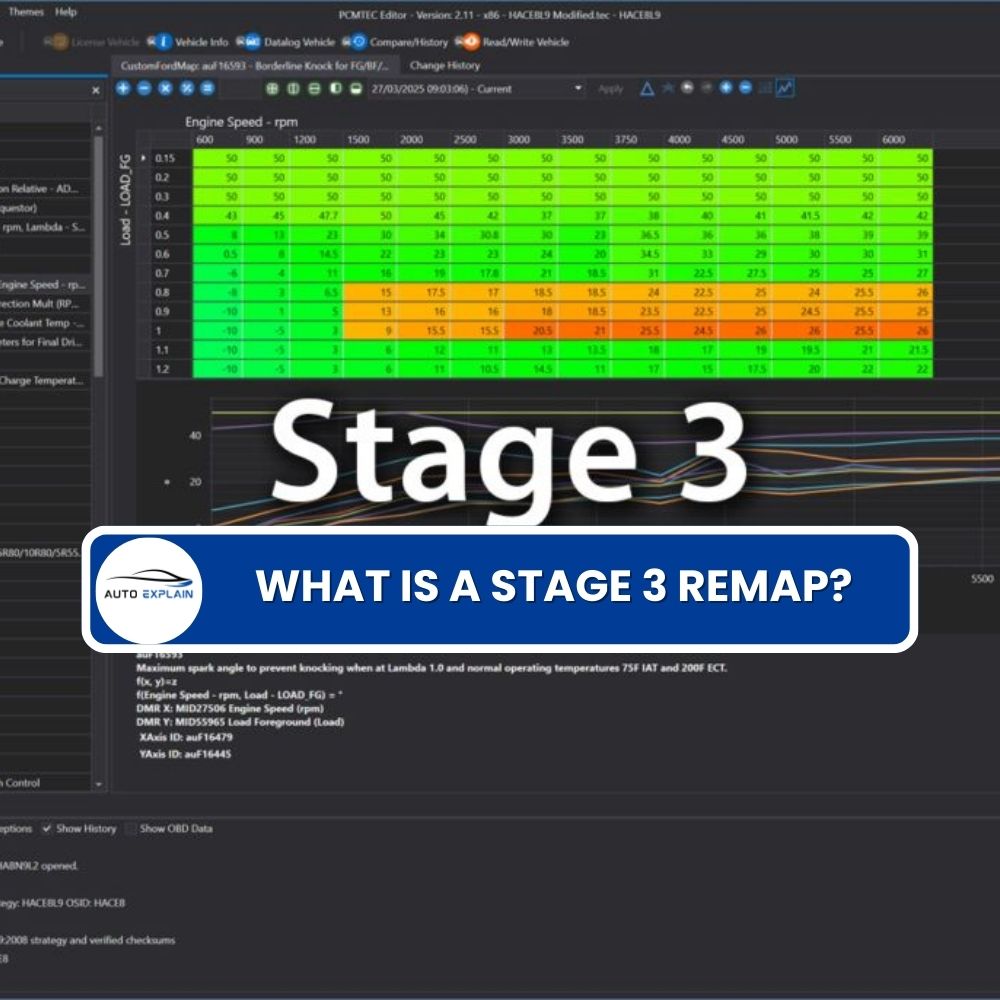
What is a Stage 3 Remap?

The Best Car Tuning Software in 2026: A Comprehensive Guide for Professionals


