The P0304 Mercedes Benz code indicates a cylinder 4 misfire, signaling potential issues within the engine’s combustion process. Addressing this diagnostic trouble code promptly is crucial to maintain optimal engine performance and prevent further complications; AutoExplain.com offers expert remote diagnostic and repair assistance to resolve this issue efficiently. Explore troubleshooting, misfire causes, and engine repair strategies to ensure peak performance and prevent costly repairs.
1. Understanding the P0304 Mercedes Benz Code
The P0304 Mercedes Benz code signifies a misfire detected in cylinder number 4. This diagnostic trouble code (DTC) is triggered when the engine control unit (ECU) identifies that cylinder 4 is not firing correctly or consistently. A misfire means that the combustion process in the cylinder is incomplete or not occurring at all, leading to reduced engine performance and potential damage. The engine misfire can stem from various underlying problems, ranging from faulty spark plugs to more complex issues within the engine’s mechanical or electrical systems; therefore, a thorough and systematic approach to diagnosis is essential to resolve the P0304 error code effectively.
Understanding the significance of the P0304 diagnostic code involves considering the intricate workings of your Mercedes Benz engine. Combustion engine issues can often trigger this code. AutoExplain.com specializes in providing detailed diagnostic information and expert guidance to address such issues, offering solutions that ensure your vehicle operates at its best. By understanding the diagnostic trouble codes meaning and implications, you can take proactive steps to maintain your vehicle’s health.
2. Symptoms Associated with the P0304 Code
Recognizing the symptoms associated with the P0304 code is the first step toward addressing the issue. Common symptoms include:
- Check Engine Light: This is often the first and most obvious sign. The check engine light may flash, indicating a severe misfire.
- Rough Idle: The engine may vibrate or shake noticeably when the vehicle is stationary.
- Loss of Power: The vehicle may feel sluggish, especially during acceleration.
- Poor Fuel Economy: Misfires can lead to inefficient combustion, resulting in lower miles per gallon.
- Engine Hesitation: The engine may hesitate or stumble when accelerating.
- Unusual Noises: You may hear popping or sputtering sounds from the exhaust.
- Smell of Fuel: Unburnt fuel may be noticeable, indicating incomplete combustion in cylinder 4.
These symptoms can vary in intensity depending on the severity of the misfire and other underlying issues. If you notice any of these signs, it’s crucial to investigate the problem promptly to prevent further engine damage. Remember, addressing these symptoms early with the help of AutoExplain.com can save you time and money in the long run, ensuring your vehicle’s optimal performance and safety.
3. Common Causes of the P0304 Error Code in Mercedes Benz Vehicles
The P0304 error code can be triggered by a variety of issues within your Mercedes Benz. Identifying the root cause is crucial for effective repair. Here are some of the most common causes:
- Faulty Spark Plugs: Worn, damaged, or incorrectly gapped spark plugs are a frequent culprit. They can fail to ignite the air-fuel mixture effectively.
- Defective Ignition Coils: The ignition coil provides the high voltage needed to create a spark. A failing coil can lead to misfires.
- Fuel Injector Issues: A clogged or malfunctioning fuel injector in cylinder 4 can disrupt the fuel supply, causing a misfire.
- Vacuum Leaks: Leaks in the intake manifold or vacuum lines can alter the air-fuel mixture, leading to misfires.
- Low Compression: Low compression in cylinder 4 can result from worn piston rings, damaged valves, or a head gasket leak.
- Wiring Problems: Damaged or corroded wiring and connectors in the ignition or fuel systems can cause intermittent misfires.
- EGR Valve Problems: A malfunctioning EGR (Exhaust Gas Recirculation) valve can cause improper exhaust gas recirculation, affecting combustion.
- Clogged Catalytic Converter: Although less common, a clogged catalytic converter can create backpressure, leading to misfires.
- Engine Control Unit (ECU) Issues: In rare cases, a faulty ECU can cause misfires by sending incorrect signals to the ignition or fuel systems.
Understanding these potential causes can help you or your mechanic narrow down the diagnostic process. Addressing these causes promptly is vital to restoring your Mercedes Benz to optimal performance. AutoExplain.com provides expert assistance in diagnosing these issues, ensuring you get the right solution for your vehicle’s specific needs.
4. Diagnosing the P0304 Code: A Step-by-Step Guide
Diagnosing the P0304 code requires a systematic approach to identify the root cause of the misfire. Here’s a step-by-step guide to help you through the process:
- Retrieve the Error Code: Use an OBD-II scanner to confirm the presence of the P0304 code and check for any related codes. This will provide additional context.
- Visual Inspection:
- Examine the spark plugs and ignition coils in cylinder 4 for signs of damage, wear, or corrosion.
- Check the wiring and connectors associated with the ignition and fuel systems for any damage or loose connections.
- Inspect vacuum lines and the intake manifold for leaks.
- Spark Plug Test:
- Remove the spark plug from cylinder 4 and inspect its condition. Look for signs of fouling, carbon buildup, or damage.
- Compare the spark plug with others to see if it differs significantly.
- Test the spark plug using a spark plug tester to ensure it produces a strong spark.
- Ignition Coil Test:
- Use a multimeter to check the resistance of the ignition coil. Compare the reading with the manufacturer’s specifications.
- Swap the ignition coil from cylinder 4 with one from another cylinder (e.g., cylinder 1) and see if the misfire moves to the new cylinder. If it does, the coil is likely the problem.
- Fuel Injector Test:
- Use a stethoscope or listening device to listen to the fuel injector in cylinder 4. It should produce a consistent clicking sound.
- Check the fuel injector’s resistance using a multimeter. Compare the reading with the manufacturer’s specifications.
- Consider having the fuel injector professionally cleaned and tested.
- Compression Test:
- Perform a compression test on cylinder 4 to check for low compression. Low compression can indicate issues with piston rings, valves, or the head gasket.
- Compare the compression reading with the manufacturer’s specifications.
- Vacuum Leak Test:
- Use a smoke machine to check for vacuum leaks in the intake manifold and vacuum lines.
- Listen for hissing sounds that may indicate a vacuum leak.
- EGR Valve Test:
- Inspect the EGR valve for proper operation. It should open and close smoothly.
- Clean the EGR valve if it is clogged with carbon deposits.
- ECU Check:
- In rare cases, the ECU may be the cause. Consult with a professional to test the ECU’s functionality.
By following these steps, you can systematically diagnose the P0304 code and identify the underlying issue. Remember, AutoExplain.com is here to provide expert guidance and support throughout the diagnostic process, ensuring you get accurate results and effective solutions.
5. Tools Needed for Diagnosing the P0304 Code
Having the right tools is essential for accurately diagnosing the P0304 code. Here’s a list of tools you may need:
- OBD-II Scanner: To retrieve and clear diagnostic trouble codes.
- Multimeter: To test electrical components like ignition coils and fuel injectors.
- Spark Plug Tester: To check the spark plug’s functionality.
- Compression Tester: To measure the compression in cylinder 4.
- Vacuum Leak Detector (Smoke Machine): To identify vacuum leaks in the intake system.
- Stethoscope or Listening Device: To listen to fuel injectors and other components.
- Socket Set and Wrenches: For removing and installing spark plugs, ignition coils, and other parts.
- Screwdrivers: Various sizes and types for removing covers and accessing components.
- Pliers: For disconnecting hoses and connectors.
- Protective Gloves and Safety Glasses: To ensure safety during the diagnostic process.
- Service Manual or Repair Database: To reference specifications and procedures.
Equipping yourself with these tools will enable you to perform a thorough diagnosis of the P0304 code. AutoExplain.com can also provide guidance on using these tools effectively, ensuring you get the most accurate results.
6. Step-by-Step Diagnostic Procedure for P0304
To effectively diagnose the P0304 code, follow this detailed step-by-step procedure:
Step 1: Initial Assessment
- Connect the OBD-II Scanner: Plug the scanner into the OBD-II port and retrieve the P0304 code. Note any other related codes.
- Record Freeze Frame Data: Capture the freeze frame data, which provides a snapshot of the conditions when the code was triggered.
- Clear the Code: Clear the P0304 code and take the vehicle for a test drive to see if the code returns.
Step 2: Visual Inspection
- Spark Plugs: Remove the spark plug from cylinder 4 and inspect it for damage, wear, or fouling. Compare it with a spark plug from a functioning cylinder.
- Ignition Coils: Check the ignition coil for cracks, damage, or corrosion. Ensure the connector is securely attached.
- Wiring and Connectors: Inspect the wiring and connectors associated with the ignition coil and fuel injector for damage, fraying, or corrosion.
- Vacuum Lines: Examine all vacuum lines connected to the intake manifold for cracks, leaks, or disconnections.
- Air Intake System: Inspect the air filter and intake ducts for blockages or damage.
Step 3: Component Testing
- Spark Plug Testing:
- Visual Inspection: Check for signs of wear, carbon buildup, or damage.
- Spark Test: Use a spark plug tester to ensure the spark plug produces a strong, consistent spark.
- Ignition Coil Testing:
- Resistance Test: Use a multimeter to measure the resistance of the ignition coil. Compare the reading to the manufacturer’s specifications.
- Coil Swap: Swap the ignition coil from cylinder 4 with one from a known good cylinder (e.g., cylinder 1). If the misfire moves to cylinder 1, the ignition coil is likely the problem.
- Fuel Injector Testing:
- Listening Test: Use a stethoscope to listen to the fuel injector while the engine is running. It should produce a consistent clicking sound.
- Resistance Test: Use a multimeter to measure the resistance of the fuel injector. Compare the reading to the manufacturer’s specifications.
- Injector Swap: If possible, swap the fuel injector from cylinder 4 with one from a known good cylinder. If the misfire moves, the injector is likely the issue.
- Compression Test:
- Disable the fuel and ignition systems.
- Remove all spark plugs.
- Insert the compression tester into the spark plug hole of cylinder 4.
- Crank the engine several times and record the compression reading.
- Compare the reading to the manufacturer’s specifications. A low reading indicates potential issues with piston rings, valves, or the head gasket.
- Vacuum Leak Testing:
- Use a smoke machine to introduce smoke into the intake system.
- Check for smoke escaping from vacuum lines, intake manifold gaskets, or other potential leak points.
- Alternatively, use a carburetor cleaner or propane torch to spray around vacuum lines and intake manifold. If the engine RPM changes, it indicates a vacuum leak.
Step 4: Advanced Testing (If Necessary)
- Leak-Down Test: If the compression test indicates low compression, perform a leak-down test to pinpoint the source of the leak (e.g., valves, piston rings, head gasket).
- Fuel Pressure Test: Check the fuel pressure to ensure it is within the manufacturer’s specifications.
- EGR Valve Inspection: Inspect the EGR valve for proper operation and carbon buildup.
Step 5: Final Verification
- Clear the Code: After completing the tests and repairs, clear the P0304 code.
- Test Drive: Take the vehicle for a test drive to ensure the misfire is resolved and the code does not return.
- Monitor Data: Use the OBD-II scanner to monitor engine data, such as misfire counts, to confirm that the issue is resolved.
By following this detailed diagnostic procedure, you can systematically identify and address the root cause of the P0304 code. AutoExplain.com offers expert support throughout this process, providing guidance and resources to help you achieve accurate results.
7. Repairing the P0304 Code: Solutions and Procedures
Once you have diagnosed the cause of the P0304 code, the next step is to implement the appropriate repair. Here are common solutions and procedures:
- Replace Faulty Spark Plugs:
- If the spark plug is worn, damaged, or fouled, replace it with a new one that meets the manufacturer’s specifications.
- Ensure the spark plug is properly gapped before installation.
- Replace Defective Ignition Coils:
- If the ignition coil is found to be defective, replace it with a new one.
- Ensure the new ignition coil is properly connected and secured.
- Clean or Replace Fuel Injectors:
- If the fuel injector is clogged or malfunctioning, try cleaning it using a fuel injector cleaner.
- If cleaning does not resolve the issue, replace the fuel injector with a new one.
- Repair Vacuum Leaks:
- Locate and repair any vacuum leaks in the intake manifold, vacuum lines, or other components.
- Replace cracked or damaged vacuum lines.
- Tighten loose connections and replace worn gaskets.
- Address Compression Issues:
- If the compression test reveals low compression, further investigation is needed to determine the cause.
- Worn piston rings may require an engine rebuild.
- Damaged valves may need to be replaced or re-seated.
- A leaking head gasket must be replaced.
- Repair Wiring Problems:
- Repair or replace any damaged or corroded wiring and connectors related to the ignition and fuel systems.
- Ensure all connections are clean and secure.
- Clean or Replace EGR Valve:
- If the EGR valve is clogged with carbon deposits, clean it thoroughly.
- If the EGR valve is malfunctioning, replace it with a new one.
- Clear the Code and Test Drive:
- After completing the repairs, clear the P0304 code using an OBD-II scanner.
- Take the vehicle for a test drive to ensure the misfire is resolved and the code does not return.
- Monitor engine data to confirm that the issue is resolved.
By following these repair procedures, you can effectively address the P0304 code and restore your Mercedes Benz to optimal performance. AutoExplain.com provides detailed guidance and support throughout the repair process, ensuring you achieve successful results.
8. Detailed Repair Procedures for Common Causes
To provide a more in-depth understanding, here are detailed repair procedures for some of the common causes of the P0304 code:
Replacing Spark Plugs
Tools Needed:
- Socket set
- Spark plug socket
- Torque wrench
- Spark plug gap tool
- New spark plugs
Procedure:
- Preparation: Allow the engine to cool completely before starting.
- Access: Locate the spark plug for cylinder 4. Remove any covers or components that may be obstructing access.
- Disconnect: Disconnect the ignition coil from the spark plug.
- Remove Spark Plug: Use the spark plug socket to carefully remove the spark plug.
- Inspect: Examine the old spark plug for signs of wear, damage, or fouling.
- Gap the New Spark Plug: Use the spark plug gap tool to ensure the new spark plug is properly gapped according to the manufacturer’s specifications.
- Install New Spark Plug: Carefully thread the new spark plug into the cylinder head by hand to avoid cross-threading.
- Torque: Use the torque wrench to tighten the spark plug to the manufacturer’s specified torque.
- Reconnect: Reconnect the ignition coil to the spark plug.
- Reassemble: Reinstall any covers or components that were removed.
Replacing Ignition Coils
Tools Needed:
- Socket set
- Wrench set
- New ignition coil
Procedure:
- Preparation: Ensure the engine is off.
- Access: Locate the ignition coil for cylinder 4. Remove any covers or components that may be obstructing access.
- Disconnect: Disconnect the electrical connector from the ignition coil.
- Remove Ignition Coil: Use the appropriate socket or wrench to remove the ignition coil from the cylinder head.
- Install New Ignition Coil: Install the new ignition coil, ensuring it is properly seated and aligned.
- Reconnect: Reconnect the electrical connector to the ignition coil.
- Reassemble: Reinstall any covers or components that were removed.
Cleaning Fuel Injectors
Tools Needed:
- Fuel injector cleaner
- Socket set
- Wrench set
- Safety glasses
- Gloves
Procedure:
- Preparation: Disconnect the fuel system.
- Access: Locate the fuel injector for cylinder 4. Remove any components that may be obstructing access.
- Disconnect: Disconnect the electrical connector from the fuel injector.
- Remove Fuel Injector: Carefully remove the fuel injector from the fuel rail.
- Clean: Use fuel injector cleaner to thoroughly clean the fuel injector. Follow the instructions on the cleaner.
- Reinstall: Reinstall the fuel injector into the fuel rail, ensuring it is properly seated and aligned.
- Reconnect: Reconnect the electrical connector to the fuel injector.
- Reassemble: Reinstall any components that were removed.
Repairing Vacuum Leaks
Tools Needed:
- Smoke machine or carburetor cleaner
- Wrench set
- Socket set
- New vacuum lines
- New gaskets
Procedure:
- Locate Leak: Use a smoke machine or carburetor cleaner to locate the vacuum leak.
- Access: Remove any components that may be obstructing access to the leak.
- Repair:
- If the leak is due to a cracked or damaged vacuum line, replace the line with a new one.
- If the leak is due to a worn gasket, replace the gasket with a new one.
- Tighten any loose connections.
- Reassemble: Reinstall any components that were removed.
By following these detailed repair procedures, you can effectively address common causes of the P0304 code. AutoExplain.com offers additional resources and expert support to guide you through these procedures, ensuring you achieve successful outcomes.
9. Advanced Diagnostic Techniques for P0304
In some cases, diagnosing the P0304 code may require advanced techniques. These methods can help pinpoint elusive issues that are not easily identified through standard procedures.
Using an Oscilloscope
An oscilloscope can be used to analyze the waveforms of ignition coils and fuel injectors. This can help identify issues such as:
- Ignition Coil Waveform Analysis:
- Primary Ignition Waveform: An oscilloscope can display the primary ignition waveform, which shows the voltage and current in the ignition coil’s primary circuit. Irregularities in the waveform can indicate issues with the coil’s internal resistance, insulation, or switching.
- Secondary Ignition Waveform: The secondary ignition waveform shows the voltage at the spark plug. Analyzing this waveform can reveal issues with the spark plug gap, insulation, or the presence of misfires.
- Fuel Injector Waveform Analysis:
- An oscilloscope can display the fuel injector waveform, which shows the voltage and current during the injector’s operation. This can help identify issues such as:
- Injector Response Time: The time it takes for the injector to open and close.
- Injector Current Draw: Indicates if the injector is drawing the correct amount of current.
- Injector Signal Integrity: Identifies any disruptions or abnormalities in the signal.
Performing a Cylinder Leak-Down Test
A cylinder leak-down test can provide more detailed information about the condition of the cylinder’s components. This test involves pressurizing the cylinder with compressed air and measuring the rate at which the pressure drops. The location of the air leak can indicate specific issues:
- Air Escaping from the Exhaust: Indicates a leaking exhaust valve.
- Air Escaping from the Intake: Indicates a leaking intake valve.
- Air Escaping from the Coolant Reservoir: Indicates a leaking head gasket.
- Air Escaping from the Oil Fill Cap: Indicates worn piston rings.
Using a Scan Tool for Advanced Data Analysis
Advanced scan tools can provide access to a wide range of engine data parameters, which can be helpful in diagnosing intermittent or complex misfires. Key parameters to monitor include:
- Misfire Counts: Identifies the frequency of misfires in each cylinder.
- Fuel Trims: Indicates whether the engine is running lean or rich.
- Oxygen Sensor Readings: Monitors the performance of the oxygen sensors.
- Mass Airflow (MAF) Sensor Readings: Checks the accuracy of the MAF sensor.
- Engine Load: Indicates the amount of stress on the engine.
By analyzing these data parameters, you can gain insights into the underlying causes of the P0304 code. AutoExplain.com offers expert guidance on interpreting this data, helping you make accurate diagnoses.
10. Preventive Measures to Avoid P0304 Code Reoccurrence
Preventing the reoccurrence of the P0304 code involves regular maintenance and proactive care. Here are some essential preventive measures:
- Regular Spark Plug Maintenance:
- Replace spark plugs at the manufacturer-recommended intervals.
- Inspect spark plugs regularly for signs of wear, damage, or fouling.
- Ensure spark plugs are properly gapped during installation.
- Ignition System Check:
- Inspect ignition coils for cracks, damage, or corrosion.
- Check wiring and connectors for damage, fraying, or corrosion.
- Replace ignition coils as needed.
- Fuel System Maintenance:
- Use high-quality fuel to prevent fuel injector clogging.
- Add fuel injector cleaner to the fuel tank periodically.
- Replace the fuel filter at the recommended intervals.
- Vacuum System Inspection:
- Regularly inspect vacuum lines for cracks, leaks, or disconnections.
- Replace any damaged or worn vacuum lines.
- Ensure all connections are tight and secure.
- Compression Testing:
- Perform a compression test periodically to monitor the condition of the engine’s cylinders.
- Address any compression issues promptly to prevent further damage.
- Engine Oil Maintenance:
- Change engine oil and filter at the manufacturer-recommended intervals.
- Use the correct type of engine oil for your vehicle.
- Air Filter Replacement:
- Replace the air filter at the recommended intervals to ensure proper airflow to the engine.
- Regular Vehicle Inspections:
- Have your vehicle inspected regularly by a qualified mechanic to identify potential issues before they become major problems.
- Monitor Engine Performance:
- Pay attention to any changes in engine performance, such as rough idling, loss of power, or poor fuel economy.
- Address any issues promptly.
By following these preventive measures, you can reduce the likelihood of the P0304 code reoccurring and keep your Mercedes Benz running smoothly. AutoExplain.com offers expert advice on maintaining your vehicle, helping you avoid costly repairs.
11. The Role of AutoExplain.com in Diagnosing and Resolving P0304
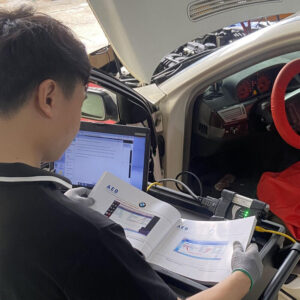
AutoExplain.com plays a crucial role in helping vehicle owners and technicians diagnose and resolve the P0304 code. Our remote diagnostic services provide expert assistance without the need for an in-person visit. Here’s how we can help:
- Expert Remote Diagnostics:
- Our experienced technicians can remotely access your vehicle’s diagnostic data using advanced tools and software.
- We can analyze the data in real-time to identify the root cause of the P0304 code.
- Step-by-Step Guidance:
- We provide step-by-step instructions on how to perform diagnostic tests and repairs.
- Our technicians can guide you through the process, answering questions and providing support.
- Access to Repair Information:
- AutoExplain.com provides access to a comprehensive database of repair information, including wiring diagrams, technical service bulletins, and repair procedures.
- Component Testing Assistance:
- We can help you test various components, such as spark plugs, ignition coils, and fuel injectors, using a multimeter or other testing tools.
- Advanced Data Analysis:
- Our technicians can analyze advanced engine data parameters to identify subtle issues that may be causing the misfire.
- ECU Programming and Software Updates:
- In some cases, the P0304 code may be caused by a software issue in the ECU. AutoExplain.com can provide ECU programming and software updates to resolve these issues.
- Customized Solutions:
- We tailor our diagnostic and repair solutions to your vehicle’s specific needs, ensuring the most effective outcome.
By leveraging AutoExplain.com’s expertise and resources, you can accurately diagnose and resolve the P0304 code, saving time and money on costly repairs.
12. Benefits of Using AutoExplain.com for Remote Diagnostics
Choosing AutoExplain.com for remote diagnostics offers numerous benefits:
- Convenience:
- Remote diagnostics can be performed from the comfort of your home or shop, eliminating the need to travel to a repair facility.
- Cost Savings:
- Remote diagnostics can be more affordable than traditional in-person diagnostics.
- You can avoid the costs of towing and rental cars.
- Expert Assistance:
- Our experienced technicians provide expert guidance and support, ensuring accurate diagnoses and effective repairs.
- Faster Turnaround:
- Remote diagnostics can often be performed more quickly than traditional diagnostics, getting you back on the road sooner.
- Access to Advanced Technology:
- AutoExplain.com uses advanced diagnostic tools and software to provide the most accurate and comprehensive diagnoses.
- Customized Solutions:
- We tailor our diagnostic and repair solutions to your vehicle’s specific needs, ensuring the best possible outcome.
- Support and Guidance:
- Our technicians provide ongoing support and guidance throughout the diagnostic and repair process, answering questions and providing assistance as needed.
By choosing AutoExplain.com, you can enjoy the benefits of expert diagnostics, convenience, and cost savings. Contact us today via WhatsApp at +1(936)2896695 or email at [email protected] to learn more about our remote diagnostic services. Our office is located at 4590 Angus Road, New York, United States. Visit our website at AutoExplain.com for additional information.
13. Case Studies: Successful P0304 Repairs with AutoExplain.com
To illustrate the effectiveness of AutoExplain.com, here are a few case studies showcasing successful P0304 repairs:
Case Study 1: Mercedes-Benz C-Class Misfire
- Problem: A Mercedes-Benz C-Class owner experienced a persistent P0304 code, accompanied by rough idling and loss of power.
- Diagnosis: AutoExplain.com performed remote diagnostics and identified a faulty ignition coil in cylinder 4.
- Solution: The owner replaced the ignition coil following our step-by-step instructions. The code was cleared, and the vehicle’s performance was restored.
- Outcome: The owner saved on diagnostic fees and avoided a costly trip to the repair shop.
Case Study 2: Mercedes-Benz E-Class Vacuum Leak
- Problem: A Mercedes-Benz E-Class exhibited a P0304 code, along with poor fuel economy and engine hesitation.
- Diagnosis: AutoExplain.com conducted remote diagnostics and identified a vacuum leak in the intake manifold.
- Solution: The owner repaired the vacuum leak by replacing a worn gasket, following our guidance.
- Outcome: The P0304 code was resolved, and the vehicle’s fuel economy and performance improved significantly.
Case Study 3: Mercedes-Benz S-Class Fuel Injector Issue
- Problem: A Mercedes-Benz S-Class displayed a P0304 code, along with a strong smell of fuel and rough engine performance.
- Diagnosis: AutoExplain.com remotely diagnosed a clogged fuel injector in cylinder 4.
- Solution: The owner had the fuel injector professionally cleaned and reinstalled it, following our recommendations.
- Outcome: The P0304 code was cleared, and the vehicle’s engine performance returned to normal.
These case studies highlight how AutoExplain.com’s remote diagnostic services can effectively resolve the P0304 code and other automotive issues, providing convenient and cost-effective solutions.
14. Cost Analysis: DIY vs. Professional Repair with AutoExplain.com
When facing a P0304 code, you have two primary options: DIY repair or professional service. Here’s a cost analysis comparing both approaches, highlighting the benefits of using AutoExplain.com:
DIY Repair:
- Pros:
- Potential cost savings on labor.
- Sense of accomplishment.
- Cons:
- Requires technical knowledge and experience.
- May require purchasing specialized tools.
- Risk of misdiagnosis or incorrect repair.
- Time-consuming.
Cost Breakdown (DIY):
- OBD-II Scanner: $50 – $200
- Multimeter: $20 – $100
- Spark Plug Socket: $10 – $30
- Replacement Parts (e.g., spark plugs, ignition coils): $50 – $200
- Total Estimated Cost: $130 – $530
Professional Repair (Traditional):
- Pros:
- Expert diagnosis and repair.
- Guaranteed workmanship.
- Cons:
- Higher cost due to labor charges.
- Inconvenience of dropping off and picking up the vehicle.
- Potential for unnecessary repairs.
Cost Breakdown (Traditional):
- Diagnostic Fee: $80 – $150
- Labor Costs: $80 – $150 per hour
- Replacement Parts: $50 – $200
- Total Estimated Cost: $210 – $700+
Professional Repair with AutoExplain.com: