The 9062 Mercedes Code signifies a fault related to the auxiliary battery system, indicating the component G1/7 (auxiliary battery) is either defective or not installed. This error can trigger various electrical issues, especially regarding the transmission’s ability to shift into Park. AutoExplain.com is here to provide you with comprehensive guidance on diagnosing, understanding, and resolving this common Mercedes-Benz problem. Learn about auxiliary battery replacement, battery control module issues, and CAN communication problems to keep your Mercedes-Benz running smoothly.
1. Understanding the 9062 Mercedes Code
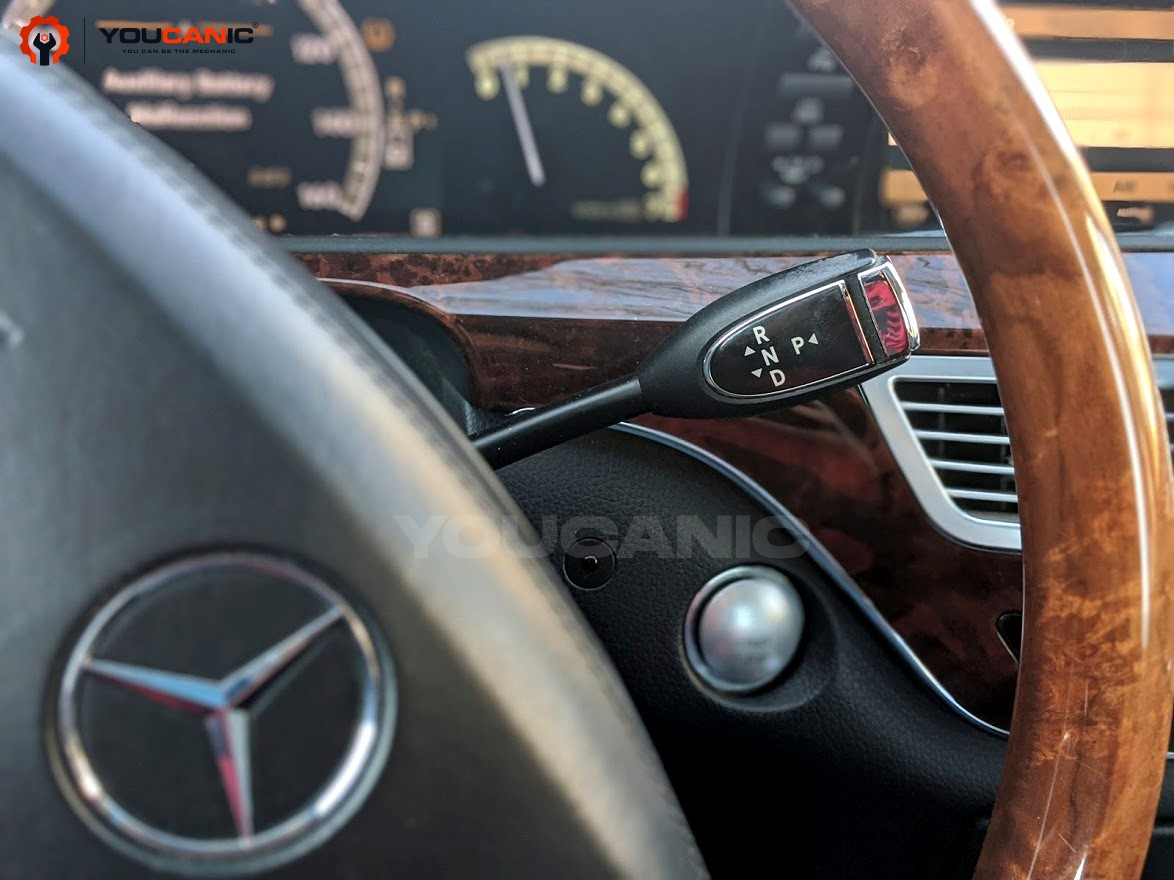
The 9062 Mercedes code indicates a problem with the auxiliary battery, also known as the secondary battery. This battery plays a vital role in powering specific electrical systems, including the electronic gear shifter and other accessories. When this code appears, it signals that the auxiliary battery is either faulty or not present, which can affect the vehicle’s functionality.
1.1 What Does the 9062 Code Mean?
The 9062 code directly points to the auxiliary battery system, specifically stating that “Component G1/7 (auxiliary battery) is defective or not installed.” This means the vehicle’s diagnostic system has detected an issue with the auxiliary battery’s performance or its presence.
1.2 Symptoms Associated with the 9062 Code
Several symptoms may accompany the 9062 code, including:
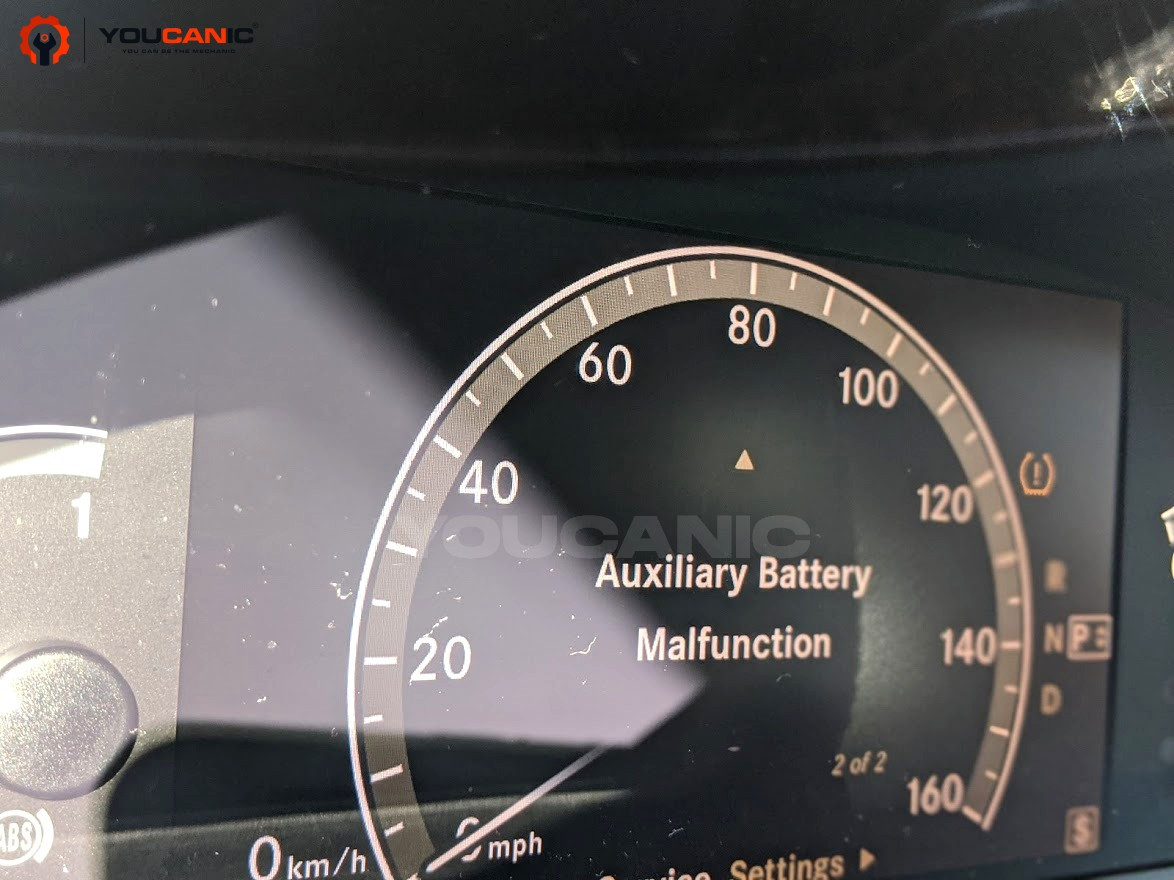
- Auxiliary Battery Malfunction Message: This is the most common symptom, appearing on the dashboard display.
- Stop Vehicle Shift to P Leave Engine Running: This message may appear if the auxiliary battery voltage is low.
- Battery Symbol on Dashboard: A general battery warning light may illuminate.
- Electrical System Issues: Malfunctions in systems powered by the auxiliary battery, such as the COMAND system or heated seats.
- Inability to Shift to Park: In critical situations where the main battery fails, the auxiliary battery should allow shifting to Park. If it doesn’t, the 9062 code could be a culprit.
1.3 Common Causes of the 9062 Code
Several factors can trigger the 9062 code:
- Defective Auxiliary Battery: The most common cause is a battery that has aged and can no longer hold a charge.
- Faulty Battery Management System (BMS): The BMS monitors and controls the auxiliary battery’s charging and discharging.
- Wiring Issues: Damaged, corroded, or loose wiring can disrupt the battery’s connection and communication with other systems.
- Faulty Charging System: Issues with the alternator or voltage regulator can prevent the auxiliary battery from charging properly.
- Auxiliary Battery Relay Issues: A malfunctioning relay can prevent the battery from receiving power.
- CAN Communication Problems: Interruptions in the Controller Area Network (CAN) can affect communication between the auxiliary battery and other modules.
 Mercedes-Benz Auxiliary Battery Location
2. Diagnosing the 9062 Mercedes Code
Proper diagnosis is crucial to accurately address the 9062 code. Here’s a step-by-step guide to help you identify the root cause of the problem.
2.1 Tools Required for Diagnosis
- OBD-II Scanner: Essential for reading and clearing diagnostic trouble codes (DTCs). For Mercedes-Benz-specific codes, a scanner capable of reading all systems is recommended.
- Multimeter: Used to measure voltage and check for continuity in circuits.
- Battery Load Tester: To assess the auxiliary battery’s ability to hold a charge under load.
- Wiring Diagram: A vehicle-specific wiring diagram for the auxiliary battery circuit.
2.2 Step-by-Step Diagnostic Procedure
- Read the Fault Codes:
- Connect the OBD-II scanner to the vehicle’s diagnostic port.
- Retrieve all stored fault codes. Note down all codes present, including the 9062 code.
- Clear the codes and test drive the vehicle to see if the 9062 code returns.
- Inspect the Auxiliary Battery:
- Locate the auxiliary battery (refer to section 4 for common locations).
- Visually inspect the battery for any signs of damage, such as cracks or leaks.
- Check the battery terminals for corrosion. Clean them if necessary.
- Measure Battery Voltage:
- Use a multimeter to measure the voltage of the auxiliary battery. A fully charged battery should read approximately 12.6 volts.
- If the voltage is significantly lower (e.g., below 12 volts), the battery may be discharged or defective.
- Perform a Load Test:
- Use a battery load tester to assess the battery’s ability to hold a charge under load.
- Follow the load tester’s instructions. If the battery fails the load test, it likely needs replacement.
- Check the Charging System:
- With the engine running, use a multimeter to check the voltage at the auxiliary battery terminals.
- The voltage should be between 13.5 and 14.5 volts, indicating that the charging system is functioning correctly.
- If the voltage is outside this range, investigate the alternator and voltage regulator.
- Inspect Wiring and Connections:
- Examine the wiring and connectors in the auxiliary battery circuit for any signs of damage, corrosion, or looseness.
- Use a wiring diagram to trace the circuit and identify potential problem areas.
- Check the ground connections to ensure they are clean and secure.
- Test the Battery Management System (BMS):
- Use an advanced diagnostic scanner to check the BMS for any fault codes or abnormal readings.
- Verify that the BMS is properly communicating with the auxiliary battery and the vehicle’s other systems.
- Check the Auxiliary Battery Relay:
- Locate the auxiliary battery relay (K57/2) in the vehicle’s electrical system.
- Test the relay to ensure it is functioning correctly.
- Replace the relay if it is faulty.
- Evaluate CAN Communication:
- Use a diagnostic scanner to monitor the CAN bus communication between the auxiliary battery and other modules.
- Look for any communication errors or interruptions.
- Address any CAN communication issues by inspecting the wiring and connectors and troubleshooting the affected modules.
2.3 Interpreting Diagnostic Results
- Low Battery Voltage: Indicates a discharged or defective battery.
- Failed Load Test: Confirms that the battery cannot hold a charge and needs replacement.
- Charging System Issues: Points to problems with the alternator, voltage regulator, or related components.
- Wiring Problems: Identifies damaged or corroded wiring that needs repair or replacement.
- BMS Faults: Indicates issues with the battery management system that need further investigation.
- Relay Malfunction: Confirms that the auxiliary battery relay is not functioning correctly.
- CAN Communication Errors: Suggests interruptions in the vehicle’s communication network.
If you are unsure about any of these steps or lack the necessary tools, AutoExplain.com offers remote technical support to guide you through the diagnostic process. Contact us via WhatsApp at (+84)967469410 or email us at [email protected] for expert assistance.
3. Repairing the 9062 Mercedes Code
Once you’ve diagnosed the cause of the 9062 Mercedes code, the next step is to implement the necessary repairs. Here’s a detailed guide on how to fix common issues associated with this code.
3.1 Replacing the Auxiliary Battery
The most common solution for the 9062 code is replacing the auxiliary battery. Here’s how to do it:
- Gather the Necessary Tools:
- New auxiliary battery (ensure it matches the specifications of the original battery)
- Socket set
- Wrench set
- Screwdriver
- Gloves
- Safety glasses
- Locate the Auxiliary Battery:
- Refer to section 4 for common locations of the auxiliary battery in Mercedes-Benz vehicles.
- Disconnect the Negative Terminal:
- Use a wrench to disconnect the negative terminal of the auxiliary battery.
- Secure the cable away from the battery to prevent accidental contact.
- Disconnect the Positive Terminal:
- Disconnect the positive terminal of the auxiliary battery.
- Again, secure the cable away from the battery.
- Remove the Old Battery:
- Remove any brackets or fasteners holding the battery in place.
- Carefully lift the old battery out of the vehicle.
- Install the New Battery:
- Place the new auxiliary battery in the battery tray.
- Secure it with the brackets or fasteners.
- Connect the Positive Terminal:
- Connect the positive terminal to the new battery.
- Ensure it is tightened securely.
- Connect the Negative Terminal:
- Connect the negative terminal to the new battery.
- Ensure it is tightened securely.
- Verify the Installation:
- Double-check that all connections are secure and that the battery is properly installed.
- Clear the Fault Codes:
- Use an OBD-II scanner to clear the 9062 code and any other stored fault codes.
- Test the System:
- Start the vehicle and check if the auxiliary battery malfunction message is gone.
- Test the electrical systems powered by the auxiliary battery to ensure they are functioning correctly.
3.2 Addressing Wiring Issues
If damaged or corroded wiring is causing the 9062 code, follow these steps to repair it:
- Inspect the Wiring:
- Carefully examine the wiring in the auxiliary battery circuit for any signs of damage, such as fraying, cracking, or corrosion.
- Clean Corroded Connections:
- Use a wire brush or sandpaper to clean any corroded connections.
- Apply dielectric grease to protect the connections from future corrosion.
- Repair Damaged Wiring:
- If the wiring is frayed or cracked, repair it by splicing in a new section of wire.
- Use heat-shrink tubing to protect the spliced connection.
- Replace Damaged Connectors:
- If the connectors are damaged, replace them with new ones.
- Ensure the new connectors are properly crimped and secured.
- Verify Continuity:
- Use a multimeter to check for continuity in the wiring circuit.
- If there is no continuity, identify and repair the break in the circuit.
- Secure the Wiring:
- Secure the wiring with zip ties or electrical tape to prevent it from rubbing against other components.
- Test the System:
- Start the vehicle and check if the auxiliary battery malfunction message is gone.
- Test the electrical systems powered by the auxiliary battery to ensure they are functioning correctly.
3.3 Fixing Charging System Problems
If the alternator or voltage regulator is causing the 9062 code, follow these steps to address the issue:
- Test the Alternator:
- Use a multimeter to check the alternator’s output voltage.
- With the engine running, the alternator should produce between 13.5 and 14.5 volts.
- If the voltage is outside this range, the alternator may need replacement.
- Replace the Alternator:
- Disconnect the negative terminal of the main battery.
- Remove the belt from the alternator pulley.
- Disconnect the wiring from the alternator.
- Remove the bolts holding the alternator in place.
- Install the new alternator and reassemble the components in the reverse order.
- Check the Voltage Regulator:
- The voltage regulator controls the alternator’s output voltage.
- If the voltage regulator is faulty, it can cause the alternator to overcharge or undercharge the battery.
- Replace the voltage regulator if necessary.
- Test the System:
- Start the vehicle and check if the auxiliary battery malfunction message is gone.
- Test the electrical systems powered by the auxiliary battery to ensure they are functioning correctly.
3.4 Addressing BMS Issues
If the Battery Management System (BMS) is causing the 9062 code, follow these steps:
- Check for BMS Fault Codes:
- Use an advanced diagnostic scanner to check the BMS for any fault codes.
- Note down any codes present.
- Update BMS Software:
- Check if there is a software update available for the BMS.
- Update the BMS software using a diagnostic scanner.
- Replace the BMS:
- If the BMS is faulty and cannot be repaired, replace it with a new one.
- Ensure the new BMS is properly programmed and calibrated.
- Test the System:
- Start the vehicle and check if the auxiliary battery malfunction message is gone.
- Test the electrical systems powered by the auxiliary battery to ensure they are functioning correctly.
3.5 Replacing the Auxiliary Battery Relay
If the auxiliary battery relay (K57/2) is faulty, follow these steps to replace it:
- Locate the Relay:
- Refer to the vehicle’s wiring diagram to locate the auxiliary battery relay.
- Remove the Old Relay:
- Disconnect the relay from its socket.
- Install the New Relay:
- Plug the new relay into the socket.
- Test the System:
- Start the vehicle and check if the auxiliary battery malfunction message is gone.
- Test the electrical systems powered by the auxiliary battery to ensure they are functioning correctly.
 Function Of Mercedes Auxiliary Battery
3.6 Clearing the 9062 Code
After performing the necessary repairs, it’s crucial to clear the 9062 code using an OBD-II scanner. This will reset the vehicle’s diagnostic system and turn off the warning message.
- Connect the Scanner: Plug the OBD-II scanner into the vehicle’s diagnostic port.
- Select the “Clear Codes” Function: Navigate to the function that allows you to clear fault codes.
- Confirm the Action: Follow the scanner’s prompts to confirm that you want to clear the codes.
- Verify the Code is Cleared: After clearing the codes, start the vehicle and check if the 9062 code and the auxiliary battery malfunction message are gone.
If the code returns after clearing it, there may still be an underlying issue that needs to be addressed.
3.7 When to Seek Professional Help
While many repairs can be performed DIY, some situations require professional expertise:
- Complex Electrical Issues: If you are not comfortable working with electrical systems or if the problem is difficult to diagnose, it’s best to seek professional help.
- BMS Programming: Battery Management System (BMS) programming and calibration often require specialized tools and knowledge.
- Persistent Code: If the 9062 code returns after performing repairs, it may indicate a more complex problem that requires professional diagnosis.
AutoExplain.com offers remote technical support to assist you with diagnosing and repairing the 9062 Mercedes code. Our experienced technicians can provide guidance and support to help you resolve the issue efficiently. Contact us via WhatsApp at (+84)967469410 or email us at [email protected] for expert assistance.
4. Auxiliary Battery Locations in Mercedes-Benz Models
The auxiliary battery location can vary depending on the Mercedes-Benz model. Here are some common locations:
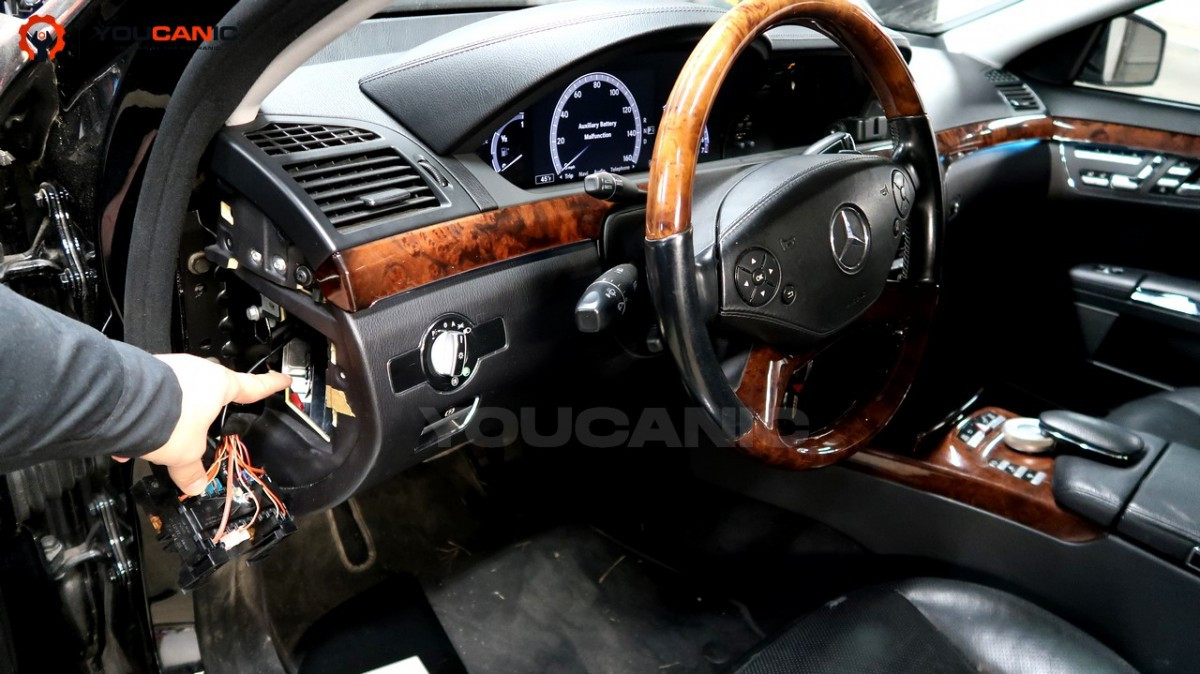
- Left Side of the Dashboard: This is a common location, often found in models like the S-Class (W221 and W222).
- Engine Bay: In some models, like the E-Class (W211), the auxiliary battery is located in the engine bay, typically on the passenger side.
- Under the Front Passenger Seat: Many SUVs, such as the ML, R, and GL classes, have the auxiliary battery under the front passenger seat.
- Behind the Driver’s Seat: In models like the SLK and SL, the auxiliary battery is located behind the driver’s seat back panel.
- Trunk: Some models have the auxiliary battery in the trunk, often near the fuse box.
Here is a table summarizing auxiliary battery locations for several Mercedes-Benz models:
| Model |
Location |
| S-Class (W221, W222) |
Left side of the dashboard |
| E-Class (W211) |
Engine bay (passenger side) |
| ML, R, GL Class |
Under the front passenger seat |
| SLK, SL |
Behind the driver’s seat |
| C-Class (W205) |
Driver’s side |
| GLC-Class (X253, C253) |
Driver’s side |
5. Maintaining Your Mercedes-Benz Auxiliary Battery
Proper maintenance can extend the life of your auxiliary battery and prevent issues that trigger the 9062 code. Here are some tips for maintaining your auxiliary battery:
5.1 Regular Voltage Checks
Regularly check the voltage of your auxiliary battery using a multimeter. A healthy battery should maintain a voltage of around 12.6 volts when the engine is off. If the voltage drops below 12 volts, it may indicate a problem.
5.2 Keep Terminals Clean
Keep the battery terminals clean and free from corrosion. Use a wire brush to remove any corrosion, and apply dielectric grease to prevent future buildup.
5.3 Avoid Deep Discharges
Avoid letting the auxiliary battery discharge completely. Deep discharges can damage the battery and shorten its lifespan. If you know that the vehicle will be sitting unused for an extended period, consider using a battery maintainer to keep the battery charged.
5.4 Ensure Proper Charging
Make sure that the vehicle’s charging system is functioning correctly. A faulty alternator or voltage regulator can prevent the auxiliary battery from charging properly, leading to premature failure.
5.5 Battery Load Testing
Have the auxiliary battery load tested periodically to assess its ability to hold a charge under load. This can help you identify a weakening battery before it fails completely.
5.6 Regular Vehicle Use
Regular vehicle use can help maintain the auxiliary battery’s health. Short trips can prevent the battery from fully charging, so try to take longer drives occasionally to ensure the battery is properly charged.
 Auxilary Battery
6. Common Mistakes to Avoid
When dealing with the 9062 Mercedes code, there are several common mistakes that you should avoid:
- Ignoring the Symptoms: Don’t ignore the symptoms of a faulty auxiliary battery, such as the auxiliary battery malfunction message or electrical system issues. Addressing the problem early can prevent further damage.
- Using Generic Scanners: Generic OBD-II scanners may not be able to read Mercedes-Benz-specific fault codes. Use a scanner that is capable of reading all systems to accurately diagnose the problem.
- Neglecting Wiring Inspections: Always inspect the wiring and connections in the auxiliary battery circuit for any signs of damage, corrosion, or looseness. Wiring problems can often be the root cause of the 9062 code.
- Skipping Load Tests: Don’t skip the battery load test. This test is essential for assessing the battery’s ability to hold a charge under load and can help you determine if the battery needs replacement.
- Improper Battery Installation: Ensure that the new auxiliary battery is properly installed and secured. Loose connections can lead to further problems.
- Failing to Clear Codes: Always clear the fault codes after performing repairs. This will reset the vehicle’s diagnostic system and turn off the warning message.
- Assuming the Battery is the Only Problem: While the battery is often the cause, other components like the BMS, relay, or charging system can also be at fault. Thoroughly diagnose the system before replacing parts.
7. Real-World Scenarios and Case Studies
Understanding how the 9062 code manifests in real-world scenarios can provide valuable insights. Here are a couple of case studies:
7.1 Case Study 1: S-Class (W221) with 9062 Code
Vehicle: Mercedes-Benz S-Class (W221)
Symptom: Auxiliary battery malfunction message on the dashboard
Diagnosis: The technician used an OBD-II scanner to retrieve the 9062 code. Upon inspecting the auxiliary battery (located on the left side of the dashboard), they found that the battery voltage was low (11.8 volts). A load test confirmed that the battery was unable to hold a charge.
Solution: The technician replaced the auxiliary battery with a new one. After clearing the fault codes, the auxiliary battery malfunction message disappeared, and the vehicle’s electrical systems functioned correctly.
7.2 Case Study 2: ML-Class (W164) with 9062 Code
Vehicle: Mercedes-Benz ML-Class (W164)
Symptom: Stop Vehicle Shift to P Leave Engine Running message on the dashboard
Diagnosis: The technician retrieved the 9062 code using a diagnostic scanner. Upon inspecting the auxiliary battery (located under the front passenger seat), they found that the battery terminals were corroded. After cleaning the terminals, they measured the battery voltage (12.4 volts). However, a load test revealed that the battery was failing under load.
Solution: The technician replaced the auxiliary battery with a new one and applied dielectric grease to the terminals to prevent future corrosion. After clearing the fault codes, the warning message disappeared, and the vehicle operated normally.
8. Related Codes and Issues
Several other codes and issues can be related to the 9062 Mercedes code. Understanding these can help you diagnose and repair the problem more effectively:
8.1 B1028 – Component G1/7 (Auxiliary Battery) Has a Short Circuit to Ground
This code indicates a short circuit in the auxiliary battery circuit, which can be caused by damaged wiring or a faulty component.
8.2 B1029 – Component G1/7 (Auxiliary Battery) Has an Open Circuit
This code indicates an open circuit in the auxiliary battery circuit, which can be caused by a broken wire or a loose connection.
8.3 Stop Vehicle Shift to P Leave Engine Running
This message can be triggered by a low voltage in the main battery or the auxiliary battery.
8.4 Battery Symbol on Dashboard
A general battery warning light on the dashboard can indicate a problem with the main battery or the auxiliary battery.
8.5 CAN Communication Issues
Problems with the Controller Area Network (CAN) can affect communication between the auxiliary battery and other modules, leading to various fault codes.
9. Staying Up-to-Date with Mercedes-Benz Technology
Mercedes-Benz vehicles are known for their advanced technology, which means staying informed about the latest diagnostic and repair procedures is essential. Here are some tips for keeping up-to-date:
9.1 Official Mercedes-Benz Resources
Refer to official Mercedes-Benz resources, such as service manuals, technical bulletins, and training programs, for the most accurate and up-to-date information.
9.2 Online Forums and Communities
Participate in online forums and communities dedicated to Mercedes-Benz repair. These can be valuable resources for sharing knowledge and learning about common issues and solutions.
9.3 Training Courses
Consider taking training courses on Mercedes-Benz diagnostics and repair. These courses can provide you with the knowledge and skills you need to tackle complex problems.
9.4 Diagnostic Tools Updates
Keep your diagnostic tools updated with the latest software. These updates often include new diagnostic capabilities and repair procedures.
10. AutoExplain.com: Your Partner in Mercedes-Benz Repair
At AutoExplain.com, we are dedicated to providing you with the expertise and support you need to diagnose and repair your Mercedes-Benz. Our team of experienced technicians offers remote technical support to help you resolve complex issues quickly and efficiently.
10.1 Remote Technical Support
Our remote technical support services include:
- Diagnostic Assistance: We can help you diagnose the 9062 code and other Mercedes-Benz problems using advanced diagnostic techniques.
- Repair Guidance: We provide step-by-step guidance on how to repair common issues, including auxiliary battery replacement, wiring repairs, and charging system problems.
- Software Updates: We can assist you with software updates for your vehicle’s control modules.
- Programming and Coding: We offer programming and coding services for various Mercedes-Benz systems.
10.2 Contact Us
For expert assistance with the 9062 Mercedes code or any other Mercedes-Benz issue, contact AutoExplain.com today:
- WhatsApp: (+84)967469410
- Email: [email protected]
- Website: AutoExplain.com
- Office Address: 4590 Angus Road, New York, United States
Let AutoExplain.com be your trusted partner in Mercedes-Benz repair. We are here to help you keep your vehicle running smoothly and efficiently.
11. FAQ: Common Questions About Mercedes-Benz Auxiliary Batteries
Here are some frequently asked questions about Mercedes-Benz auxiliary batteries:
11.1 How do I know if my auxiliary battery is bad?
Common symptoms of a bad auxiliary battery include the “Auxiliary Battery Malfunction” message on the dashboard, electrical system issues, and a low battery voltage (below 12 volts). A load test can confirm if the battery is failing.
11.2 Can I drive with the auxiliary battery malfunction warning?
While it is generally safe to drive short distances with the auxiliary battery malfunction warning, it is recommended to have the issue resolved as soon as possible to prevent further electrical system problems.
11.3 How long does an auxiliary battery last?
The lifespan of an auxiliary battery is typically between 3 to 5 years, depending on usage and environmental conditions.
11.4 Do I need to program a new auxiliary battery?
In most cases, a new auxiliary battery does not need to be programmed. However, some newer models may require programming to ensure proper integration with the vehicle’s systems.
11.5 Can I use an aftermarket auxiliary battery?
Yes, you can use an aftermarket auxiliary battery as long as it meets the specifications of the original battery. Ensure that the voltage, capacity, and dimensions are compatible with your vehicle.
11.6 Where is the auxiliary battery located in my Mercedes-Benz?
The location of the auxiliary battery varies depending on the model. Common locations include the left side of the dashboard, the engine bay, under the front passenger seat, and behind the driver’s seat. Refer to your vehicle’s service manual for the exact location.
11.7 How much does it cost to replace an auxiliary battery?
The cost to replace an auxiliary battery can vary depending on the model and location. On average, the cost ranges from $250 to $450 at a dealership or auto repair shop. DIY replacement can cost between $30 and $95 for the battery.
11.8 Can a bad auxiliary battery affect the main battery?
Yes, a bad auxiliary battery can place additional strain on the main battery, as the charging system may work harder to compensate for the faulty auxiliary battery.
11.9 Is the auxiliary battery covered under warranty?
The auxiliary battery may be covered under the vehicle’s original warranty or an extended warranty. Check your warranty documentation for details.
11.10 What is the difference between a secondary battery and an auxiliary battery?
The terms are often used interchangeably. However, a secondary battery may power multiple electrical systems, while an auxiliary battery primarily serves as a backup for essential functions like the electronic gear shifter.
By understanding the 9062 Mercedes code, diagnosing the underlying issues, and implementing the appropriate repairs, you can keep your Mercedes-Benz running smoothly and efficiently. AutoExplain.com is here to provide you with the expert guidance and support you need every step of the way. Contact us today for assistance and let us help you resolve your Mercedes-Benz problems quickly and effectively.