01397 Audi fault code signals a problem with the Central Locking System Motor in the rear right door, often leading to security and convenience issues. At AutoExplain, we provide advanced diagnostic and programming solutions to resolve this and other complex automotive electronic issues efficiently. We empower automotive professionals to accurately diagnose and repair vehicle faults, increasing customer satisfaction and garage profitability.
1. Understanding the 01397 Audi Fault Code
The 01397 Audi fault code indicates a malfunction within the central locking system, specifically affecting the motor in the rear right door. This can manifest as the door failing to lock or unlock with the central locking system, creating security vulnerabilities and inconveniencing vehicle occupants. Let’s delve into the specifics of this fault code and how AutoExplain’s cutting-edge solutions can help.
1.1. Decoding the 01397 Error Message
The 01397 diagnostic trouble code (DTC) is a specific identifier used by the vehicle’s onboard diagnostic system to pinpoint issues. For Audi vehicles, this code translates to “Central Locking System Motor; Rear Right (V163): Implausible Signal”. This message tells the technician or vehicle owner that there is likely a problem with the electrical signals being sent to or from the central locking motor located in the rear right door of the vehicle.
The “implausible signal” portion of the error message suggests that the signal being received by the control module is not within the expected parameters. This could mean the signal is too high, too low, intermittent, or completely absent. The central locking system relies on accurate signals to properly actuate the locking mechanisms, so any deviation can cause the system to malfunction.
Common Interpretations of the “Implausible Signal”
- Electrical Faults: Issues such as short circuits, open circuits, or high resistance in the wiring harness.
- Component Failure: A failing motor or actuator within the door lock assembly.
- Control Module Problems: Issues within the central control unit that manages the locking system.
- Signal Interference: External electromagnetic interference disrupting the signal.
Understanding these interpretations is the first step in effectively diagnosing and resolving the underlying problem.
1.2. Common Symptoms Associated With the 01397 Code
When the 01397 fault code is triggered in an Audi, there are several noticeable symptoms that vehicle owners and technicians can observe:
- Rear Right Door Not Locking/Unlocking: This is the most direct symptom. The door may not respond when using the key fob or the central locking button inside the car.
- Inconsistent Locking Behavior: Sometimes the door locks or unlocks, while other times it does not. This inconsistency can be frustrating for users.
- Alarm System Issues: The vehicle’s alarm system may behave erratically. It could trigger false alarms or fail to arm correctly.
- Central Locking System Malfunctions: The entire central locking system might exhibit issues. This could affect other doors or the trunk, not just the rear right door.
- Error Message on Dashboard: Some Audi models display a warning message on the dashboard indicating a problem with the locking system.
- Unusual Noises from the Door: Clicking or grinding sounds coming from the door when attempting to lock or unlock the vehicle.
- Battery Drain: In some cases, a continuously failing motor can draw excess power, leading to battery drain over time.
- Interior Light Issues: The interior lights might not respond correctly when the rear right door is opened or closed.
Recognizing these symptoms can help in the early detection of issues, preventing further complications and potentially costly repairs. AutoExplain can help you quickly identify and address these problems with precision.
1.3. Potential Causes of the 01397 Fault
Several factors can trigger the 01397 fault code in an Audi. Identifying these potential causes is crucial for accurate diagnosis and effective repair.
- Faulty Door Lock Actuator: The door lock actuator is responsible for physically locking and unlocking the door. If this component fails, it can trigger the 01397 code.
- Wiring Issues: Damaged, corroded, or shorted wires in the door harness can disrupt the signal to the central locking motor.
- Connector Problems: Loose or corroded connectors can prevent proper electrical contact, leading to signal issues.
- Central Control Module Failure: Although less common, a malfunctioning central control module can send incorrect signals to the door lock actuator.
- Moisture Ingress: Water or moisture inside the door can corrode electrical components and cause malfunctions.
- Mechanical Issues: Physical obstructions or damage to the door locking mechanism can prevent the actuator from functioning correctly.
- Low Battery Voltage: Insufficient voltage can sometimes cause the system to behave erratically, triggering false fault codes.
- Software Glitches: In rare cases, software issues within the vehicle’s computer system can lead to incorrect error messages.
- Aftermarket Installations: Improperly installed aftermarket accessories, such as alarms or remote start systems, can interfere with the central locking system.
Understanding these potential causes enables technicians to perform targeted diagnostics and implement effective solutions, streamlining the repair process. AutoExplain offers advanced tools and expertise to address each of these issues, ensuring a comprehensive approach to vehicle maintenance.
 Audi door panel with central locking system actuator
2. Diagnosing the 01397 Audi Fault Code
Proper diagnosis is essential for resolving the 01397 Audi fault code accurately. A systematic approach ensures that the underlying issue is identified and addressed effectively. Here’s a step-by-step guide to help technicians diagnose this problem efficiently.
2.1. Step-by-Step Diagnostic Process
- Initial Scan:
- Use a professional-grade scan tool, such as those supported by AutoExplain, to read and record all stored fault codes. This provides a comprehensive overview of the vehicle’s system status.
- Note all codes, not just the 01397, as other related codes can provide valuable context.
- Visual Inspection:
- Inspect the rear right door and surrounding areas for any visible signs of damage, such as dents, scratches, or misaligned components.
- Check the wiring harness that enters the door for any signs of wear, tear, or damage.
- Connector Examination:
- Locate and inspect the electrical connectors for the central locking motor in the rear right door.
- Look for corrosion, loose pins, or damage to the connector housings. Clean and reseat the connectors to ensure proper contact.
- Wiring Harness Testing:
- Use a multimeter to test the continuity and voltage of the wires in the door harness.
- Check for short circuits, open circuits, and high resistance. Compare readings to the vehicle’s wiring diagram to identify discrepancies.
- Actuator Testing:
- Disconnect the door lock actuator and use a multimeter to test its resistance. Compare the reading to the manufacturer’s specifications.
- Apply voltage directly to the actuator to see if it functions correctly. If it does not respond, the actuator may need replacement.
- Control Module Check:
- If the wiring and actuator appear to be in good condition, the central control module may be the issue.
- Check the module for any signs of damage or corrosion. Use a scan tool to read data from the module and look for any anomalies.
- Live Data Analysis:
- Use a scan tool to monitor live data from the central locking system while operating the door locks.
- Look for inconsistencies or abnormal readings that could indicate a problem with the control module or related components.
- Component Isolation:
- Isolate the problem by systematically disconnecting and testing components in the circuit. This can help pinpoint the exact source of the fault.
- Final Verification:
- After performing any repairs, clear the fault codes and retest the system to ensure that the 01397 code does not return.
- Verify that the central locking system is functioning correctly, and all doors lock and unlock properly.
By following this detailed diagnostic process, technicians can accurately identify the cause of the 01397 fault code and implement the appropriate repairs, ensuring customer satisfaction and vehicle reliability.
2.2. Tools and Equipment Needed for Diagnosis
To effectively diagnose the 01397 Audi fault code, technicians need a specific set of tools and equipment. Having the right tools not only streamlines the diagnostic process but also ensures accuracy and safety.
- Professional-Grade Scan Tool:
- A high-quality scan tool is essential for reading and clearing fault codes, as well as accessing live data from the vehicle’s control modules.
- AutoExplain supports a range of advanced scan tools that are compatible with Audi vehicles, offering comprehensive diagnostic capabilities.
- Multimeter:
- A multimeter is used to measure voltage, current, and resistance in electrical circuits.
- It helps in identifying short circuits, open circuits, and other wiring issues.
- Wiring Diagram:
- A detailed wiring diagram for the vehicle’s central locking system is crucial for tracing circuits and identifying the correct wires to test.
- These diagrams provide valuable information about the layout and connections of the system.
- Connector Test Kit:
- A connector test kit includes various probes and adapters that allow technicians to test electrical connectors without damaging them.
- This kit is useful for checking continuity and voltage at connector terminals.
- Terminal Release Tool Set:
- This set is used to safely remove terminals from electrical connectors without damaging the connector or the terminal.
- It is essential for inspecting and cleaning connector terminals.
- Inspection Mirror:
- An inspection mirror allows technicians to visually inspect hard-to-reach areas, such as behind door panels and inside the door cavity.
- It helps in identifying corrosion, damage, or other issues that may not be immediately visible.
- Flashlight or Work Light:
- Good lighting is essential for performing visual inspections and working in tight spaces.
- A bright flashlight or work light ensures that all components are clearly visible.
- Protective Gear:
- Safety glasses, gloves, and other protective gear are necessary to protect technicians from electrical hazards and sharp objects.
- Safety should always be a top priority when working on automotive electrical systems.
- Laptop or Tablet:
- A laptop or tablet with access to online repair manuals and technical information can be invaluable during the diagnostic process.
- It allows technicians to quickly look up wiring diagrams, component locations, and repair procedures.
By having these tools and equipment on hand, technicians can effectively diagnose and repair the 01397 Audi fault code, ensuring that the vehicle is restored to proper working condition. AutoExplain provides the resources and support needed to equip your garage with the best diagnostic tools available.
2.3. Interpreting Diagnostic Trouble Codes (DTCs)
Interpreting Diagnostic Trouble Codes (DTCs) is a critical skill for any automotive technician. DTCs provide valuable information about the nature and location of a problem within a vehicle’s system. Understanding how to interpret these codes accurately can save time and prevent misdiagnosis.
- Understanding Code Structure:
- DTCs typically consist of a five-character alphanumeric code.
- The first character indicates the system (e.g., P for Powertrain, B for Body, C for Chassis, U for Network).
- The second character indicates whether the code is generic (0) or manufacturer-specific (1).
- The third character indicates the subsystem (e.g., Fuel and Air Metering, Ignition System, etc.).
- The last two characters are specific to the fault.
- Using a Scan Tool:
- Connect a scan tool to the vehicle’s OBD-II port to read the stored DTCs.
- Record all codes, not just the primary one, as related codes can provide additional context.
- Use the scan tool to access freeze frame data, which captures the conditions present when the code was set.
- Consulting Repair Manuals:
- Refer to the vehicle’s repair manual or a reliable online database to look up the specific meaning of each DTC.
- The repair manual provides detailed information about the possible causes, symptoms, and diagnostic procedures for each code.
- Identifying Related Codes:
- Pay attention to any other DTCs that are present, as they may be related to the primary code.
- For example, if there are codes related to the central control module or other door lock actuators, they could provide clues about the underlying problem.
- Prioritizing Codes:
- Prioritize the DTCs based on their severity and relevance to the symptoms.
- Address the most critical codes first, as they may be causing other codes to be set.
- Verifying the Code:
- After addressing the identified issues, clear the DTCs and retest the system to ensure that the codes do not return.
- If the code returns, further diagnosis may be necessary to identify the root cause of the problem.
- Using Online Resources:
- Utilize online forums, technical databases, and manufacturer websites to gather additional information about specific DTCs.
- These resources can provide valuable insights and tips from other technicians who have encountered similar issues.
- Continuous Learning:
- Stay up-to-date with the latest DTCs and diagnostic procedures by attending training courses and reading industry publications.
- The automotive industry is constantly evolving, so continuous learning is essential for staying competitive.
By mastering the art of interpreting DTCs, technicians can quickly and accurately diagnose vehicle problems, leading to more efficient repairs and greater customer satisfaction. AutoExplain offers the tools, resources, and support needed to help technicians become proficient in DTC interpretation and vehicle diagnostics.
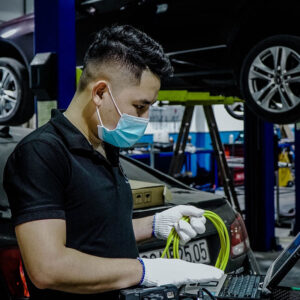
 Automotive technician using a diagnostic scan tool on a car.
3. Repairing the 01397 Audi Fault Code
Once the 01397 Audi fault code has been accurately diagnosed, the next step is to implement the necessary repairs. The specific repair procedure will depend on the underlying cause of the problem, which could range from a simple wiring issue to a faulty door lock actuator or control module.
3.1. Common Repair Procedures
- Wiring Repair:
- Inspection: Carefully inspect the wiring harness for any signs of damage, such as cuts, abrasions, or corrosion. Pay close attention to areas where the harness passes through the door jamb or is exposed to movement.
- Repair: Repair any damaged wires by splicing in new sections of wire using proper crimping and soldering techniques. Ensure that all connections are properly insulated to prevent short circuits.
- Replacement: If the wiring harness is severely damaged, it may be necessary to replace the entire harness.
- Connector Repair:
- Cleaning: Clean corroded connector terminals using a wire brush or contact cleaner. Ensure that all terminals are free of dirt and debris.
- Tightening: Tighten loose connector terminals using a terminal tightening tool. This will ensure a good electrical connection.
- Replacement: If the connector is damaged beyond repair, replace it with a new connector that is compatible with the vehicle’s wiring harness.
- Door Lock Actuator Replacement:
- Removal: Remove the door panel to access the door lock actuator. Disconnect the electrical connector and any mechanical linkages.
- Installation: Install the new door lock actuator, ensuring that all connections are secure and properly aligned.
- Testing: Test the new actuator to ensure that it functions correctly and that the door locks and unlocks properly.
- Central Control Module Repair/Replacement:
- Repair: If the central control module is found to be faulty, it may be possible to repair it by replacing damaged components or reprogramming the module.
- Replacement: If the module is beyond repair, replace it with a new or remanufactured module that is compatible with the vehicle.
- Programming: After replacing the control module, it may be necessary to program it to the vehicle’s specific configuration. AutoExplain offers programming solutions to streamline this process.
- Moisture Removal:
- Drying: If moisture is found inside the door, dry all components thoroughly using a heat gun or compressed air.
- Sealing: Seal any potential entry points to prevent future moisture ingress.
- Mechanical Adjustment:
- Alignment: Adjust the door locking mechanism to ensure that it is properly aligned and functioning smoothly.
- Lubrication: Lubricate all moving parts with a suitable lubricant to reduce friction and prevent wear.
By following these repair procedures, technicians can effectively address the underlying cause of the 01397 Audi fault code and restore the vehicle’s central locking system to proper working condition. AutoExplain provides the tools, resources, and support needed to help technicians perform these repairs quickly and efficiently.
3.2. Parts and Components Required for Repair
The specific parts and components required to repair the 01397 Audi fault code will depend on the underlying cause of the problem. Having a clear understanding of the potential issues can help ensure that you have the necessary parts on hand to complete the repair efficiently.
- Door Lock Actuator:
- If the door lock actuator is faulty, it will need to be replaced. Ensure that you order the correct actuator for the vehicle’s make, model, and year.
- Consider purchasing a high-quality actuator from a reputable supplier to ensure reliability and longevity.
- Wiring Harness:
- If the wiring harness is damaged beyond repair, it will need to be replaced. Order a new wiring harness that is compatible with the vehicle’s central locking system.
- Ensure that the harness includes all necessary connectors and terminals.
- Connectors and Terminals:
- If the connectors or terminals are corroded or damaged, they will need to be replaced. Purchase new connectors and terminals that are compatible with the vehicle’s wiring harness.
- Use proper crimping tools to ensure a secure and reliable connection.
- Central Control Module:
- If the central control module is faulty, it may need to be replaced. Order a new or remanufactured module that is compatible with the vehicle’s configuration.
- Keep in mind that the new module may need to be programmed to the vehicle’s specific settings.
- Fuses and Relays:
- Check the fuses and relays associated with the central locking system. Replace any blown fuses or faulty relays.
- Ensure that you use the correct type and rating of fuses and relays.
- Lubricants and Cleaners:
- Use a suitable lubricant to lubricate the door locking mechanism and reduce friction.
- Use a contact cleaner to clean corroded electrical connectors and terminals.
- Sealants and Adhesives:
- Use a sealant or adhesive to seal any potential entry points for moisture.
- This will help prevent future corrosion and damage to the electrical components.
- Miscellaneous Hardware:
- Keep a supply of miscellaneous hardware, such as screws, bolts, and clips, on hand to replace any that are lost or damaged during the repair process.
By having these parts and components readily available, technicians can streamline the repair process and minimize downtime. AutoExplain can assist in sourcing the necessary parts and components, ensuring that you have everything you need to complete the repair quickly and efficiently.
3.3. Step-by-Step Repair Guide
To effectively repair the 01397 Audi fault code, follow this comprehensive step-by-step guide. This guide covers the most common repair procedures and provides detailed instructions to help technicians complete the job successfully.
Step 1: Preparation
- Gather all necessary tools, equipment, and parts.
- Park the vehicle in a well-lit and safe area.
- Disconnect the negative battery terminal to prevent electrical shock.
Step 2: Access the Door Lock Actuator
- Remove the door panel. This typically involves removing screws, clips, and other fasteners.
- Consult the vehicle’s repair manual for specific instructions on removing the door panel.
- Carefully disconnect any electrical connectors and mechanical linkages.
Step 3: Inspect the Wiring Harness and Connectors
- Visually inspect the wiring harness for any signs of damage, such as cuts, abrasions, or corrosion.
- Pay close attention to areas where the harness passes through the door jamb or is exposed to movement.
- Inspect the electrical connectors for corrosion, loose pins, or damage to the connector housings.
Step 4: Test the Wiring Harness
- Use a multimeter to test the continuity and voltage of the wires in the door harness.
- Check for short circuits, open circuits, and high resistance.
- Compare readings to the vehicle’s wiring diagram to identify discrepancies.
Step 5: Replace or Repair the Wiring Harness and Connectors
- If the wiring harness is damaged, repair it by splicing in new sections of wire using proper crimping and soldering techniques.
- Ensure that all connections are properly insulated to prevent short circuits.
- If the connectors are corroded or damaged, replace them with new connectors that are compatible with the vehicle’s wiring harness.
Step 6: Test the Door Lock Actuator
- Disconnect the door lock actuator and use a multimeter to test its resistance.
- Compare the reading to the manufacturer’s specifications.
- Apply voltage directly to the actuator to see if it functions correctly.
Step 7: Replace the Door Lock Actuator (If Necessary)
- If the door lock actuator is faulty, replace it with a new actuator that is compatible with the vehicle’s make, model, and year.
- Install the new actuator, ensuring that all connections are secure and properly aligned.
Step 8: Reassemble the Door
- Reconnect all electrical connectors and mechanical linkages.
- Reinstall the door panel, ensuring that all screws, clips, and fasteners are properly secured.
Step 9: Test the System
- Reconnect the negative battery terminal.
- Test the central locking system to ensure that the door locks and unlocks properly.
- Use a scan tool to clear any fault codes and retest the system.
Step 10: Final Verification
- Verify that the central locking system is functioning correctly and that all doors lock and unlock properly.
- Perform a final inspection to ensure that all repairs have been completed successfully.
By following this step-by-step repair guide, technicians can effectively address the 01397 Audi fault code and restore the vehicle’s central locking system to proper working condition. AutoExplain provides the tools, resources, and support needed to help technicians perform these repairs quickly and efficiently.
 Mechanic repairing car door lock.
4. Preventing Future Occurrences of the 01397 Fault Code
Preventing future occurrences of the 01397 Audi fault code involves implementing proactive maintenance practices and addressing potential issues before they escalate. By taking a preventative approach, vehicle owners and technicians can minimize the risk of central locking system failures and ensure long-term reliability.
4.1. Maintenance Tips for Central Locking Systems
- Regular Inspections:
- Periodically inspect the central locking system components, including the door lock actuators, wiring harnesses, and connectors.
- Look for any signs of damage, corrosion, or wear.
- Lubrication:
- Lubricate the door locking mechanisms and linkages with a suitable lubricant to reduce friction and prevent wear.
- This will help ensure smooth and reliable operation of the system.
- Connector Maintenance:
- Clean and protect electrical connectors to prevent corrosion and ensure a good electrical connection.
- Apply dielectric grease to the connector terminals to prevent moisture ingress and corrosion.
- Wiring Protection:
- Protect the wiring harnesses from damage by securing them properly and preventing them from rubbing against sharp edges.
- Use wire loom or protective sleeving to protect the wires from abrasion.
- Moisture Control:
- Keep the interior of the vehicle dry to prevent moisture from damaging the electrical components.
- Address any leaks or water intrusion issues promptly.
- Battery Maintenance:
- Maintain a healthy battery to ensure that the central locking system receives adequate voltage.
- Low battery voltage can cause the system to behave erratically and trigger fault codes.
- Software Updates:
- Keep the vehicle’s software up-to-date to ensure that the central locking system is functioning properly.
- Software updates can address known issues and improve system performance.
- Professional Service:
- Schedule regular maintenance appointments with a qualified technician to inspect and service the central locking system.
- A professional technician can identify potential issues and address them before they become major problems.
By following these maintenance tips, vehicle owners and technicians can significantly reduce the risk of central locking system failures and ensure long-term reliability.
4.2. Best Practices for Electrical System Maintenance
Maintaining a vehicle’s electrical system is crucial for ensuring its overall reliability and performance. Following best practices for electrical system maintenance can help prevent a wide range of issues, from simple malfunctions to catastrophic failures.
- Regular Battery Checks:
- Test the battery regularly to ensure that it is in good condition and providing adequate voltage.
- Clean the battery terminals to prevent corrosion and ensure a good electrical connection.
- Fuse and Relay Inspection:
- Inspect the fuses and relays regularly to ensure that they are in good condition and functioning properly.
- Replace any blown fuses or faulty relays with the correct type and rating.
- Wiring Inspection:
- Visually inspect the wiring harnesses for any signs of damage, such as cuts, abrasions, or corrosion.
- Repair or replace any damaged wires to prevent short circuits and other electrical issues.
- Connector Maintenance:
- Clean and protect electrical connectors to prevent corrosion and ensure a good electrical connection.
- Apply dielectric grease to the connector terminals to prevent moisture ingress and corrosion.
- Grounding Points:
- Inspect the grounding points to ensure that they are clean and properly connected.
- Corroded or loose grounding points can cause a variety of electrical problems.
- Charging System Maintenance:
- Test the charging system to ensure that the alternator is providing adequate voltage and current.
- Replace the alternator if it is not functioning properly.
- Lighting System Maintenance:
- Check the headlights, taillights, and other lights regularly to ensure that they are functioning properly.
- Replace any burned-out bulbs promptly.
- Scan for Fault Codes:
- Use a scan tool to check for any stored fault codes in the vehicle’s computer system.
- Address any identified issues promptly to prevent further damage.
- Professional Service:
- Schedule regular maintenance appointments with a qualified technician to inspect and service the electrical system.
- A professional technician can identify potential issues and address them before they become major problems.
By following these best practices for electrical system maintenance, vehicle owners and technicians can ensure the reliability and longevity of the vehicle’s electrical system. AutoExplain offers the tools, resources, and support needed to help technicians perform these maintenance tasks quickly and efficiently.
4.3. Using Quality Parts and Components
Using high-quality parts and components is essential for ensuring the reliability and longevity of any automotive repair. When it comes to electrical system repairs, using quality parts is particularly important, as substandard parts can lead to a variety of problems, including premature failure, poor performance, and even safety hazards.
- Choose Reputable Brands:
- Select parts and components from reputable brands that are known for their quality and reliability.
- Research the brands and read reviews to ensure that you are purchasing high-quality products.
- OEM vs. Aftermarket:
- Consider using Original Equipment Manufacturer (OEM) parts, as they are designed and manufactured to meet the vehicle manufacturer’s specifications.
- If using aftermarket parts, choose high-quality alternatives that are known to be reliable and compatible with the vehicle.
- Check for Certifications:
- Look for parts and components that have been certified by recognized organizations, such as the Society of Automotive Engineers (SAE) or the Automotive Service Excellence (ASE).
- These certifications indicate that the parts have been tested and meet certain quality standards.
- Read Reviews and Ratings:
- Read online reviews and ratings from other technicians and vehicle owners to get an idea of the quality and performance of the parts.
- Pay attention to any recurring issues or complaints.
- Verify Compatibility:
- Ensure that the parts and components you are purchasing are compatible with the vehicle’s make, model, and year.
- Consult the vehicle’s repair manual or a reliable online database to verify compatibility.
- Proper Installation:
- Follow the manufacturer’s instructions for installing the parts and components.
- Use the correct tools and techniques to ensure a proper and secure installation.
- Warranty:
- Choose parts and components that come with a warranty.
- A warranty provides added protection and peace of mind in case of premature failure.
- Proper Storage:
- Store the parts and components in a clean and dry environment to prevent damage or corrosion.
- Follow the manufacturer’s instructions for storage.
By using quality parts and components, vehicle owners and technicians can ensure the reliability and longevity of their repairs. AutoExplain recommends using high-quality parts and components for all electrical system repairs to minimize the risk of future problems and ensure customer satisfaction.
 Selection of car parts on a shelf.
5. Advanced Solutions with AutoExplain
AutoExplain stands at the forefront of automotive diagnostic and programming solutions, offering advanced tools and expertise to tackle complex issues like the 01397 Audi fault code. Our innovative approach empowers automotive professionals to deliver unparalleled service quality and efficiency.
5.1. Remote Diagnostic and Programming Services
AutoExplain offers remote diagnostic and programming services designed to streamline the repair process and minimize downtime. Our remote services provide technicians with access to advanced diagnostic tools and expert support, allowing them to quickly and accurately identify and resolve vehicle issues.
- Remote Diagnostics:
- Connect to the vehicle remotely using a compatible scan tool and our secure platform.
- Our expert technicians can access and analyze the vehicle’s diagnostic data in real-time.
- Receive detailed diagnostic reports and recommended repair procedures.
- Remote Programming:
- Program and configure vehicle control modules remotely using our advanced programming tools.
- Update software, calibrate sensors, and perform other programming tasks without the need for specialized equipment.
- Ensure that the vehicle is operating at peak performance with the latest software updates.
- Expert Support:
- Receive expert technical support from our team of experienced automotive technicians.
- Get answers to your questions, troubleshooting assistance, and guidance on complex repair procedures.
- Benefit from our extensive knowledge base and years of experience in the automotive industry.
- Cost Savings:
- Reduce the cost of repairs by minimizing downtime and avoiding the need for specialized equipment.
- Our remote services are cost-effective and can help you save time and money.
- Increased Efficiency:
- Improve the efficiency of your repair shop by streamlining the diagnostic and programming processes.
- Our remote services allow you to focus on the repair itself, rather than spending time troubleshooting complex issues.
- Wide Range of Vehicles:
- Our remote diagnostic and programming services are compatible with a wide range of vehicles, including Audi, Volkswagen, BMW, Mercedes-Benz, and more.
- We support both older and newer models, ensuring that you can service a diverse range of vehicles.
- Secure and Reliable:
- Our remote services are secure and reliable, using state-of-the-art encryption and authentication protocols to protect your data.
- We ensure that all connections are secure and that your privacy is protected.
By utilizing AutoExplain’s remote diagnostic and programming services, automotive technicians can enhance their capabilities, improve their efficiency, and deliver superior service to their customers. Our remote services are a valuable tool for any modern repair shop looking to stay ahead of the curve.
5.2. Custom Coding and Programming Solutions
AutoExplain specializes in custom coding and programming solutions that allow you to tailor vehicle settings to your specific needs and preferences. Our custom solutions provide a level of personalization and customization that is not available through traditional repair methods.
- Performance Tuning:
- Optimize the vehicle’s engine performance by adjusting parameters such as fuel injection, ignition timing, and boost pressure.
- Improve horsepower, torque, and throttle response for a more exhilarating driving experience.
- Feature Activation:
- Activate hidden features and functions that are not enabled by default, such as cornering lights, automatic folding mirrors, and enhanced display options.
- Customize the vehicle’s features to match your individual preferences.
- Module Configuration:
- Configure vehicle control modules to match your specific needs, such as adjusting the sensitivity of parking sensors or the volume of warning chimes.
- Tailor the vehicle’s settings to your driving style and preferences.
- Retrofitting:
- Retrofit aftermarket accessories and components to the vehicle and program the control modules to recognize and integrate them seamlessly.
- Add features such as navigation systems, backup cameras, and upgraded audio systems.
- Diagnostic Enhancements:
- Customize the diagnostic system to provide more detailed and accurate information about vehicle issues.
- Improve the efficiency of your repair shop by streamlining the diagnostic process.
- Security Enhancements:
- Enhance the vehicle’s security system by adding features such as anti-theft alarms and immobilizers.
- Protect your vehicle from theft and unauthorized access.
- Convenience Features:
- Add convenience features such as remote start, automatic door locking, and programmable key fobs.
- Make your driving experience more comfortable and convenient.
- Personalization:
- Personalize the vehicle’s settings to match your individual preferences, such as adjusting the ambient lighting, seat memory settings, and climate control preferences.
- Make your vehicle truly your own.
AutoExplain’s custom coding and programming solutions provide a level of personalization and customization that is simply not available through traditional repair methods. Our solutions are designed to enhance the vehicle’s performance, features, and convenience, making your driving experience more enjoyable and rewarding.
5.3. Training and Support for Automotive Professionals
AutoExplain is committed to providing comprehensive training and support for automotive professionals. We understand that the automotive industry is constantly evolving, and that technicians need to stay up-to-date with the latest technologies and repair techniques in order to remain competitive.
- Online Training Courses:
- Access a wide range of online training courses that cover various aspects of automotive diagnostics, programming, and repair.
- Learn at your own pace and on your own schedule.
- Webinars:
- Participate in live webinars led by industry experts.
- Get answers to your questions and learn about the latest trends and technologies.
- Hands-On Workshops:
- Attend hands-on workshops where you can gain practical experience with the latest diagnostic and programming tools.
- Learn by doing and get personalized instruction from experienced instructors.
- Certification Programs:
- Earn industry-recognized certifications that demonstrate your expertise in automotive diagnostics and repair.
- Enhance your career prospects and increase your earning potential.
- Technical Support:
- Receive expert technical support from our team of experienced automotive technicians.
- Get answers to your questions, troubleshooting assistance, and guidance on complex repair procedures.
- Knowledge Base:
- Access our extensive knowledge base, which contains a wealth of information about automotive diagnostics, programming, and repair.