The 0105 Mercedes Fault Code signifies a malfunction within the Manifold Absolute Pressure (MAP) or Barometric Pressure circuit, potentially impacting engine performance. At AutoExplain.com, we provide expert diagnostics and remote programming to resolve these automotive challenges efficiently. Rely on our expert assistance for sensor replacement and precise troubleshooting for Mercedes-Benz vehicles.
1. Understanding the 0105 Mercedes Fault Code
The 0105 Mercedes Fault Code indicates a problem within the Manifold Absolute Pressure (MAP) or Barometric Pressure sensor circuit. These sensors are crucial for monitoring engine performance and ensuring the correct air-fuel mixture. When the engine control module (ECM) detects an issue with the electrical signals from these sensors, it triggers the P0105 code, which can affect engine efficiency and overall performance.
1.1. What Does the 0105 Code Mean for Your Mercedes?
The 0105 diagnostic trouble code (DTC) means the engine control module (ECM) has detected a malfunction in the MAP or barometric pressure sensor circuit. This circuit is responsible for providing critical data about the engine’s air intake and pressure levels. These readings are crucial for the ECM to properly adjust fuel delivery and timing, ensuring optimal engine performance and emissions control.
1.2. The Role of MAP and Barometric Pressure Sensors in Mercedes Engines
The MAP sensor measures the pressure inside the intake manifold, reflecting the engine load and vacuum. The barometric pressure sensor, on the other hand, measures the ambient air pressure. Both sensors provide essential data to the ECM, enabling it to calculate the correct air-fuel mixture. This ensures efficient combustion, reduces emissions, and maintains smooth engine operation. Accurate sensor readings are vital for the sophisticated engine management systems in Mercedes-Benz vehicles.
1.3. Common Symptoms Associated with the 0105 Fault Code
When the 0105 fault code is triggered in your Mercedes, you may observe several symptoms, including:
- Poor Engine Performance: Reduced power and acceleration due to incorrect air-fuel mixture.
- Rough Idling: Unstable engine behavior when the vehicle is stationary.
- Increased Fuel Consumption: The engine may consume more fuel than usual as it attempts to compensate for the sensor malfunction.
- Check Engine Light: Illumination of the check engine light on the dashboard.
- Stalling: The engine may stall unexpectedly, especially at low speeds or when idling.
- Difficulty Starting: The engine may take longer to start or fail to start altogether.
These symptoms can significantly impact your driving experience, making it crucial to address the issue promptly to avoid further complications.
2. Diagnosing the 0105 Mercedes Fault Code
Diagnosing the 0105 Mercedes fault code requires a systematic approach to identify the root cause. At AutoExplain.com, we guide you through the diagnostic process and offer remote support to ensure accurate and efficient troubleshooting.
2.1. Initial Inspection and Preliminary Checks
Begin with a thorough visual inspection of the engine bay. Check for any obvious signs of damage to the MAP sensor, its wiring, and vacuum hoses. Look for:
- Damaged Wiring: Inspect the wiring harness for cuts, fraying, or corrosion.
- Loose Connections: Ensure all electrical connectors are securely attached to the MAP sensor and ECM.
- Vacuum Leaks: Examine the vacuum hoses connected to the intake manifold for cracks, leaks, or disconnections.
- Sensor Condition: Check the MAP sensor for physical damage or contamination.
Addressing these preliminary issues can often resolve the problem without further diagnostics.
2.2. Using an OBD-II Scanner to Read and Interpret Data
An OBD-II scanner is essential for reading and interpreting the data related to the 0105 fault code. Follow these steps:
- Connect the Scanner: Plug the OBD-II scanner into the diagnostic port, typically located under the dashboard.
- Read the Codes: Turn on the ignition and use the scanner to read the stored fault codes. Note all codes, including any related to the MAP sensor or barometric pressure.
- View Live Data: Access the live data stream and monitor the MAP sensor readings while the engine is running. Compare these readings to the manufacturer’s specifications.
- Check Sensor Voltage: Use the scanner to check the voltage output of the MAP sensor. An abnormal voltage reading indicates a potential sensor malfunction.
- Clear the Codes: After noting the codes, clear them and test drive the vehicle to see if the 0105 code returns.
2.3. Testing the MAP Sensor: Voltage, Resistance, and Signal Integrity
To further diagnose the MAP sensor, perform the following tests using a multimeter:
- Voltage Test:
- Disconnect the MAP sensor connector.
- Turn on the ignition (engine off).
- Use the multimeter to measure the voltage between the power and ground wires. It should read approximately 5 volts.
- If the voltage is incorrect, check the wiring and ECM for potential issues.
- Resistance Test:
- Disconnect the MAP sensor.
- Use the multimeter to measure the resistance between the sensor terminals.
- Compare the resistance values to the manufacturer’s specifications. An unusual reading indicates a faulty sensor.
- Signal Integrity Test:
- Reconnect the MAP sensor.
- Start the engine and let it idle.
- Use the multimeter to measure the voltage signal from the MAP sensor. The voltage should vary with engine vacuum.
- Check for a stable and consistent signal. Erratic or absent signals indicate a sensor or wiring problem.
2.4. Checking for Vacuum Leaks and Intake System Issues
Vacuum leaks can significantly affect the MAP sensor readings and trigger the 0105 fault code. Inspect the intake system for leaks using these methods:
- Visual Inspection: Check all vacuum hoses, intake manifold gaskets, and throttle body connections for cracks or damage.
- Smoke Test: Use a smoke machine to introduce smoke into the intake system. Observe where the smoke escapes, indicating the location of the leak.
- Carburetor Cleaner Test: Spray carburetor cleaner around the intake manifold and vacuum hoses while the engine is idling. If the engine speed changes, it indicates a vacuum leak in that area.
- Inspect the PCV Valve: A faulty PCV valve can also cause vacuum leaks. Inspect and replace it if necessary.
Addressing vacuum leaks is crucial for ensuring accurate MAP sensor readings and proper engine performance.
2.5. Examining Wiring and Electrical Connections
Faulty wiring and electrical connections are common causes of the 0105 fault code. Follow these steps to inspect the wiring:
- Visual Inspection: Check the wiring harness for any signs of damage, such as cuts, fraying, or corrosion.
- Continuity Test: Use a multimeter to perform a continuity test on the wires connecting the MAP sensor to the ECM. Ensure there are no breaks or shorts in the wiring.
- Connector Inspection: Examine the electrical connectors for corrosion, bent pins, or loose connections. Clean or replace connectors as needed.
- Harness Routing: Verify that the wiring harness is properly routed and not in contact with hot engine components or sharp edges that could cause damage.
3. Common Causes of the 0105 Mercedes Fault Code
Identifying the common causes of the 0105 Mercedes fault code can help streamline the diagnostic process and lead to a quicker resolution. Here’s a detailed look at the typical culprits:
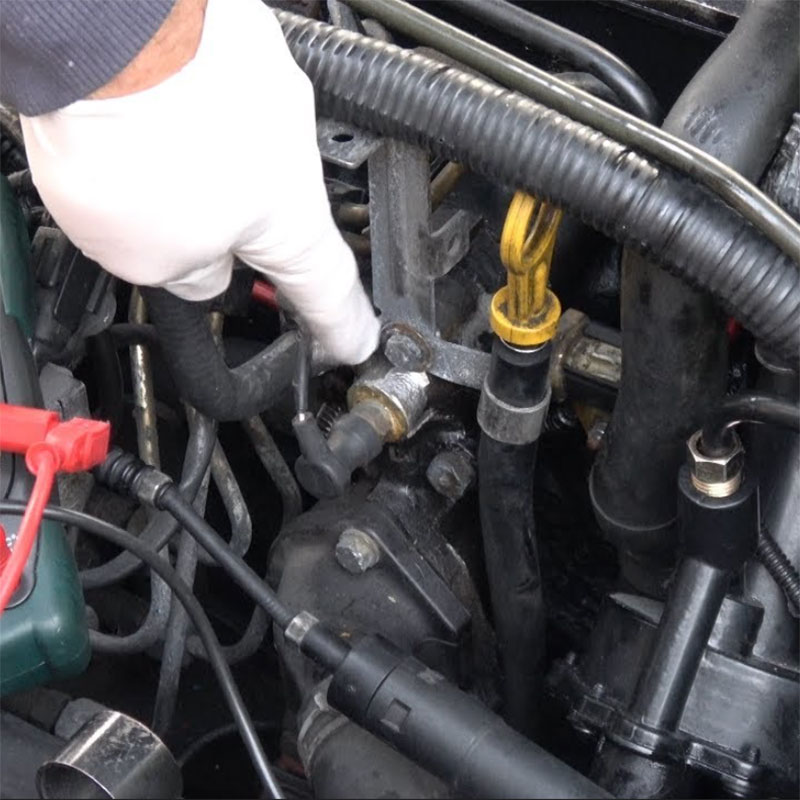
3.1. Faulty MAP Sensor: Symptoms and Replacement
A faulty MAP sensor is one of the most frequent causes of the 0105 code. Symptoms of a failing MAP sensor include:
- Inaccurate Readings: The sensor provides incorrect pressure readings to the ECM, leading to poor engine performance.
- No Signal: The sensor fails to send any signal to the ECM, triggering the fault code.
- Erratic Signal: The sensor sends an unstable or fluctuating signal, causing engine misfires and rough idling.
To replace a faulty MAP sensor:
- Disconnect the Battery: Disconnect the negative terminal of the battery to prevent electrical shorts.
- Locate the MAP Sensor: The MAP sensor is typically located on the intake manifold or throttle body.
- Disconnect the Electrical Connector: Disconnect the electrical connector from the MAP sensor.
- Remove the Old Sensor: Remove the mounting screws or bolts securing the sensor to the intake manifold.
- Install the New Sensor: Install the new MAP sensor, ensuring it is properly seated and secured.
- Reconnect the Electrical Connector: Reconnect the electrical connector to the MAP sensor.
- Reconnect the Battery: Reconnect the negative terminal of the battery.
- Clear the Codes: Use an OBD-II scanner to clear the fault codes and test the vehicle.
3.2. Vacuum Leaks: Identifying and Repairing Leaks in the Intake System
Vacuum leaks can disrupt the air-fuel mixture and cause the 0105 fault code. Common areas for vacuum leaks include:
- Vacuum Hoses: Cracks, leaks, or disconnections in the vacuum hoses.
- Intake Manifold Gasket: A damaged or deteriorated intake manifold gasket.
- Throttle Body Gasket: Leaks around the throttle body gasket.
- PCV Valve: A faulty or leaking PCV valve.
To identify and repair vacuum leaks:
- Visual Inspection: Check all vacuum hoses and connections for damage.
- Smoke Test: Use a smoke machine to locate leaks in the intake system.
- Carburetor Cleaner Test: Spray carburetor cleaner around potential leak areas and listen for changes in engine speed.
- Replace Damaged Components: Replace any damaged vacuum hoses, gaskets, or valves.
3.3. Wiring Issues: Shorts, Opens, and Corrosion
Wiring issues can prevent the MAP sensor from communicating properly with the ECM, leading to the 0105 code. Common wiring problems include:
- Shorts: Wires that are shorted to ground or other circuits.
- Opens: Breaks in the wiring that prevent the signal from reaching the ECM.
- Corrosion: Corrosion on the connectors or wiring terminals.
To address wiring issues:
- Visual Inspection: Check the wiring harness for damage, such as cuts, fraying, or melted insulation.
- Continuity Test: Use a multimeter to perform a continuity test on the wires connecting the MAP sensor to the ECM.
- Connector Inspection: Examine the electrical connectors for corrosion or damage. Clean or replace connectors as needed.
- Repair or Replace Wiring: Repair any damaged wiring or replace the entire wiring harness if necessary.
3.4. ECM Problems: Rare but Possible
Although less common, problems with the ECM can also cause the 0105 fault code. ECM issues may include:
- Internal Failures: Malfunctions within the ECM’s internal circuitry.
- Software Glitches: Software errors that affect the ECM’s ability to process sensor data.
- Damaged Connectors: Damaged or corroded connectors on the ECM.
To diagnose ECM problems:
- Check Power and Ground: Verify that the ECM is receiving proper power and ground.
- Inspect Connectors: Examine the ECM connectors for damage or corrosion.
- Software Update: Check for any available software updates for the ECM.
- ECM Replacement: If all other potential causes have been ruled out, the ECM may need to be replaced or reprogrammed. AutoExplain.com offers remote programming services to assist with this process.
3.5. Other Potential Causes
In addition to the common causes listed above, other potential factors can contribute to the 0105 fault code:
- Clogged Air Filter: A severely clogged air filter can restrict airflow to the engine, affecting MAP sensor readings.
- Throttle Body Issues: A dirty or malfunctioning throttle body can disrupt airflow and cause inaccurate sensor data.
- Exhaust Leaks: Exhaust leaks near the MAP sensor can affect pressure readings.
4. Step-by-Step Guide to Fixing the 0105 Mercedes Fault Code
Fixing the 0105 Mercedes fault code requires a systematic approach. Follow this step-by-step guide to troubleshoot and resolve the issue effectively. AutoExplain.com is here to provide expert support throughout the process.
Before starting the repair, gather the necessary tools and materials:
- OBD-II Scanner: To read and clear fault codes.
- Multimeter: To test voltage, resistance, and continuity.
- Socket Set: To remove and install the MAP sensor and related components.
- Wrench Set: For various tasks, such as tightening bolts and nuts.
- Screwdrivers: Both flathead and Phillips head screwdrivers.
- Vacuum Tester: To check for vacuum leaks.
- Smoke Machine: (Optional) To locate vacuum leaks more easily.
- Carburetor Cleaner: To test for vacuum leaks.
- Wiring Diagram: To understand the wiring connections for the MAP sensor.
- New MAP Sensor: If the old sensor is faulty.
- Replacement Vacuum Hoses: If any hoses are cracked or damaged.
- Electrical Contact Cleaner: To clean corroded connectors.
- Shop Rags: To clean up any spills.
- Safety Glasses and Gloves: To protect yourself during the repair.
Begin with a thorough visual inspection:
- Check the MAP Sensor: Look for any signs of damage, such as cracks, corrosion, or loose connections.
- Inspect the Wiring: Examine the wiring harness for cuts, fraying, or melted insulation.
- Check Vacuum Hoses: Look for cracks, leaks, or disconnections in the vacuum hoses.
- Examine Connectors: Check the electrical connectors for corrosion, bent pins, or loose connections.
- Inspect the Air Filter: Ensure the air filter is clean and not clogged.
4.3. Testing and Replacing the MAP Sensor
- Voltage Test:
- Disconnect the MAP sensor connector.
- Turn on the ignition (engine off).
- Use a multimeter to measure the voltage between the power and ground wires. It should read approximately 5 volts.
- If the voltage is incorrect, check the wiring and ECM for potential issues.
- Resistance Test:
- Disconnect the MAP sensor.
- Use a multimeter to measure the resistance between the sensor terminals.
- Compare the resistance values to the manufacturer’s specifications. An unusual reading indicates a faulty sensor.
- Signal Integrity Test:
- Reconnect the MAP sensor.
- Start the engine and let it idle.
- Use a multimeter to measure the voltage signal from the MAP sensor. The voltage should vary with engine vacuum.
- Check for a stable and consistent signal. Erratic or absent signals indicate a sensor or wiring problem.
- Replace the MAP Sensor (if necessary):
- Disconnect the battery.
- Disconnect the electrical connector from the MAP sensor.
- Remove the mounting screws or bolts securing the sensor to the intake manifold.
- Install the new MAP sensor, ensuring it is properly seated and secured.
- Reconnect the electrical connector to the MAP sensor.
- Reconnect the battery.
4.4. Addressing Vacuum Leaks
- Identify Vacuum Leaks:
- Perform a visual inspection of all vacuum hoses and connections.
- Use a smoke machine to locate leaks in the intake system.
- Spray carburetor cleaner around potential leak areas and listen for changes in engine speed.
- Repair Vacuum Leaks:
- Replace any cracked or damaged vacuum hoses.
- Tighten loose connections.
- Replace the intake manifold gasket if it is leaking.
- Replace the throttle body gasket if it is leaking.
- Inspect and replace the PCV valve if necessary.
4.5. Inspecting and Repairing Wiring Issues
- Check Wiring for Damage:
- Look for cuts, fraying, or melted insulation on the wiring harness.
- Perform a Continuity Test:
- Use a multimeter to perform a continuity test on the wires connecting the MAP sensor to the ECM.
- Ensure there are no breaks or shorts in the wiring.
- Inspect Connectors:
- Examine the electrical connectors for corrosion or damage.
- Clean corroded connectors with electrical contact cleaner.
- Replace damaged connectors as needed.
- Repair or Replace Wiring:
- Repair any damaged wiring by splicing in new sections of wire.
- Replace the entire wiring harness if necessary.
4.6. Clearing the Fault Code and Verifying the Repair
- Clear the Fault Code:
- Use an OBD-II scanner to clear the 0105 fault code from the ECM.
- Test Drive the Vehicle:
- Test drive the vehicle to see if the fault code returns.
- Monitor engine performance and check for any symptoms associated with the 0105 code.
- Recheck with Scanner:
- After the test drive, recheck the vehicle with the OBD-II scanner to ensure the fault code has not returned.
4.7. When to Seek Professional Help from AutoExplain.com
If you are unable to resolve the 0105 Mercedes fault code on your own, or if you encounter any difficulties during the repair process, it is best to seek professional help from AutoExplain.com. Our expert technicians can provide remote diagnostics and programming services to ensure your vehicle is running smoothly.
5. Advanced Troubleshooting for the 0105 Mercedes Fault Code
For those who have performed the basic troubleshooting steps and are still facing the 0105 Mercedes fault code, advanced troubleshooting techniques may be necessary. AutoExplain.com offers the expertise and support needed to tackle these complex issues.
Advanced scan tools offer more in-depth diagnostic capabilities beyond simply reading and clearing fault codes. These tools can:
- Access Live Data Streams: Monitor real-time data from various sensors, including the MAP sensor, throttle position sensor, and oxygen sensors.
- Perform Actuator Tests: Activate specific components, such as the EGR valve or throttle body, to check their functionality.
- Run Diagnostic Routines: Execute pre-programmed diagnostic routines to pinpoint specific issues.
- Graph Sensor Data: Visualize sensor data over time to identify intermittent problems or anomalies.
By leveraging these advanced features, technicians can gain a more comprehensive understanding of the engine’s performance and identify the root cause of the 0105 fault code.
5.2. Checking the Barometric Pressure Sensor
In some cases, the 0105 fault code may be related to the barometric pressure sensor rather than the MAP sensor. The barometric pressure sensor measures the ambient air pressure and provides this data to the ECM. A faulty barometric pressure sensor can cause the ECM to miscalculate the air-fuel mixture, leading to the 0105 code.
To check the barometric pressure sensor:
- Locate the Sensor: The barometric pressure sensor is typically located inside the ECM or near the air intake system.
- Check Sensor Readings: Use a scan tool to check the barometric pressure sensor readings. Compare these readings to the current atmospheric pressure.
- Test Sensor Voltage: Use a multimeter to test the voltage output of the barometric pressure sensor. Refer to the manufacturer’s specifications for the correct voltage range.
- Replace the Sensor (if necessary): If the sensor readings are inaccurate or the voltage is out of range, replace the barometric pressure sensor.
5.3. Diagnosing Intermittent Issues
Intermittent issues can be particularly challenging to diagnose, as the problem may not be present during testing. To diagnose intermittent issues related to the 0105 fault code:
- Monitor Live Data: Use a scan tool to monitor live data from the MAP sensor and other related sensors while driving the vehicle.
- Check Wiring and Connectors: Carefully inspect the wiring harness and connectors for any signs of damage or corrosion. Pay close attention to areas that may be subject to vibration or movement.
- Use Freeze Frame Data: When the 0105 fault code is triggered, the ECM stores freeze frame data, which provides a snapshot of the engine’s operating conditions at the time the code was set. Analyze this data to identify any unusual readings or patterns.
- Perform a Wiggle Test: With the engine running, gently wiggle the wiring harness and connectors while monitoring the MAP sensor readings. If the readings change, it indicates a potential wiring or connector issue.
5.4. Testing the EGR System
The Exhaust Gas Recirculation (EGR) system plays a crucial role in reducing emissions by recirculating a portion of the exhaust gas back into the intake manifold. A malfunctioning EGR system can affect the MAP sensor readings and trigger the 0105 fault code.
To test the EGR system:
- Inspect the EGR Valve: Check the EGR valve for carbon buildup or damage.
- Perform an EGR Valve Test: Use a scan tool to activate the EGR valve and check its functionality.
- Check EGR Passages: Inspect the EGR passages for clogs or restrictions.
- Test the EGR Solenoid: Use a multimeter to test the EGR solenoid for proper operation.
5.5. Checking for Software Updates
In some cases, the 0105 fault code may be caused by a software glitch in the ECM. Check for any available software updates for the ECM and install them if necessary. AutoExplain.com offers remote programming services to assist with ECM software updates.
6. Preventing Future Occurrences of the 0105 Mercedes Fault Code
Preventing future occurrences of the 0105 Mercedes fault code involves regular maintenance and proactive care. Here are some key steps to keep your Mercedes running smoothly:
6.1. Regular Maintenance: Air Filter, Spark Plugs, and More
- Replace the Air Filter: A clean air filter ensures proper airflow to the engine, preventing restrictions that can affect MAP sensor readings. Replace the air filter according to the manufacturer’s recommended intervals.
- Check and Replace Spark Plugs: Faulty spark plugs can cause misfires and affect engine performance, potentially leading to inaccurate MAP sensor readings. Inspect and replace spark plugs as needed.
- Maintain the Fuel System: A clean and properly functioning fuel system ensures the correct air-fuel mixture, which is crucial for accurate MAP sensor readings. Use fuel additives to clean fuel injectors and prevent buildup in the fuel system.
- Inspect Vacuum Hoses Regularly: Check vacuum hoses for cracks, leaks, or disconnections during regular maintenance. Replace any damaged hoses promptly.
6.2. Keeping the Intake System Clean
- Clean the Throttle Body: A dirty throttle body can restrict airflow and cause inaccurate MAP sensor readings. Clean the throttle body periodically using a throttle body cleaner.
- Clean the Mass Air Flow (MAF) Sensor: Although not directly related to the 0105 code, a dirty MAF sensor can affect engine performance and potentially impact MAP sensor readings. Clean the MAF sensor with a specialized MAF sensor cleaner.
- Inspect and Clean the Intake Manifold: Check the intake manifold for buildup or deposits and clean it as needed.
- Pay Attention to Symptoms: Be vigilant for any symptoms of engine problems, such as rough idling, poor acceleration, or increased fuel consumption. Address these issues promptly to prevent them from escalating and triggering the 0105 fault code.
- Use an OBD-II Scanner Regularly: Use an OBD-II scanner to check for fault codes regularly, even if the check engine light is not illuminated. This can help identify potential issues early before they become major problems.
- Schedule Regular Maintenance: Follow the manufacturer’s recommended maintenance schedule to ensure all engine components are functioning properly.
6.4. Ensuring Proper Wiring and Connections
- Protect Wiring Harnesses: Protect wiring harnesses from damage by ensuring they are properly routed and secured. Use wire looms or protective sleeves to prevent chafing or rubbing against sharp edges.
- Clean and Protect Connectors: Clean electrical connectors with electrical contact cleaner to prevent corrosion and ensure good connections. Use dielectric grease to protect connectors from moisture and corrosion.
- Inspect Wiring Regularly: Check wiring for any signs of damage, such as cuts, fraying, or melted insulation. Repair or replace damaged wiring promptly.
6.5. Choosing Quality Replacement Parts
- Use OEM or High-Quality Aftermarket Parts: When replacing components, such as the MAP sensor or vacuum hoses, use OEM (Original Equipment Manufacturer) parts or high-quality aftermarket parts from reputable brands.
- Research Parts Thoroughly: Before purchasing replacement parts, research them thoroughly to ensure they are compatible with your vehicle and meet or exceed OEM specifications.
- Avoid Cheap or Generic Parts: Avoid using cheap or generic parts, as they may not meet the required standards and could lead to further problems.
At AutoExplain.com, we specialize in providing expert diagnostics, remote programming, and technical support to help you resolve your Mercedes fault codes efficiently and effectively.
7.1. Remote Diagnostics and Programming Services
- Expert Technicians: Our team of experienced technicians has extensive knowledge of Mercedes-Benz vehicles and their complex systems.
- Remote Diagnostics: We can perform remote diagnostics using advanced scan tools and diagnostic software to pinpoint the root cause of your fault codes.
- Remote Programming: We offer remote programming services to update or reprogram your ECM, ensuring it is functioning correctly and compatible with the latest software.
- Step-by-Step Guidance: We provide step-by-step guidance and support throughout the diagnostic and repair process.
7.2. Access to Expert Technicians via WhatsApp and Email
- WhatsApp Support: Contact our expert technicians via WhatsApp at (+84)967469410 for quick and convenient support.
- Email Support: Send us an email at [email protected] with your questions or concerns, and we will respond promptly.
- Comprehensive Support: We provide comprehensive support to address all your technical questions and concerns.
7.3. Benefits of Choosing AutoExplain.com
- Expertise and Experience: Our team has extensive experience working with Mercedes-Benz vehicles and their complex systems.
- Convenient Remote Services: We offer convenient remote diagnostics and programming services, allowing you to resolve your fault codes from the comfort of your own home or shop.
- Cost-Effective Solutions: Our services are cost-effective compared to traditional repair shops, saving you time and money.
- Timely Support: We provide timely and responsive support to address all your technical questions and concerns.
- Guaranteed Results: We stand behind our services and guarantee your satisfaction.
- Office Address: 4590 Angus Road, New York, United States
- WhatsApp: (+84)967469410
- Email: [email protected]
- Website: AutoExplain.com
8. Frequently Asked Questions (FAQ) About the 0105 Mercedes Fault Code
Here are some frequently asked questions about the 0105 Mercedes fault code:
8.1. What Does the 0105 Code Mean Specifically for Mercedes Vehicles?
The 0105 code specifically indicates a malfunction in the Manifold Absolute Pressure (MAP) or Barometric Pressure sensor circuit in Mercedes vehicles. This can affect engine performance and efficiency.
8.2. Can I Drive My Mercedes with the 0105 Fault Code?
While you can drive your Mercedes with the 0105 fault code, it is not recommended. The issue can lead to poor engine performance, increased fuel consumption, and potential engine damage.
8.3. How Much Does It Cost to Fix the 0105 Fault Code?
The cost to fix the 0105 fault code varies depending on the cause and the repair needed. Replacing a faulty MAP sensor can cost between $100 and $300, while addressing wiring issues or vacuum leaks may be less expensive. ECM repairs or replacements can be more costly.
8.4. Is It Possible to Fix the 0105 Code Myself, or Do I Need a Professional?
It is possible to fix the 0105 code yourself if you have the necessary tools and technical knowledge. However, if you are not comfortable performing the repairs, it is best to seek professional help from AutoExplain.com.
8.5. What Are the Common Mistakes to Avoid When Diagnosing the 0105 Code?
Common mistakes to avoid when diagnosing the 0105 code include:
- Not performing a thorough inspection: Failing to check for obvious signs of damage or leaks.
- Skipping the basic tests: Not testing the MAP sensor voltage, resistance, and signal integrity.
- Ignoring vacuum leaks: Overlooking potential vacuum leaks in the intake system.
- Not checking the wiring: Failing to inspect the wiring harness and connectors for damage.
8.6. How Often Should I Check My Mercedes for Fault Codes?
You should check your Mercedes for fault codes regularly, especially if you notice any symptoms of engine problems. A good practice is to check for codes at least once a month or whenever you perform routine maintenance.
8.7. Can a Bad Air Filter Cause the 0105 Code?
Yes, a severely clogged air filter can restrict airflow to the engine, affecting MAP sensor readings and potentially triggering the 0105 code.
8.8. What Is the Role of the ECM in Relation to the 0105 Code?
The ECM (Engine Control Module) is responsible for monitoring and controlling various engine functions, including the MAP sensor. If the ECM detects an issue with the MAP sensor signal, it will trigger the 0105 fault code.
8.9. Are There Any Specific Mercedes Models That Are More Prone to the 0105 Code?
While the 0105 code can occur in various Mercedes models, some models may be more prone to it due to specific design or manufacturing issues. Consult with Mercedes-Benz forums or technical resources for model-specific information.
AutoExplain.com offers remote diagnostics and programming services to help you resolve the 0105 code remotely. Our expert technicians can use advanced scan tools and diagnostic software to pinpoint the root cause of the issue and provide step-by-step guidance throughout the repair process. Contact us via WhatsApp at (+84)967469410 or email us at AutoExplain[email protected] for support.
By understanding the 0105 Mercedes fault code, following the diagnostic steps, and implementing the appropriate repairs, you can ensure your Mercedes-Benz continues to perform at its best. Remember, AutoExplain.com is always here to provide expert assistance and support.